Ever walked down the gardening aisle at your local Home Depot or Lowe’s, stared at those towering bags of “premium” potting mix, and felt your wallet wince? You’re not alone, friend. In fact, for many American home gardeners, the cost of quality soil has become almost as painful as a rogue thorn bush. It feels like a secret club, where only those with deep pockets can afford the good stuff – the kind of rich, fluffy, nutrient-dense soil that makes your tomatoes explode with flavor and your petunias burst with color.
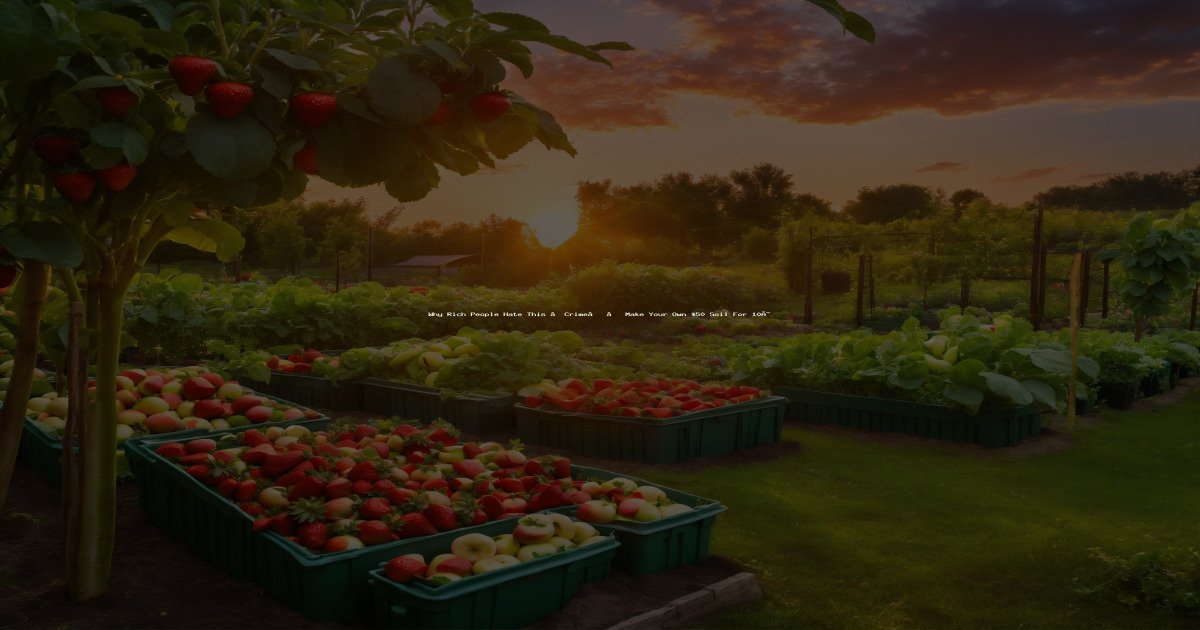
But what if I told you there’s a different way? A way to get that coveted, high-performance soil for mere pennies, turning your backyard into a thriving oasis without breaking the bank? A method so effective, so ridiculously cheap, that some might even call it… a crime? Yes, a crime against overpriced gardening supplies, a rebellion against the notion that you need to spend a fortune to grow a magnificent garden. This May, as the days lengthen and the urge to dig in the dirt becomes irresistible across USDA Zones 3 to 10, from the sun-drenched yards of Southern California to the thawing beds of New England, we’re going to spill the beans.
Imagine this: Instead of shelling out $15, $20, or even $30 for a single cubic foot bag of “organic raised bed mix,” you’re making your own, superior blend for less than 10 cents a pound. We’re talking about soil that’s not just good, but exceptional. Soil that drains perfectly in the Pacific Northwest, retains moisture beautifully in the dry Southwest, and provides a nutrient feast for hungry plants in the fertile Midwest. This isn’t just about saving money; it’s about empowerment, about taking control of your garden’s foundation, and about giving your plants the absolute best start possible – often better than anything you can buy.
This spring, with Memorial Day planting just around the corner, it’s the perfect time to get serious about your soil. Whether you’re in Florida gearing up for a second planting, or in Michigan finally putting out your cold-hardy greens, the principles of excellent soil remain the same. And the best part? The ingredients for this “criminal” soil are often right under your nose, or available for a song. So, grab a cup of coffee, settle in, and prepare to unlock the secret that will transform your garden and your budget. Let’s make some dirt cheap, gold-standard soil!
Key Takeaways for Your Garden Gold Mine:
- Save a Fortune: Learn to create premium soil for less than 10 cents per pound, bypassing expensive store-bought bags.
- Boost Plant Health: DIY soil often surpasses commercial mixes in nutrient density and microbial activity, leading to healthier, more productive plants.
- Customize for Your Region: Discover how to tailor your soil mix to specific climate challenges, whether you’re in the arid Southwest or humid Southeast.
- Embrace Composting: Master the art of composting kitchen scraps and yard waste to create the ultimate free soil amendment.
- Reduce Waste: Turn household and yard “waste” into valuable garden resources, promoting sustainability.
The ‘Crime’ of Smart Soil – Why DIY Saves You a Fortune (and Makes Gardens Thrive)
Let’s be honest, the cost of gardening supplies has skyrocketed. A single 1.5 cubic foot bag of organic potting mix can run you upwards of $20-$30, especially if you’re looking for specialized blends for raised beds or containers. If you’re planning a sizable garden, say a 4×8 foot raised bed that needs about 24 cubic feet of soil, you’re looking at a staggering $320-$480 just for the dirt! That’s enough to make any gardener, from the newbie in Zone 7 trying their first tomatoes to the seasoned pro in Zone 5 planting out their annuals, rethink their entire operation. But here’s the “crime” we’re talking about: making your own soil for a fraction of that cost, and often, making it even better.
Why is homemade soil often superior? Simple. When you buy a bag of soil, you’re getting a generic mix designed to be “good enough” for a wide range of plants and conditions. It often contains peat moss (which has environmental concerns), perlite, vermiculite, and a starter dose of synthetic or organic fertilizers. While not bad, it’s rarely optimized for *your* specific garden, *your* local climate, or *your* plant choices. When you craft your own, you control every ingredient. You can enrich it with active compost teeming with beneficial microbes, adjust drainage for heavy rainfall in the Northeast, or boost water retention for the scorching summers of the Southwest. This spring, as you’re planning your Memorial Day weekend planting spree, think about the long-term health of your garden. Investing your time in making soil now will pay dividends in healthier plants, bigger harvests, and significantly lighter expenses.
The Hidden Costs of Store-Bought Soil
- Markup: Retailers and manufacturers add significant markups to cover production, packaging, and shipping.
- Generic Formulas: As mentioned, these aren’t tailored to your unique garden needs, leading to potential issues like poor drainage or nutrient deficiencies.
- Environmental Impact: Many commercial mixes rely heavily on peat moss, a non-renewable resource whose harvesting damages fragile ecosystems. Your DIY approach can utilize sustainable alternatives.
- Questionable Ingredients: Sometimes, fillers or low-quality materials are used to cut costs, which can harm your plants in the long run.
Why May is Prime Time for Soil Building
May is the sweet spot for soil preparation across most of the continental USA. The ground has thawed, temperatures are consistently above 50°F, and plants are actively growing. This means:
- Active Composting: Warmer temperatures accelerate decomposition in your compost pile, turning kitchen scraps and yard waste into “black gold” faster.
- Bed Preparation: It’s the ideal month to amend raised beds and in-ground gardens before planting out warm-season crops like tomatoes, peppers, and squash.
- Container Refresh: Pots and containers that sat fallow over winter are ready for a fresh, nutrient-rich soil mix for spring and summer annuals and vegetables.
Embrace the “crime” this May! Your plants (and your wallet) will thank you. https://ecorganicas.com/how-to-grow-a-tea-garden-from-leaf-to-mug/
Your Ultimate Spring Soil Recipe – Ingredients for Success
Crafting your own soil mix isn’t rocket science, but it does require understanding the basic components and their roles. Think of it like baking a cake; each ingredient plays a crucial part in the final texture, flavor, and success. For a general, all-purpose potting or raised bed mix, we’re aiming for a balance of drainage, water retention, aeration, and nutrient content. This blend is perfect for the active growing season in May, supporting everything from vigorous vegetable starts to blooming annuals.
The Core Components of Your DIY “Gold Standard” Soil
- Compost (The MVP – 40-50% of your mix): This is your nutrient powerhouse, teeming with beneficial microbes. It improves soil structure, drainage, and water retention. You can make your own (we’ll cover that) or buy it in bulk from local nurseries or garden centers. Look for “finished compost” – dark, crumbly, and earthy-smelling.
- Coco Coir or Peat Moss (Water Retention & Aeration – 20-30%): These materials hold moisture like a sponge and lighten the mix. Coco coir, made from coconut husks, is a more sustainable alternative to peat moss. You can find compressed coco coir bricks at Home Depot, Lowe’s, or on Amazon US, which expand significantly when hydrated. Peat moss is also widely available but consider the environmental impact.
- Perlite or Vermiculite (Drainage & Aeration – 15-20%):
- Perlite: White, volcanic rock that looks like tiny popcorn. It’s excellent for improving drainage and aeration, especially crucial in regions with heavy rainfall like the Pacific Northwest.
- Vermiculite: A mica-based mineral that also aids aeration but has better water retention properties than perlite. It’s great for seed-starting mixes and gardens in drier climates like the Southwest.
You can find large bags of both at major retailers.
- Aged Manure (Nutrient Boost – 10-15%): If you have access to aged cow, horse, or chicken manure, it’s a fantastic, nutrient-rich amendment. Crucially, it must be aged (6 months to a year) to prevent burning your plants. Fresh manure is too strong. Many local farms will give it away or sell it cheaply.
- Coarse Sand (Optional, for Drainage – 5-10%): If you’re dealing with particularly heavy clay soil or need exceptional drainage (e.g., for succulents), a bit of coarse builder’s sand (not play sand) can help. Use sparingly, as too much can create a concrete-like consistency.
Putting it All Together: A Basic Recipe
For a general-purpose potting mix or raised bed filler, try this ratio:
- 2 parts finished compost
- 1 part coco coir (or peat moss)
- 1 part perlite (or vermiculite, or a mix of both)
- 0.5 part aged manure
Mix these ingredients thoroughly on a tarp or in a large wheelbarrow. You’ll be amazed at the fluffy, rich texture you achieve – far superior to many bagged mixes. For containers, consider adding a slow-release organic fertilizer like Espoma Bio-tone Starter Plus, available at most American garden centers, to ensure sustained nutrient supply. This homemade concoction will nourish your plants through the growing season, giving them the robust start they need for a bountiful harvest by Labor Day. https://ecorganicas.org/when-to-plant-garlic/
Regional Secrets to Super Soil – Tailoring Your Mix Across the USA
While a general recipe is a great starting point, the truly “criminal” gardener knows that the best soil is customized. The diverse climates and native soil types across the continental USA demand a nuanced approach. What works perfectly in the humid South might lead to waterlogging in the rainy Pacific Northwest, or rapid drying in the arid Southwest. This May, as planting ramps up, let’s look at how to tweak your homemade soil to thrive in your specific region.
Northeast (USDA Zones 3-7)
Challenges: Often heavy clay soils, cold springs, variable rainfall.
Soil Solution: Focus on improving drainage and warming up the soil.
Tweaks:
- Increase Perlite: Add an extra 5-10% perlite to your base mix to ensure good drainage and prevent compaction, especially important for raised beds and containers experiencing spring rains.
- Leaf Mold: Incorporate well-rotted leaf mold (easily made by composting leaves over winter). It improves soil structure and provides slow-release nutrients.
- Compost is King: Use plenty of finished compost to break up clay and enrich the soil, preparing it for your Memorial Day plantings of tomatoes and peppers.
South (USDA Zones 7-10)
Challenges: High humidity, intense summer heat, sandy or heavy clay soils, rapid nutrient depletion.
Soil Solution: Enhance water retention, nutrient stability, and disease resistance.
Tweaks:
- Boost Coco Coir/Vermiculite: Increase these by 5-10% to retain moisture during hot, dry spells, which are common even in late spring.
- Worm Castings: Add 10-15% worm castings for a supercharged nutrient boost and microbial diversity that helps plants resist diseases in humid conditions. You can buy these on Amazon or make your own with a vermicompost bin.
- Pine Bark Fines: If you have sandy soil, adding 5-10% pine bark fines can improve water retention and add organic matter.
Midwest (USDA Zones 3-6)
Challenges: Rich native soils but often compacted, harsh winters, hot summers, variable spring weather.
Soil Solution: Improve aeration, structure, and maintain fertility.
Tweaks:
- Balanced Approach: The general recipe works well here. Focus on consistent compost application to keep the rich soil friable.
- Green Manure: Consider planting a spring cover crop (like clover or oats) in beds you won’t use immediately, then tilling it in a few weeks before planting warm-season crops. This adds organic matter and nutrients naturally.
- Gypsum: For compacted clay soils, a light application of gypsum can help improve structure over time.
Pacific Northwest (USDA Zones 6-9)
Challenges: Abundant rainfall, acidic soils, slugs.
Soil Solution: Maximize drainage, balance pH, and deter pests.
Tweaks:
- High Perlite/Coarse Sand: Prioritize drainage! Increase perlite by 10-15% and consider adding 5% coarse sand to prevent waterlogging, especially in May when spring rains can still be heavy.
- Lime: Test your soil pH. PNW soils tend to be acidic. A light application of dolomitic lime (available at Lowe’s) can help raise pH for most vegetables.
- Biochar: Incorporate biochar (5-10%) for long-term drainage improvement and microbial habitat.
Southwest (USDA Zones 7-10)
Challenges: Arid climate, intense sun, alkaline soils, rapid water evaporation.
Soil Solution: Supercharge water retention, lower pH, and protect roots.
Tweaks:
- Maximize Coco Coir/Vermiculite: Increase these by 15-20% to hold precious moisture.
- Compost & Humic Acid: Abundant compost is crucial. Additionally, a liquid humic acid supplement can improve nutrient uptake in alkaline soils.
- Mulch Heavily: Once your plants are in, a 2-4 inch layer of organic mulch (straw, wood chips) is non-negotiable to conserve moisture and regulate soil temperature.
By tailoring your homemade soil, you’re not just saving money, you’re creating the perfect environment for your plants to thrive, no matter where you garden in the USA. https://ecorganicas.org/do-plant-cells-have-mitochondria/
Proven Techniques for Composting Gold – Turning ‘Waste’ into Wealth
Compost is the undisputed king of homemade soil amendments. It’s rich in nutrients, improves soil structure, enhances water retention, and introduces a vibrant ecosystem of beneficial microorganisms. The best part? You can make it almost entirely from materials you’d otherwise throw away! This is where the real “crime” against expensive soil begins – transforming kitchen scraps and yard waste into “black gold” that enriches your garden for free. May is an excellent month to either start a new compost pile or turn an existing one, as warmer temperatures accelerate decomposition.
Choosing Your Composting Method
- Hot Composting (Fast & Furious):
- How it works: Requires a good balance of “greens” (nitrogen-rich: kitchen scraps, grass clippings) and “browns” (carbon-rich: leaves, wood chips, shredded paper), moisture, and regular turning to maintain high temperatures (130-160°F).
- Pros: Breaks down materials quickly (weeks to a few months), kills weed seeds and pathogens.
- Cons: More labor-intensive, requires active management.
- May Tip: As you start mowing lawns more frequently, grass clippings are excellent “greens” for hot composting.
- Cold Composting (Slow & Steady):
- How it works: Simply pile up organic materials and let nature take its course.
- Pros: Minimal effort, great for large volumes of yard waste.
- Cons: Takes much longer (6 months to 2 years), may not kill all weed seeds.
- May Tip: Ideal for adding spring garden clean-up waste and fallen branches.
- Vermicomposting (Worm Power!):
- How it works: Red wiggler worms consume kitchen scraps and produce nutrient-rich worm castings.
- Pros: Produces incredibly rich compost (castings) quickly, great for small spaces (indoors or out), minimal odor.
- Cons: Requires specific worms, sensitive to temperature extremes.
- May Tip: As the weather warms, outdoor worm bins become very productive. Keep them shaded to prevent overheating.
Essential Composting Ingredients (The “Green” & “Brown” Balance)
- Greens (Nitrogen-rich): Fruit and vegetable scraps, coffee grounds, tea bags, grass clippings, fresh plant trimmings, chicken manure.
- Browns (Carbon-rich): Dried leaves, shredded newspaper/cardboard, wood chips, straw, sawdust, pine needles.
Aim for roughly a 2:1 ratio of browns to greens for optimal decomposition. Layering these materials helps create the right balance.
American Product Recommendations for Composting
- Compost Bins/Tumblers: For hot composting, consider a <a href="
” target=”_blank”>compost tumbler from Home Depot or Lowe’s. Brands like Lifetime and Yimby are popular and make turning easy.
- Worm Bins: For vermicomposting, the “Worm Factory 360” (available on Amazon US) is a popular multi-tray system.
- Shredders/Chippers: If you have a lot of woody material, a small electric chipper/shredder (e.g., Sun Joe, available on Amazon) can greatly speed up decomposition.
By actively composting, you’re not just making fantastic soil; you’re reducing landfill waste and creating a sustainable cycle right in your own backyard. It’s a win-win that truly embodies the spirit of self-sufficiency. https://ecorganicas.com/container-gardening-styling-make-pots-the-star-of-your-patio/
The Easy Path to Perfect Potting Mix – From Seedlings to Containers
Container gardening is incredibly popular across the US, from urban balconies in New York City to patios in Phoenix. But buying bagged potting mix for every pot can quickly become prohibitively expensive. This is where your homemade “criminal” soil mix truly shines. You can create specialized mixes for different stages of plant growth and different container types, ensuring your plants get exactly what they need without the premium price tag. In May, many gardeners are either starting seeds for succession planting or potting up their vegetable and flower starts into larger containers.
Specialized Homemade Mixes for Every Need
- Seed Starting Mix (Fine & Sterile):
- Recipe: 1 part fine coco coir (or peat moss), 1 part fine vermiculite, 0.5 part very fine compost (sieved).
- Why it works: This mix is light, drains well, holds moisture, and provides minimal nutrients, encouraging strong root development without burning delicate seedlings. Sterilizing the mix (baking in an oven at 200°F for 30 minutes) can prevent “damping off” disease.
- May Tip: Perfect for starting basil, cilantro, or heat-loving flowers indoors for later transplanting.
- General Potting Mix (Balanced & Versatile):
- Recipe: 2 parts finished compost, 1 part coco coir, 1 part perlite/vermiculite mix, 0.5 part aged manure.
- Why it works: This is your workhorse mix for most container plants – annuals, perennials, herbs, and vegetables. It offers a good balance of drainage, water retention, and nutrients.
- May Tip: Use this for potting up tomato starts, peppers, petunias, or anything you’re moving into larger pots for the summer.
- Raised Bed Mix (Robust & Long-Lasting):
- Recipe: 3 parts finished compost, 1 part topsoil (if available and good quality), 1 part coco coir, 0.5 part aged manure, 0.5 part perlite or coarse sand.
- Why it works: Raised beds need a robust mix that won’t compact easily and can sustain plants for an entire season. The topsoil adds mineral content and bulk.
- May Tip: Ideal for filling new raised beds or topping off existing ones before planting your warm-season crops.
Comparing DIY to Store-Bought
Consider a typical 1 cubic foot bag of “premium” potting mix from Home Depot. It might cost $15-$20. It’s often peat-based, contains perlite/vermiculite, and a small amount of slow-release fertilizer. Your DIY equivalent, using bulk compost, coco coir bricks, and a bag of perlite, will cost you pennies on the dollar per cubic foot. Plus, you know exactly what’s in it, avoiding any questionable fillers or synthetic ingredients you might not want in your organic garden. Brands like Burpee or Park Seed sell their own potting mixes, but even those can’t beat the cost-effectiveness and customization of homemade. This cost savings allows you to invest more in quality seeds from Baker Creek Heirloom Seeds or tools for your growing hobby!
Making your own potting mix is not just about saving money; it’s about providing a superior, tailored environment for your plants. It’s a simple, rewarding process that empowers you to grow the healthiest, most vibrant garden possible.
Free Gardening Guide – Download Now
Get our complete step-by-step PDF guide – FREE for US gardeners!
Beyond the Basics – Advanced Soil Amendments for Peak Performance
Once you’ve mastered the art of making your own base soil, you can take your gardening game to the next level with advanced amendments. These aren’t always necessary for every gardener, but for those seeking truly peak performance – bigger yields, more vibrant blooms, and healthier plants – they can make a significant difference. Think of these as the “secret sauce” that rich gardeners might buy in tiny, expensive bottles, but you can incorporate them into your budget-friendly homemade soil. Many of these are available at local garden centers, Home Depot, Lowe’s, or easily ordered from Amazon US.
Unlocking Your Soil’s Full Potential
- Mycorrhizal Fungi (Root Powerhouse):
- What it is: Beneficial fungi that form a symbiotic relationship with plant roots, extending the root system’s reach and improving nutrient and water uptake.
- How to use: Mix into your potting soil or sprinkle directly into planting holes when transplanting. A little goes a long way! Great for nearly all plants, especially vegetables and perennials.
- American products: Brands like MycoApply or Espoma Bio-tone Starter Plus often include mycorrhizal fungi.
- Worm Castings (Nature’s Superfood):
- What it is: The nutrient-rich excrement of earthworms, packed with microbes, enzymes, and readily available nutrients.
- How to use: Add 10-20% to your potting mix, use as a top dressing, or make a “worm tea” for liquid feeding.
- American products: Many local nurseries sell worm castings, or you can find them on Amazon from brands like Wiggle Worm Soil Builder.
- Bone Meal (Phosphorus Boost):
- What it is: A natural source of phosphorus, essential for strong root development, flowering, and fruiting.
- How to use: Mix a few tablespoons per planting hole, especially for root crops (carrots, potatoes) or flowering plants.
- American products: Jobe’s Organics and Espoma offer bone meal at most garden stores.
- Blood Meal (Nitrogen Kickstart):
- What it is: A natural source of nitrogen, promoting vigorous leafy growth.
- How to use: Use sparingly (a tablespoon per plant) as too much can burn plants. Great for leafy greens or plants needing a quick nitrogen boost.
- American products: Similar to bone meal, available from Jobe’s and Espoma.
- Biochar (Long-Term Soil Health):
- What it is: A highly porous charcoal made from biomass, it improves soil structure, water retention, nutrient holding capacity, and provides a habitat for microbes. It remains in the soil for centuries!
- How to use: Mix 5-10% into your raised beds or garden soil. It’s a long-term investment.
- American products: Brands like Wakefield Biochar are available online and in some garden centers.
- Kelp Meal (Trace Minerals & Growth Hormones):
- What it is: Dried seaweed, rich in trace minerals, vitamins, and natural plant growth hormones.
- How to use: Mix a small amount (a tablespoon per gallon of soil) into your potting mix or use as a top dressing.
- American products: Neptune’s Harvest is a popular brand, found at many nurseries.
By strategically incorporating these advanced amendments, you can fine-tune your homemade soil to meet the exact needs of your plants, pushing them towards their maximum potential. This isn’t just gardening; it’s horticultural alchemy, and it’s all within your reach this spring! https://ecorganicas.com/container-gardening-styling-make-pots-the-star-of-your-patio/
Comparison Table: DIY Soil vs. Commercial Options
Let’s break down how your homemade soil stacks up against some popular commercial options you might find at American retailers. This table illustrates the “crime” of saving money while getting superior results!
| Product/Technique | Best For | Price Range (per cubic foot) | Where to Buy | Rating (1-5 Stars) |
|---|---|---|---|---|
| DIY Homemade Potting Mix | All-purpose containers, raised beds, specific plant needs | $0.50 – $2.00 | Home Depot (components), Lowe’s (components), Amazon US (components), local compost/manure | ⭐⭐⭐⭐⭐ |
| Miracle-Gro Potting Mix | General container gardening, quick results (with synthetic fertilizers) | $8.00 – $12.00 | Home Depot, Lowe’s, Walmart, Amazon US | ⭐⭐⭐ |
| Espoma Organic Potting Mix | Organic container gardening, slightly better quality | $12.00 – $18.00 | Garden Centers, Home Depot, Lowe’s, Amazon US | ⭐⭐⭐⭐ |
| FoxFarm Ocean Forest Potting Soil | Premium container gardening, high-nutrient needs (e.g., cannabis, heavy feeders) | $20.00 – $30.00 | Specialty Garden Stores, Amazon US | ⭐⭐⭐⭐ |
| Local Bulk Compost | Garden beds, soil amendment, large-scale use | $1.00 – $5.00 | Local Nurseries, Landscape Supply Yards, Municipal Compost Facilities | ⭐⭐⭐⭐⭐ |
Expert Tips for American Gardeners This May
Here are 10+ actionable tips to help you make the most of your homemade soil and your garden this spring:
- Test Your Soil: Before making major amendments, get a soil test from your local university extension office. It’s inexpensive (around $15-$25) and provides invaluable information on pH and nutrient levels.
- Start Small with Composting: If you’re new to composting, begin with a small bin or a simple pile. Don’t get overwhelmed; any amount of homemade compost is a win!
- Collect Rainwater: Use rainwater for watering your plants and moistening your compost pile. It’s free, pH-neutral, and doesn’t contain chlorine like tap water.
- Mulch, Mulch, Mulch: After planting, apply a 2-4 inch layer of organic mulch (straw, wood chips, shredded leaves) to conserve moisture, suppress weeds, and regulate soil temperature.
- Rotate Crops: Practice crop rotation to prevent nutrient depletion and reduce pest/disease buildup in your garden beds.
- Support Pollinators: Plant native flowers to attract bees and butterflies, essential for pollinating your vegetable crops.
- Succession Planting: In May, consider planting quick-growing crops like lettuce, radishes, or bush beans every 2-3 weeks for a continuous harvest throughout the summer.
- Harden Off Seedlings: Before transplanting your May-started seedlings outdoors, gradually expose them to outdoor conditions for a week or two to prevent transplant shock.
- Check Your USDA Zone: Always double-check your USDA Hardiness Zone (available on the USDA website) to ensure you’re planting appropriate varieties at the right time.
- Attend Local Workshops: Many university extension offices and botanical gardens offer free or low-cost gardening workshops.
- Keep a Garden Journal: Note down what you planted, when, how your soil performed, and your harvest dates. This is invaluable for future seasons.
- Don’t Overwater: Check soil moisture with your finger before watering. Overwatering can be as detrimental as underwatering, especially in spring when evaporation rates might still be lower.
Frequently Asked Questions About DIY Soil
Q1: Can I use garden soil from my yard for containers or raised beds?
</