Vegetable Gardening: The Ultimate Guide for Beginners
Introduction
Vegetable gardening is a fun and rewarding hobby that can provide you with fresh, organic produce all season long. Whether you’re a seasoned gardener or just starting out, this guide will provide you with everything you need to know to get started.
Planning Your Vegetable Garden
The first step in starting a vegetable garden is to plan your layout. Consider the amount of space you have, the amount of sunlight your garden will receive, and the types of vegetables you want to grow.
Once you have a plan, you can start preparing your soil. The best soil for vegetable gardening is loose, well-drained, and rich in organic matter. You can improve your soil by adding compost or manure.
Choosing the Right Vegetables to Grow
There are many different types of vegetables that you can grow in your garden. When choosing vegetables, consider your climate, the amount of space you have, and your personal preferences.
Some of the most popular vegetables for beginners include tomatoes, peppers, cucumbers, zucchini, and beans.
Planting Your Vegetables
Once you have chosen your vegetables, it’s time to plant them. Most vegetables are planted in the spring after the last frost.
To plant your vegetables, dig a hole that is twice the width of the root ball and just as deep. Place the plant in the hole and fill it with soil, tamping down gently to remove any air pockets.
Watering Your Vegetables
Vegetables need regular watering, especially during hot, dry weather. Water your vegetables deeply and regularly, allowing the soil to dry out slightly between watering.
Fertilizing Your Vegetables
Vegetables need fertilizer to grow healthy and strong. Fertilize your vegetables every few weeks with a balanced fertilizer.
Pest and Disease Control
Pests and diseases can be a problem for vegetable gardeners. To prevent pests and diseases, keep your garden clean and free of weeds. You can also use natural pest control methods, such as companion planting and organic insecticides.
Harvesting Your Vegetables
When your vegetables are ripe, it’s time to harvest them. To harvest your vegetables, simply cut them from the plant.
Conclusion
Vegetable gardening is a fun and rewarding way to grow your own food. By following the tips in this guide, you can grow a beautiful and bountiful vegetable garden.
Secondary Keywords
Vegetable gardening, how to start a vegetable garden, vegetable garden planning, choosing vegetables to grow, planting vegetables, watering vegetables, fertilizing vegetables, pest and disease control, harvesting vegetables, organic gardening, sustainable gardening, backyard gardening, raised bed gardening, container gardening, square foot gardening, gardening tips, gardening tricks, gardening for beginners
Planting a vegetable garden can be a rewarding and fulfilling experience. Not only do you get to enjoy fresh, homegrown produce, but you also get to connect with nature and nurture your green thumb. However, before you start digging and sowing seeds, it’s important to properly prepare your garden to ensure the best possible growing conditions. In this article, we will guide you through the essential steps to prepare for planting a vegetable garden.
The first step in preparing for a vegetable garden is selecting the right location. Most vegetables require at least six hours of direct sunlight each day, so choose a spot in your yard that receives ample sunlight. Additionally, make sure the location has good drainage to prevent waterlogging, as excess moisture can lead to root rot and other diseases.
Clear the Area
Once you have chosen the location, it’s time to clear the area of any existing vegetation, weeds, or debris. Remove any rocks, sticks, or other obstacles that may hinder the growth of your plants. Pull out any weeds by hand or use a garden hoe to loosen the soil and remove them more easily.
Test the Soil
Before you start planting, it’s crucial to test the soil to determine its composition and pH level. You can purchase a soil testing kit from a garden center or send a sample to a local agricultural extension office for analysis. Testing the soil will help you understand its fertility and acidity, allowing you to make any necessary amendments to create optimal growing conditions for your vegetables.
Improve the Soil
Based on the results of your soil test, you may need to improve the soil by adding organic matter or adjusting its pH level. Organic matter, such as compost or well-rotted manure, can improve soil structure, fertility, and drainage. Spread a layer of organic matter over the garden bed and mix it into the top few inches of soil using a garden fork or tiller. If the soil pH is too acidic or alkaline, you can adjust it by adding lime or sulfur, respectively.
Plan Your Layout
Before you start planting, it’s essential to plan your garden layout. Consider the mature size of each vegetable plant and provide enough space between them to ensure proper airflow and sunlight penetration. Group plants with similar water and nutrient requirements together for more efficient watering and fertilizing. You can use a garden planner tool or simply sketch out your garden plan on paper.
Prepare the Beds
Now that you have cleared the area and improved the soil, it’s time to prepare the garden beds. Use a garden rake to level the soil and remove any remaining debris. Create raised beds or mounded rows to improve drainage and prevent soil compaction. You can also add a layer of mulch to help suppress weeds, retain moisture, and regulate soil temperature.
Start Planting
Finally, it’s time to start planting your vegetable garden. Follow the planting instructions for each vegetable, including the recommended spacing, depth, and timing. Water the newly planted seeds or seedlings gently but thoroughly to ensure good soil contact and proper hydration. Keep an eye on the weather forecast and protect your young plants from frost or extreme heat if necessary.
Maintain and Enjoy
Once your vegetable garden is planted, it’s important to maintain it properly. Regularly water, weed, and monitor for pests or diseases. Consider using organic pest control methods or companion planting to deter pests naturally. Harvest your vegetables when they are ripe and enjoy the fruits of your labor.
By following these steps to prepare for planting a vegetable garden, you are setting yourself up for a successful growing season. Remember to stay patient and enjoy the process, as gardening is a journey of learning and discovery. Happy gardening!
Hey there, plant pals! Today, we’re chatting about growing your melons at home. Whether you’ve got a big garden or a little balcony, get ready for a tasty adventure as we break down how to make these sweet treats happen.
Why Grow Your Melons?
First off, why bother growing melons? Well, imagine a melon you grew yourself – it tastes way better than the store ones. It’s super juicy and full of flavor. Plus, you’re in charge, so no yucky chemicals.
Find the Perfect Spot for Melon Magic
So, where should you plant your melon dreams? Melons love the sun, so find a sunny spot in your garden that gets at least six hours of sunlight each day. No garden? No worries! You can grow them in containers on your sunny balcony or patio.
Get the Soil Ready for Melon Fun
Melons aren’t picky, but they like well-draining soil with a pH between 6.0 and 7.0. Before planting, tidy up the soil by removing weeds and adding some compost or aged manure to make it extra good for growing.
Quench the Thirsty Melons: Watering Tricks
Melons are like plants that guzzle water, especially when it’s hot. Water them well, but don’t drown them. Putting some mulch around them helps keep the soil moist and tells those pesky weeds to hit the road.
From Tiny Seeds to Melon Stars
Start the melon journey by planting seeds indoors about 4-6 weeks before the last frost. Once they’re ready and the frost is gone, move them outside with some space to spread out.
Melon Boot Camp: Growing from Seed
Give those seeds a cozy home. A warm spot or a sunny window will do the trick. Move the pots around every so often, so the little plants don’t lean too much towards the light.
Planting Day Fun
Before your melon team heads out, toughen them up a bit. Let them get used to the outside world over a week or two. Then, on a sunny day, dig a hole, put a plant in, and pat the soil down gently.
Take Care of Your Melon Gang
Once your melon buddies are settled, give them some regular care. Water them when they’re thirsty, feed them every two weeks with some good plant food, and keep an eye out for bugs or weird plant issues. Fix those issues ASAP.
Time for the Melon Harvest
Timing is everything when it comes to picking melons. Wait until the skin changes color, the stem easily comes off, and the melon sounds hollow when you tap it. Grab a knife, cut them off, and enjoy the victory.
Store Your Prize Melons
If you can resist eating your melons right away, store them in a cool, dry place for a few days. Want them to last longer? Stick them in the fridge, but let them warm up a bit before taking a bite for the best flavor.
Melons have enemies – bugs and diseases. Watch out for aphids, cucumber beetles, and spider mites. Fight back with helpful bugs, switch up where you plant things, and use natural bug control. And don’t let powdery mildew ruin the fun – keep things breezy, and don’t water from above.
Find melon seeds or plants at local garden stores, nurseries, or online shops. Look for places that have lots of kinds of melons that work in your area.
With tons of melons to choose from, which ones are best for your garden? Try ‘Charentais,’ ‘Sugar Baby,’ and ‘Honeydew.’ Think about size, taste, and what they need to grow to find your perfect melon match.
Get ready, future melon grower! You’ll need a good shovel or fork for the soil, a way to water them, something for climbing melons to lean on, and a sharp knife for the big harvest.
Growing your melons is like hosting a delicious flavor party in your backyard. Follow our guide, and soon you’ll be the expert on growing melons, enjoying the yummy results of your gardening skills. Ready to start the melon fun? Begin today and let your taste buds celebrate the homegrown melon feast!
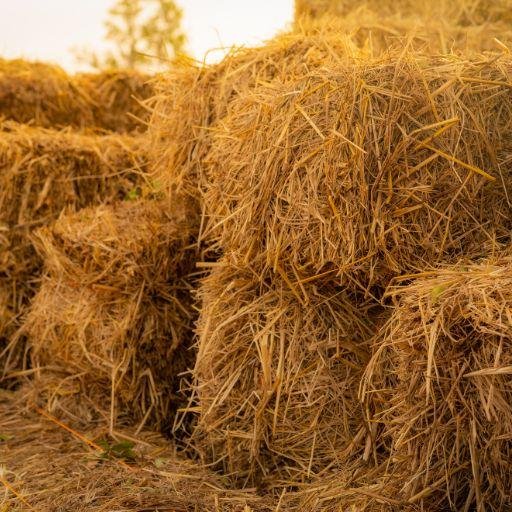
Discover the art of vertical straw bale gardening, a sustainable and innovative way to grow your favorite plants. Learn how to create a thriving garden using straw bales.
Straw bale gardening is a cool way to grow stuff, and it’s better for the Earth. Instead of using dirt, you use straw bales. In this article, we’ll learn all about it and why it’s awesome.
Bale gardening what is straw-
Straw is a kind of dried plant material that’s left behind after grains like wheat, rice, or barley are harvested. It looks like long, skinny, and hollow tubes. People often use straw as bedding for animals, to make straw hats, or in gardening.
In this gardening, instead of using soil in the ground, gardeners use these straw bales as a kind of container to grow plants. They’re like plant beds made of straw. The straw bales help the plants grow by providing support and a place for their roots to spread out. It’s a creative way to garden without traditional soil.
is straw bale garden easy?
Yes, a straw bale garden is generally considered to be relatively easy, especially for beginners and those with limited gardening space. Here’s why it’s considered easy:
No Need for Good Soil: You don’t need to worry about having perfect soil in your yard. Straw bales provide a clean slate for gardening, and you don’t have to dig or amend the soil.
Fewer Weeds: Straw bales act as a natural weed barrier, so you’ll spend less time pulling weeds compared to traditional gardening.
Good Drainage: Straw bales offer excellent drainage, which helps prevent overwatering and root rot issues.
Better for Your Back: Since the gardening is done above ground level on the bales, there’s less bending and kneeling, making it easier on your back and joints.
Versatile: You can grow various plants in straw bales, from vegetables to flowers, making it a flexible gardening option.
Reusability: With proper care, straw bales can be reused for several growing seasons, saving you time and money.
However, it’s essential to follow the necessary steps like conditioning the straw bales correctly and providing regular care to ensure a successful straw bale garden. While it’s generally easier than traditional gardening, like any gardening method, it does require some effort and attention.
Straw Bale Gardening
Where Straw Bale Gardening Came From
People have been using straws to help their plants for a long time. It’s an old trick that’s become a new way to garden.
Taking care of your straw bale garden is easy. You water your plants, watch out for bugs, and give them plant food when they need it. You can also use the same straw bales again next year.
Welcome to the world of vertical straw bale gardening, an exciting and eco-friendly method for growing plants. In this guide, we’ll explain everything about this unique way of gardening, from getting started to taking care of your garden. Let’s begin this green journey together.
This is a way of growing plants using straw bales as your planting bed. It’s an excellent option if you have limited space or poor soil. The straw bales become both your plant containers and the soil. In this section, we’ll talk about why it’s becoming so popular and the benefits it offers.
Choosing where to put your straw bale garden is super important. We’ll help you pick the perfect spot by considering things like sunlight, water drainage, and how easy it is to reach. A good location sets the stage for a healthy garden.
Before you start planting, you need to get your straw bales ready. We’ll show you how to condition and set them up for your plants. This step is essential for creating a good environment for your garden to grow.
Selecting the right plants for your straw bale garden is a big decision. Whether you love colorful flowers, tasty vegetables, or fragrant herbs, we have recommendations and tips to help you choose the best plants for your garden.
Now that your straw bales are ready, it’s time to start planting. We’ll cover the basics, like how far apart to plant your seeds, how much to water, and how to keep bugs away. You’ll learn how to take care of your garden from the very beginning.
Keeping Your Garden Healthy
Taking care of your garden is an ongoing job. In this section, we’ll talk about what you need to do every day and throughout the year to make sure your garden stays happy and healthy.
Helping the Environment
Straw bale garden isn’t just beautiful; it’s also good for the environment. Find out how it helps reduce waste, saves resources, and promotes eco-friendly gardening practices.
Pros and cons of straw bale gardening
Pros
No Soil Needed: You don’t need good soil because the straw bales provide the growing medium. This is great if your yard has poor soil.
Less Back Strain: You don’t have to bend over as much because the garden is raised, which can be easier on your back.
Weed Control: Straw bales suppress weeds, so you’ll spend less time weeding your garden.
Good Drainage: Straw bales have good drainage, which helps prevent root rot in your plants.
Warmer Soil: The straw bales heat up as they decompose, giving your plants a warm and cozy place to grow.
Accessible: Perfect for people with limited mobility because you can set up your garden at a comfortable height.
Recycling: You’re reusing straw, which is an eco-friendly way to garden.
Cons
Initial Setup: Conditioning the straw bales takes some time and effort. You need to water and fertilize them for a few weeks before planting.
Watering Needs: Straw bales can dry out quickly, especially in hot weather, so you’ll need to water them often.
Limited Plant Depth: Some deep-rooted plants may struggle to grow in straw bales.
Decomposition: Over time, the straw bales will break down, and you’ll need to replace them, which can be an ongoing expense.
Less Support: Tall or heavy plants may need additional support because straw bales can be less stable than traditional soil.
Learning Curve: If you’re new to straw bale gardening, there’s a bit of a learning curve to get the best results.
In summary, this gardening can be a fantastic solution for many gardeners, especially those with poor soil or limited mobility. However, it does require some initial effort and ongoing maintenance, so weigh the pros and cons to see if it’s the right choice for you.
Conclusion
This is a cool way to grow your own plants. With our help, you can start your garden adventure. Try this unique technique and watch your garden thrive in ways you never expected.
Can I use any straw for straw bale gardening?
Yes, you can use straw, but it’s better than hay because it has fewer weed seeds.
How often should I water my straw bales?
Water when the top of the bale feels dry, usually when it hasn’t rained for a while.
Can I grow vegetables and flowers together in one bale?
Absolutely! Many people do this successfully.
Do I need to add fertilizer?
Yes, your plants will appreciate some extra nutrients. We’ll explain how to do it right.
Can I try straw bale gardening in the city?
Yes, it’s great for small spaces, like balconies or urban gardens.
Can I reuse the straw bales?
You can use them for a season or two, but eventually, they’ll break down. You can turn them into compost.
What are the disadvantages of straw bale gardens?
Limited Water Retention: Straw bales have poor water retention capacity compared to traditional soil, making it necessary to water them frequently. Uneven Moisture Distribution: Water doesn’t disperse uniformly in straw bales, often resulting in uneven moisture levels. Quick Drying: Straw bales tend to dry out rapidly in hot weather, necessitating frequent watering.
What can I grow in a straw bale garden?
Tomatoes Peppers Cucumbers Zucchini Beans Lettuce Spinach Kale Radishes Carrots
How long do straw bales last for gardening?
The longevity of straw bales in gardening can vary depending on several factors, including the quality of the bales, environmental conditions, and how well you maintain them. On average, straw bales used for gardening can last for one to two growing seasons.
How do you condition straw bales for gardening?
Conditioning straw bales for gardening is a crucial step that prepares them to serve as a suitable growing medium for your plants
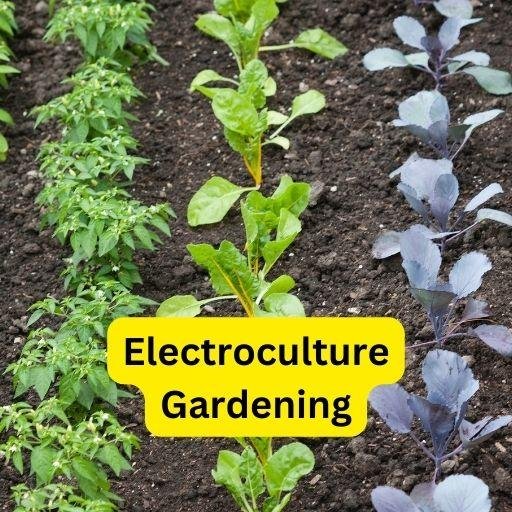
Electroculture Gardening: The Shockingly Effective Way to Boost Your Garden
Discover the power of electroculture gardening to supercharge your plants and make your garden thrive. Learn the basics, benefits, and how to get started with this innovative method.
Introduction
Welcome to the world of electroculture gardening, where electricity meets gardening to create an electrifying effect on your plants. Electroculture gardening is a fantastic method that helps plants grow better and healthier. In this guide, we will explore what electroculture gardening is all about, its benefits, and how you can try it in your own garden. Let’s get ready to energize your garden and watch it flourish like never before!
Electroculture Gardening
Electroculture Gardening: What is it?
Electroculture gardening is a special way of gardening that uses electricity to help plants grow. By applying controlled electrical currents to the soil and plants, we can make them absorb nutrients better and grow stronger.
The Science Behind It
Let’s understand how it works:
1. Opening Cell Pathways with Electroporation
Electroporation is a fancy word that means electricity creates tiny openings in plant cells. These openings help the plants absorb more nutrients and water, which makes them grow faster and stronger.
2. Enhancing Soil Moisture with Electroosmosis
Electroosmosis is when electricity moves water in the soil. It helps water spread out evenly, so the plants get just the right amount of water they need.
3. Improving Soil Fertility with Ionization
Ionization is a process where electricity breaks down minerals in the soil, making it easier for plants to use them. This boosts the soil’s fertility and helps plants grow better.
4. Stimulating Plant Growth with Electromagnetic Fields
Electromagnetic fields from electricity help plants grow better. They encourage plants to make food through photosynthesis and absorb nutrients more effectively.
5. Sending Signals for Growth
Electricity sends special signals to the plants, telling them to grow, flower, and produce fruits. This makes the plants happy and healthy!
Getting Started: How to Do Electroculture Gardening
Ready to try electroculture gardening? Here’s how:
1. Test Your Soil
Before you start, check your soil’s composition and nutrient levels. This will help you know how much electricity your plants need.
2. Choose the Right Plants
Not all plants like electricity, so choose the ones that benefit the most. Tomatoes, peppers, and corn are some that love it!
3. Set Up the System
Get the right equipment like electrodes and a power source. Safety first! Make sure everything is safe and secure.
4. Apply the Electricity
Gently give your plants some electricity. Start small and see how they respond. Adjust the electricity based on their needs.
5. Watch Your Garden Grow!
Keep an eye on your plants as they grow stronger and happier. With time, you’ll see the amazing results of electroculture gardening.
Benefits of Electroculture Gardening
Why should you give it a try? Here are some great reasons:
1. Happy, Healthy Plants
Electroculture gardening makes your plants thrive, giving you beautiful and healthy greenery.
2. Less Chemicals
You won’t need as many chemicals in your garden, which is good for the environment.
3. Save Water
With electroosmosis, water is used efficiently, so you save water in the process.
4. Better Soil
Your soil becomes richer and more fertile, supporting a thriving ecosystem.
5. More Harvest
Get ready for bigger and better harvests as your plants grow strong and productive.
Is It Safe?
Yes, as long as you follow safety rules and keep everything insulated, it’s safe.
Can I Do It in My Small Garden?
Absolutely! You can try electroculture gardening in any size garden.
Is It Complicated?
It may seem complex, but with the right guidance, it’s easy to do.
Will It Work with My Other Gardening Methods?
Yes, you can combine it with other gardening techniques to get even better results.
Can I Use Solar Power?
Yes, using solar power is an eco-friendly option to run your electroculture system.
What Plants Benefit the Most?
Plants like tomatoes, peppers, and corn love electroculture gardening!
Conclusion
Electroculture gardening is an exciting way to boost your garden’s growth and health. By using electricity, you can unlock the full potential of your plants and enjoy a thriving garden. It’s a simple and effective method that any gardener can try. So why not give it a go and see your garden shine with vitality?
Farming vs Gardening are two terms that are often used interchangeably, but they are not the same. Both involve growing plants, but the methods, scale, and purposes are different. In this article, we will explore the differences between farming and gardening, and why it is important to understand them.
What is Farming?
Farming is the process of cultivating crops and raising livestock for food or other products on a large scale. It involves using a significant amount of land, machinery, and labor to produce goods for commercial purposes. Farming is a complex and challenging task that requires specialized knowledge, skills, and resources.
Farming vs Gardening
Types of Farming
Arable Farming: Involves cultivating crops like cereals, vegetables, fruits, and oilseeds on arable land.
Pastoral Farming: Involves raising animals like cattle, sheep, goats, and pigs for meat, milk, wool, and leather.
Mixed Farming: Involves a combination of arable and pastoral farming on the same land.
Characteristics of Farming
Commercial: Farming is a business that involves producing goods for sale in the market.
Large-scale: Farming involves using large tracts of land, machinery, and labor to produce a significant amount of goods.
Profit-driven: The primary goal of farming is to make a profit by producing goods that meet the demand of consumers.
What is Gardening?
Gardening is the process of growing plants, flowers, vegetables, and herbs for personal use or decoration. It can be done on a small scale, such as in a backyard or balcony, or a larger scale, such as in a community garden. Gardening is often done for pleasure, relaxation, and health benefits, rather than for commercial purposes.
Types of Gardening
Vegetable Gardening: Involves growing vegetables for personal use or sale in a small garden.
Flower Gardening: Involves growing flowers for decoration and beauty in a garden.
Herb Gardening: Involves growing herbs for personal use or sale in a small garden.
Container Gardening: Involves growing plants in containers or pots on a balcony or patio.
Characteristics of Gardening
Non-commercial: Gardening is done for personal use or decoration, rather than for commercial purposes.
Small-scale: Gardening can be done on a small scale, such as in a backyard or balcony.
Leisure-driven: Gardening is often done for pleasure, relaxation, and health benefits.
Differences between Farming and Gardening
While farming and gardening involve growing plants, there are several differences between the two:
Scale
Farming involves using a large amount of land, machinery, and labor to produce goods on a commercial scale, while gardening is often done on a smaller scale, such as in a backyard or community garden.
Purpose
The primary purpose of farming is to produce goods for commercial sale, while gardening is often done for personal use or decoration.
Techniques
Farming requires specialized knowledge, skills, and techniques, such as irrigation, fertilization, pest control, and crop rotation, while gardening can be done with simple techniques, such as planting, watering, and pruning.
Investment
Farming requires a significant investment of capital, including land, machinery, and labor, while gardening can be done with minimal investment.
Profit
Farming is profit-driven, while gardening is often done for personal satisfaction or enjoyment.
Farming and gardening have different impacts on the environment. Large-scale farming can lead to soil erosion, water pollution, and greenhouse gas emissions, while gardening can help to reduce air pollution, provide habitat for wildlife, and improve soil health.
Farming and gardening can have different social and cultural significance. Farming has been a vital part of human civilization for thousands of years and is often associated with rural communities and traditions, while gardening is often seen as a hobby or pastime that can be enjoyed by people of all ages and backgrounds.
The differences between farming and gardening are not always clear-cut. Some forms of agriculture, such as small-scale organic farming or permaculture, blur the lines between farming and gardening by incorporating sustainable and ecological practices.
Both farming and gardening can provide benefits for human health and well-being. Eating fresh, locally grown food from farms or gardens can provide important nutrients and reduce the risk of chronic diseases while spending time outdoors in nature while farming or gardening can improve mental health and reduce stress.
In conclusion, farming and gardening are two distinct practices that involve growing plants but differ in their scale, purpose, techniques, investment, and profit. Understanding these differences is important for resource management, environmental impact, social and cultural significance, and personal health and well-being. Both farming and gardening have their unique benefits and challenges and can be enjoyed by people of all ages and backgrounds.
Straw bale gardening has gained popularity in recent years due to its many benefits. It allows you to grow a variety of plants without the need for soil, making it ideal for small spaces or areas with poor soil quality. However, like any gardening method, it comes with its own set of challenges. In this article, we will discuss the most common straw bale gardening problems and how to overcome them.
Straw bale gardening is a unique way to grow plants without the need for soil. While it has many advantages, there are also some common problems that gardeners may encounter. Let’s explore these problems and how to overcome them.
Problem 1: Overheating and Water Retention
Overheating and water retention are common problems in straw bale gardening, especially during the summer months. The causes of overheating and water retention are often related to the straw bale’s structure and placement.
Symptoms of overheating and water retention include dry soil and wilted plants. To prevent these problems, it is important to keep the straw bale moist and place it in a shaded area. You can also use a drip irrigation system to keep the bale moist without overwatering.
Straw Bale Gardening Problems
Problem 2: Nutrient Deficiencies
Straw bales do not contain the same nutrients as soil, which can lead to nutrient deficiencies in plants. Symptoms of nutrient deficiencies include yellowing leaves and stunted growth.
To overcome nutrient deficiencies, you can add fertilizers and other nutrients to the straw bale before planting. You can also use compost tea or fish emulsion to add nutrients throughout the growing season.
Problem 3: Pests and Diseases
Straw bale gardening is not immune to pests and diseases-
Common pests in straw bale gardening include aphids, mites, and slugs, while diseases like powdery mildew and blight can also affect plants. Symptoms of pests and diseases include yellowing leaves, spots on leaves, and wilting plants.
To prevent and treat pests and diseases, you can use organic pest control methods like neem oil or insecticidal soap. You can also practice crop rotation and sanitation to prevent the spread of diseases.
Problem 4: Weed Growth
Weed growth is another common problem in straw bale gardening. Weeds can compete with plants for nutrients and water, leading to stunted growth and reduced yield.
To prevent and control weed growth, you can cover the straw bale with mulch or weed fabric. You can also use a hoe or hand-pull weeds as soon as they appear.
Problem 5: Structural Integrity of Straw Bale
The structural integrity of the straw bale can also be a problem in straw bale gardening. If the bale starts to break down or collapse, it can affect the plant’s growth and stability.
To maintain the structural integrity of the straw bale, it is important to keep it dry and protected from rain. You can also add a layer of plastic or tarp to prevent moisture from seeping into the bale.
Problem 6: Uneven Decomposition
Uneven decomposition can occur in straw bale gardening if the bale is not properly conditioned before planting. This can lead to uneven moisture levels and nutrient distribution, affecting plant growth.
To promote even decomposition, it is important to condition the straw bale with nitrogen-rich fertilizers and water for at least two weeks before planting. You can also turn the ball over to distribute moisture and nutrients evenly.
Problem 7: Availability and Cost of Straw Bales
Straw bales may not always be available or affordable, which can be a problem for gardeners who want to try straw bale gardening. However, there are alternatives like hay bales or compost bins that can be used instead.
In conclusion, straw bale gardening is a unique and innovative way to grow plants without soil. While it has its own set of challenges, these can be overcome with proper maintenance and care. By understanding the common problems in straw bale gardening and their solutions, you can enjoy a bountiful and fruitful harvest in your straw bale garden.
Common problems that can arise Straw Bale Gardening
Temperature Fluctuations Straw bales can be sensitive to temperature fluctuations, particularly during the early stages of plant growth. If the weather is particularly hot or cold, you may need to take additional steps to protect your plants. Consider using shade cloth or row covers to protect your plants from extreme temperatures.
Can I reuse the same straw bale for multiple growing seasons?
Yes, you can reuse the same straw bale for up to two growing seasons if it is still structurally sound.
Can I use any type of straw bale for gardening?
It is best to use wheat straw bales as they decompose slower and contain fewer weed seeds.
Can I add fertilizers and other nutrients to the straw bale to prevent nutrient deficiencies?
Yes, you can add fertilizers and other nutrients to the straw bale before planting or throughout the growing season.
Do I need to water the straw bale garden more frequently than traditional soil gardening?
Yes, you may need to water the straw bale garden more frequently as straw bales tend to dry out faster than soil.
Can I grow any plant in a straw bale garden?
Most plants can be grown in a straw bale garden, but some may require more nutrients or support than others. It is best to research the specific needs of the plants you want to grow before planting.
No-Dig Gardening for Beginners: A Simple Guide to Growing Healthy Plants Without Tilling
Learn how to start your own No-Dig Gardening for Beginners. Discover the benefits of this low-maintenance, eco-friendly approach to gardening and get tips on how to grow healthy plants without tilling the soil.
Are you a beginner gardener looking for a low-maintenance, eco-friendly way to grow healthy plants? Then look no further than no-dig gardening! This simple and sustainable gardening technique involves building up layers of organic material on top of the soil instead of tilling it. Not only does it save you time and effort, but it also improves soil health and reduces weed growth. In this article, we’ll give you a step-by-step guide to starting your own no-dig garden, as well as answer some frequently asked questions about this method.
No-Dig Gardening for Beginners
How to Start a No-Dig Garden
Step 1: Choose a Suitable Site H3: Factors to Consider
When choosing a site for your no-dig garden, there are a few factors to consider:
Sunlight: Most vegetables and fruits require at least 6 hours of sunlight per day, so choose a site that gets plenty of sun.
Drainage: Make sure the site has good drainage to prevent waterlogged soil.
Access: Choose a site that is easily accessible and close to a water source.
Size: Decide how big you want your garden to be and make sure the site is large enough to accommodate it.
Step 2: Gather Materials H3: What You’ll Need
To start your no-dig garden, you’ll need the following materials:
Cardboard or newspaper: to lay on top of the soil and suppress weeds.
Compost: to create a nutrient-rich growing medium.
Mulch: to retain moisture and regulate temperature.
Seeds or seedlings: to plant in your garden.
Step 3: Build Your Garden H3: How to Layer
Once you have your materials, it’s time to start building your garden. Follow these steps:
Lay cardboard or newspaper on top of the soil to suppress weeds.
Add a layer of compost on top of the cardboard or newspaper. This will be your growing medium.
Add a layer of mulch on top of the compost to retain moisture and regulate temperature.
Plant your seeds or seedlings in the mulch.
Benefits of No Dig Gardening
Healthier Soil
No-dig gardening improves soil health by allowing beneficial microorganisms to thrive. Tilling disrupts the soil structure and destroys these microorganisms, which can lead to soil compaction and nutrient depletion.
Reduced Weed Growth
By suppressing weeds with cardboard or newspaper and mulch, no-dig gardening reduces the need for herbicides and manual weeding.
Low-Maintenance
No-dig gardening requires less time and effort than traditional gardening methods. Once you’ve built your garden, you simply need to add compost and mulch periodically and water your plants.
Eco-Friendly
No-dig gardening is a sustainable and eco-friendly gardening method. It reduces soil erosion, conserves water, and minimizes the use of fossil fuels by eliminating the need for tilling.
What is the No-Dig Gardening Method?
The no-dig gardening method, as the name suggests, involves gardening without tilling the soil. Instead of digging up the soil, you create a layer of organic material on top of the soil, also known as the “no-dig garden bed.” This layer of organic matter serves as a mulch that enriches the soil with nutrients and improves soil structure. This method is an excellent way to promote soil health and increase the biodiversity of your garden.
Benefits of the No-Dig Gardening Method
One of the main advantages of the no-dig gardening method is that it requires less physical labor than traditional gardening methods. You do not have to till the soil or weed the garden bed, which can save you a lot of time and effort. Additionally, the no-dig gardening method promotes soil health and reduces soil erosion, making it an eco-friendly approach to gardening.
Implementing the No-Dig Gardening Method
To implement the no-dig gardening method, you first need to prepare the soil by removing any weeds or grass from the area you want to garden in. Then, you should create a layer of organic matter on top of the soil, such as compost, leaves, or straw. This layer should be about six inches deep and should cover the entire area you want to garden in.
After creating the no-dig garden bed, you can plant your vegetables or flowers directly into the organic matter. The organic matter will provide the plants with all the necessary nutrients and help retain moisture in the soil.
Maintenance of the No-Dig Garden Bed
One of the best things about the no-dig gardening method is that it requires minimal maintenance. You do not have to till the soil or weed the garden bed regularly, which can save you a lot of time and effort. However, you should still add more organic matter to the garden bed annually to maintain its structure and provide your plants with enough nutrients.
Conclusion
The no-dig gardening method is an eco-friendly and efficient approach to gardening that promotes soil health and reduces soil erosion. By creating a layer of organic matter on top of the soil, you can enrich the soil with nutrients and improve soil structure. This method requires minimal maintenance and can save you a lot of time and effort in the long run.
Benefits of Digging Your Soil
Digging your soil has several benefits that can improve your garden’s overall health and productivity. Here are some of the most significant advantages of digging your soil:
Loosens the Soil When you dig your soil, you loosen it up, making it easier for air, water, and nutrients to penetrate the soil. This helps to promote healthy root growth, which is essential for a thriving garden.
Improves Drainage By loosening the soil, you also improve its drainage. This means that excess water can drain away more easily, reducing the risk of waterlogged soil and root rot.
Controls Weeds When you dig your soil, you expose weed seeds to air and sunlight, which can prevent them from germinating. This can help to reduce the number of weeds in your garden and make it easier to keep them under control.
Reduces Soil Compaction Soil compaction can occur when the soil is too tightly packed, making it difficult for roots to grow and absorb nutrients. Digging your soil can help to alleviate compaction, making it easier for your plants to thrive.
Drawbacks of Digging Your Soil
While digging your soil has several benefits, there are also some drawbacks to consider. Here are some of the most significant disadvantages of digging your soil:
Destroys Soil Structure Digging your soil can destroy its structure, making it harder for air and water to move through the soil. This can lead to soil compaction, which can be detrimental to your plant’s health.
Brings Up Weed Seeds While digging can help to control weeds, it can also bring up new weed seeds from deeper into the soil. This can lead to an increase in weed growth and make it more challenging to keep them under control.
Disrupts Microbes Digging your soil can disrupt the delicate balance of microbes in your soil, which can be harmful to your plants. Microbes play an essential role in breaking down organic matter and releasing nutrients into the soil.
Benefits of Not Digging Your Soil
Now let’s explore the benefits of not digging your soil. Here are some of the most significant advantages of this method:
Maintains Soil Structure By not digging your soil, you can maintain its structure, which is crucial for healthy plant growth. The soil structure allows air and water to move through the soil, which is essential for nutrient absorption.
Promotes Microbial Activity Not digging in your soil can promote microbial activity, which is beneficial for your plants’ health. Microbes play an essential role in breaking down organic matter and releasing nutrients into the soil.
Reduces Soil Erosion Not digging your soil can help to reduce soil erosion, which can be a problem in areas with heavy rainfall or high winds. Soil erosion can wash away valuable nutrients and make it difficult for plants to grow.
Drawbacks of Not Digging Your Soil
While there are several benefits to not digging your soil, there are also some drawbacks to consider. Here are some of the most significant disadvantages of this method:
Can Lead to Soil Compaction-Not digging your soil can lead to soil compaction, which can be detrimental to your plant’s health. Compacted soil makes it difficult for roots to grow and absorb nutrients, which can stunt their growth.
Requires More Work Upfront If you choose not to dig your soil, you’ll need to do more work upfront to prepare your garden beds. This may involve adding organic matter, such as compost or manure, to the top layer of soil to provide nutrients for your plants.
May Be Less Effective for Heavy Soils If you have heavy clay soil, not digging it may not be as effective as digging. Heavy soils can become compacted, making it difficult for water and nutrients to penetrate the soil. In this case, digging your soil may be necessary to improve drainage and promote healthy root growth.
Requires Consistent Maintenance If you choose not to dig your soil, you’ll need to consistently maintain it to ensure that it remains healthy and productive. This may involve adding compost or other organic matter to the top layer of soil each year and using a mulch to help retain moisture.
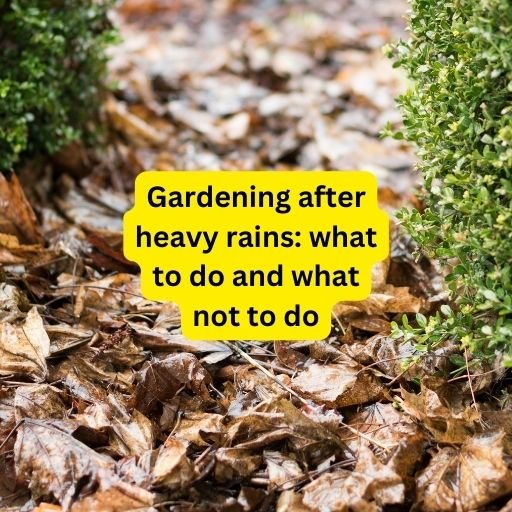
Gardening is a fulfilling hobby, but heavy rains can wreak havoc on your garden. Whether it’s flooded soil, waterlogged roots, or diseased plants, rain can cause many issues for your garden. To keep your garden healthy and beautiful, here are some do’s and don’ts to follow after heavy rains.
Do Drain Flooded Soil
If heavy rains have caused flooding in your garden, you need to drain the soil as soon as possible. Flooded soil can lead to root rot, which can kill your plants. You can drain the soil by digging a trench or using a pump. If you’re unable to drain the soil quickly, consider moving your plants to a higher area.
Gardening after heavy rains
Don’t Overwater Your Plants
After heavy rains, it may seem counterintuitive, but it’s important not to overwater your plants. Overwatering can lead to waterlogged roots, which can also cause root rot. Be sure to check the soil moisture levels regularly and water your plants only when the soil is dry to the touch.
Do Remove Debris
After heavy rains, it’s important to remove any debris from your garden. Debris can harbor disease and pests, which can harm your plants. Use a rake or your hands to remove leaves, sticks, and other debris from your garden.
Don’t Plant New Seeds or Transplants
If you’ve had heavy rains, it’s best to wait a few days before planting new seeds or transplants. Planting in waterlogged soil can lead to poor root development and can cause the seeds or transplants to rot. Wait until the soil has drained and is dry to the touch before planting.
Do Check for Diseases and Pests
Heavy rains can cause diseases and pests to spread in your garden. Check your plants regularly for signs of disease, such as yellowing leaves, wilting, or mold. If you see any signs of disease, remove the infected plants and dispose of them properly to prevent the disease from spreading.
Don’t Forget to Fertilize
After heavy rains, your plants may need a boost of nutrients to recover. Fertilize your plants with a balanced fertilizer, such as 10-10-10. This will help your plants recover and grow stronger.
Do Prune Damaged Branches
If heavy rains have caused damage to your plants, it’s important to prune any damaged branches. Pruning will help your plants recover and will promote new growth. Be sure to make clean cuts and avoid leaving stubs, which can harbor disease.
In conclusion, following these dos and don’ts after heavy rains will help keep your garden healthy and beautiful. Whether it’s draining flooded soil, removing debris, or fertilizing your plants, taking these steps will help your garden recover from heavy rains and thrive.
5 Reasons Your Dog Is Lazy And What To Do About It
If you’re looking for a way to live a healthier and more sustainable lifestyle, backyard gardening is a great place to start. With a few basic supplies and some knowledge of what grows well in your climate, you can start growing your own fruits and vegetables in no time. In this guide, we’ll cover everything you need to know to get started with a backyard vegetable garden.
Why Garden at Home?
There are numerous advantages to growing your own food, including:
Control over the quality and safety of your food: By growing your own produce, you know exactly what goes into the soil and what pesticides are used, if any.
Cost savings: Homegrown fruits and vegetables can save you money in the long run, especially if you’re buying organic.
Improved physical and mental health: Gardening is a great form of physical activity, and it has been shown to improve mental well-being and reduce stress.
Connection to nature: Gardening allows you to spend time in the fresh air and connect with the natural world.
Backyard Vegetable Gardening
Choosing the Right Location for Your Garden
When choosing a spot for your garden, consider the following factors:
Sunlight: To grow properly, most vegetables require at least six hours of direct sunlight per day.
Soil: Most vegetables grow best in well-drained soil with a neutral pH. You may need to amend your soil with compost or other organic matter if it is heavy clay or sandy.
Water: Make sure the garden will be easily accessible for watering, as vegetables need consistent moisture to grow well.
What to Plant in Your Garden
When deciding what to plant, consider the following:
Climate: Choose vegetables that will thrive in your climate. Some vegetables, such as tomatoes and peppers, are more heat-loving and do better in warmer climates, while others, such as lettuce and spinach, prefer cooler temperatures.
Space: Make sure you have enough room for each plant to grow. Some vegetables, like pumpkins and squash, can take up a lot of space, while others, like carrots and radishes, can be planted closely together.
Personal taste: Of course, the most important factor is what you and your family will actually eat. Choose vegetables that you like and will use in your cooking.
How to Plant and Care for Your Garden
Once you’ve chosen your location and selected the vegetables you want to grow, it’s time to get started. Here are the steps to take:
Prepare the soil: Before planting, amend the soil with compost or other organic matter if needed.
Plant seeds or seedlings: Depending on the vegetable, you may plant seeds directly in the ground or start with seedlings.
Water and fertilize: Make sure to water your plants regularly and provide them with the nutrients they need to grow. You can use compost or a balanced fertilizer to do this.
Pest control: Keep an eye out for pests like aphids or slugs and take action to control them as needed. You can use insecticidal soap or other natural methods to keep pests at bay.
Enjoying Your Harvest
Once your garden is up and running, you’ll be able to enjoy fresh, healthy produce right from your own backyard. Here are a few tips for making the most of your harvest:
Use it fresh: Eat your produce as soon as possible after harvesting it for the best flavor and nutrition.
Store it properly: If you have more produce than you can eat right away, store it properly to extend its shelf life.
can guinea pigs eat rabbit food?-An Essential Guide
Winter Gardening Activities to Enjoy in the Off-Season
Winter can be a challenging time for gardeners, but it doesn’t mean the gardening season has to come to a complete halt. In fact, winter can be the perfect time to plan and prepare for the coming spring and summer growing seasons. Here are some winter gardening activities that can be enjoyed in the off-season.
Indoor Seed Starting
Starting seeds indoors is a great way to get a head start on the growing season. This can be done in a sunny window, under grow lights, or in a greenhouse. It’s important to choose the right soil and containers, as well as provide proper water, light, and temperature conditions. This can be a fun and rewarding project for both experienced and beginner gardeners.
Winter Pruning
Winter is the perfect time for pruning deciduous trees and shrubs. This helps to encourage new growth and improve the overall health of the plants. It’s also a good opportunity to remove any dead, diseased or damaged branches. When pruning, be sure to use clean and sharp tools to prevent damaging the plant.
Winter Gardening
Composting
Composting is a great way to recycle yard waste and kitchen scraps into rich organic matter for your garden. Winter is a good time to start a compost pile or bin, as cooler temperatures can slow down the decomposition process. Composting can also help reduce the amount of waste sent to landfills and improve the soil structure and fertility of your garden.
Planning for the Next Season
Winter is a great time to plan for the next growing season. This can include researching new plants to try, drawing a garden plan, and ordering seeds and supplies. Winter is also a good time to assess the performance of your existing plants and make any necessary changes to improve their growth and health.
Taking a Garden Tour
Visiting botanical gardens, arboretums, and other public gardens during the winter can be a great way to get inspiration for your own garden. This can also be a good opportunity to learn about new plants and gardening techniques.
In conclusion, there are many winter gardening activities that can be enjoyed in the off-season. Whether you’re starting seeds indoors, pruning shrubs, composting, planning for the next season, or taking a garden tour, there is always something to do in the world of gardening. So don’t let winter slow you down, get out there and get started on your next gardening project!
11 Innovative Ways to Transform Your Garden This Winter
Winter doesn’t have to be a time when your garden goes into hibernation. There are many ways to keep your garden thriving, even when the temperatures are low. In this article, we present 25 creative and practical ideas for how to enjoy your garden this winter.
1. Create a Winter Wonderland
Turn your garden into a winter wonderland by adding holiday lights and decorations. String fairy lights around trees and bushes, hang wreaths on your gate and front door, and place candle-lit lanterns along paths and walkways. The addition of sparkling lights and festive decorations can transform even the simplest of gardens into a magical winter wonderland.
2. Build a Winter Greenhouse
If you have the space and the resources, consider building a winter greenhouse. A greenhouse allows you to extend the growing season and grow your favorite plants all year round. You can even enjoy fresh herbs and vegetables during the winter months.
3. Add Warmth with Fire Pits and Chimineas
Nothing beats sitting by a warm fire on a chilly winter evening. Install a fire pit or chiminea in your garden to create a cozy outdoor space. Invite friends and family to gather around the fire for an evening of hot cocoa, s’mores, and good conversation.
4. Create a Winter Garden Bed
Plant a winter garden bed with a variety of beautiful blooms that thrive in the colder months. Pansies, primroses, and hellebores are just a few of the many flowers that will bring color and life to your garden during the winter.
5. Add a Winter Water Feature
A water feature can add a sense of tranquility to your garden, even during the winter. A bird bath, fountain, or even a simple stone basin filled with water will provide a source of water for birds and other wildlife. The sound of running water will also create a peaceful atmosphere in your garden.
6. Incorporate Winter-Friendly Trees and Shrubs
Plant winter-friendly trees and shrubs in your garden to provide year-round interest. Holly trees are known for their bright red berries and evergreen leaves, while dogwood trees produce beautiful red stems during the winter months.
7. Add a Winter Vegetable Garden
Plant a winter vegetable garden to enjoy fresh produce during the colder months. Carrots, kale, and radishes are just a few of the many vegetables that will thrive in a winter garden.
8. Create a Winter Wildlife Habitat
Attract wildlife to your garden by creating a winter wildlife habitat. Provide food, water, and shelter for birds and other wildlife, and watch as your garden comes to life.
9. Use Winter Containers
Use winter containers to bring a pop of color to your garden during the winter months. Fill pots and containers with evergreen cuttings, branches, and berries to create beautiful arrangements that will last all winter long.
10. Add Winter-Friendly Ground Cover
Plant winter-friendly ground cover in your garden to keep the soil covered and prevent erosion. Ivy, periwinkle, and wintercreeper are just a few of the many options that will thrive during the winter.
11. Create a Winter Pathway
Install a winter pathway in your garden to provide a safe and attractive way to walk around. Use stones, bricks, or pavers to create a path that will stand up to the winter elements
Garden Design Tips for Winter
Winter is the time when the beauty of the garden becomes muted and dull. But with the right garden design tips, you can turn your winter garden into a stunning landscape. Here are some practical and effective ways to make the most of your garden during the winter months.
Make Use of Evergreens
Evergreens are a great way to add color and texture to your garden in the winter. They provide a constant source of green throughout the year and can help to break up the monotony of the winter landscape. Consider planting evergreens like pine, spruce, or holly in your garden to bring a pop of color to your winter garden.
Incorporate Winter Bloomers
Winter bloomers like witch hazel, snowdrops, and winter jasmine add a touch of color to your winter garden. These plants provide a much-needed source of color in the winter and can help to brighten up the landscape. When selecting winter bloomers, choose plants that are native to your area for the best results.
Create Garden Features
Garden features like bird feeders, bird baths, and birdhouses can add interest to your winter garden. These features can provide a source of food and shelter for birds, making your garden a more attractive and welcoming place for wildlife.
Use Lighting to Your Advantage
Lighting is an effective way to add interest to your garden in the winter. Outdoor lighting can help to highlight garden features, create mood and atmosphere, and create a warm and inviting environment in your garden. Consider using outdoor lighting fixtures like lanterns, string lights, or solar lights to bring your winter garden to life.
Add Texture with Ground Covers
Ground covers like mulch, stones, and bark can add texture and depth to your winter garden. These materials can help to break up the monotony of the winter landscape and create a warm and inviting atmosphere. Consider incorporating ground covers into your garden design to add interest and texture to your winter garden.
Conclusion
By following these garden design tips, you can turn your winter garden into a stunning landscape that will provide you with joy and beauty throughout the year. With a little effort, you can create a winter garden that will be a source of pride and satisfaction for years to come.
Growers Guide: Tips for Winter Gardening
Winter gardening can be a challenging task, but with the right preparation and knowledge, you can successfully grow a variety of crops in the colder months. Here are some tips to help you get started.
Choose the Right Crops
Not all crops are well-suited for winter gardening. Cool-season vegetables, such as lettuce, spinach, and kale, are more tolerant of cold temperatures and can thrive in the winter months. These crops are also fast-growing, so you can harvest them quickly and have fresh produce on hand.
Provide Adequate Light
Light is a critical factor for winter gardening. With fewer hours of daylight and lower light intensity, it’s essential to provide supplemental lighting to your plants. This can be done using grow lights or a greenhouse. Grow lights can mimic natural light and provide the necessary spectrum of light for your plants to grow.
Maintain Proper Soil Temperature
Soil temperature is crucial for seed germination and plant growth. In the winter months, soil temperatures can drop below the ideal range for many crops. To counteract this, consider using raised beds or container gardening. These methods allow you to control the temperature of the soil and provide a warm environment for your plants.
Watering and Irrigation
Winter gardening can be a challenge when it comes to watering your plants. Cold temperatures and frozen soil can make it difficult to water your plants, but it’s crucial to keep them hydrated. Consider installing a drip irrigation system to ensure your plants are getting enough water, even in the colder months.
Protect Your Plants from the Cold
Extreme cold temperatures can damage or kill your plants. To protect them, consider using row covers, cold frames, or greenhouses. These structures provide insulation from the cold and allow you to regulate the temperature for your plants.
Use Quality Soil and Fertilizer
The quality of your soil and fertilizer is critical for successful winter gardening. Make sure to use high-quality, well-draining soil, and consider adding organic matter such as compost or mulch to your soil to improve its structure and fertility. Choose a balanced fertilizer that provides the necessary nutrients for your plants to grow strong and healthy.
In conclusion, winter gardening can be a rewarding and productive activity with the right preparation and knowledge. By following these tips, you can successfully grow a variety of crops in the colder months and enjoy fresh produce year-round.
Winter Gardening: How to Grow a Thriving Garden in the Cold Months
Winter gardening can be a challenge, but with the right preparation and knowledge, you can have a productive and beautiful garden, even in the colder months. Here are some tips to help you get started.
Choose the Right Plants
Not all plants are well-suited for winter gardening. Cool-season plants, such as pansies, violas, and kale, are more tolerant of cold temperatures and can thrive in the winter months. These plants are also fast-growing, so you can enjoy their beauty quickly.
Provide Adequate Light
Light is a critical factor for winter gardening. With fewer hours of daylight and lower light intensity, it’s essential to provide supplemental lighting to your plants. This can be done using grow lights or a greenhouse. Grow lights can mimic natural light and provide the necessary spectrum of light for your plants to grow.
Maintain Proper Soil Temperature
Soil temperature is crucial for seed germination and plant growth. In the winter months, soil temperatures can drop below the ideal range for many plants. To counteract this, consider using raised beds or container gardening. These methods allow you to control the temperature of the soil and provide a warm environment for your plants.
Watering and Irrigation
Winter gardening can be a challenge when it comes to watering your plants. Cold temperatures and frozen soil can make it difficult to water your plants, but it’s crucial to keep them hydrated. Consider installing a drip irrigation system to ensure your plants are getting enough water, even in the colder months.
Protect Your Plants from the Cold
Extreme cold temperatures can damage or kill your plants. To protect them, consider using row covers, cold frames, or greenhouses. These structures provide insulation from the cold and allow you to regulate the temperature for your plants.
Use Quality Soil and Fertilizer
The quality of your soil and fertilizer is critical for successful winter gardening. Make sure to use high-quality, well-draining soil, and consider adding organic matter such as compost or mulch to your soil to improve its structure and fertility. Choose a balanced fertilizer that provides the necessary nutrients for your plants to grow strong and healthy.
In conclusion, winter gardening can be a rewarding and beautiful activity with the right preparation and knowledge. By following these tips, you can have a productive and thriving garden, even in the colder months.
9 Unique Fenced Vegetable Garden Ideas To Make Your Yard Look Great
If you are looking for ways to spruce up your yard, you’ve come to the right place. Fenced vegetable gardens provide the perfect solution for adding a unique aesthetic and fresh produce to your outdoor space. Whether you have a small patch of land or plenty of room to spare, there are plenty of creative ideas out there for creating a beautiful fenced vegetable garden. In this blog post, we’ll examine nine unique design ideas that will make your yard look great and yield a bountiful harvest.
If you’re looking for unique ways to add interest and appeal to your yard, consider incorporating fences into your vegetable garden. Fences can serve a number of purposes in the garden, from providing support for climbing plants to creating a barrier against pests. And when it comes to material, there are plenty of options to choose from that will complement your garden’s style. Here are some ideas to get you started.
9 Unique Fenced Vegetable Garden Ideas To Make Your Yard Look Great
Your yard is a reflection of your personal style, so why not make it unique? A fence is the perfect way to add privacy and security to your vegetable garden, while also adding some visual interest. Here are some unique fence ideas for your vegetable garden:
Woven willow fence – This type of fence is beautiful and rustic, and it will give your garden an extra level of privacy.
Bamboo fence – Bamboo fences are strong and durable, making them perfect for protecting your veggies from critters. Plus, they look great!
Pallet fence – If you’re looking for a budget-friendly fencing option, consider using pallets. With a little bit of work, you can create a sturdy and attractive pallet fence.
Stone wall – A stone wall is a classic fencing option that will never go out of style. It’s also very effective at keeping animals out of your garden.
Metal gate – A metal gate is a great way to add both security and style to your garden fence.
The most important factor to consider when choosing a fence for your vegetable garden is the height of the fence. You’ll want to make sure the fence is tall enough to deter animals from getting into your garden, but not so tall that it’s difficult to reach over or climb. A good rule of thumb is to choose a fence that’s at least 6 feet tall.
Other factors to consider include the material of the fence and the color. For example, if you’re looking for a more natural look, you might choose a wooden fence. If you want something more durable, you might opt for a metal or vinyl fence. And if you want your fence to blend in with your surroundings, you might choose a neutral color like green or brown.
With a little creativity and the right materials, you can create your own unique fenced vegetable garden in no time. From traditional designs to more modern pieces, there are plenty of creative options available for creating an attractive yet functional space that will be sure to impress. We hope these 9 unique fenced vegetable garden ideas have provided you with some great inspiration for making your yard look amazing. Now it’s time for you to get out there and start planting!
Creating a lush and fruitful vegetable garden can be a difficult task, especially when working with limited space. But with the right planning and strategy, you can still create your dream vegetable garden—even if you only have 20×20 feet to work with. In this step-by-step guide, we’ll walk you through everything you need to know about creating a beautiful and productive 20×20 vegetable garden layout. We’ll cover topics such as what types of vegetables to plant, how to fit them in the space, and how to care for your plants once they’re established. Let’s get started!
A lush, vegetable garden layout can be achieved by following this step-by-step guide. The first step is to plot out the garden space. Next, determine which vegetables you would like to grow. Once you have decided on the vegetables, it is time to create a planting schedule. Finally, you will need to care for your garden and harvest your crops!
When it comes to vegetable gardening, there are a few things to consider. One of the most important considerations is the size of your garden. If you have a small garden, choose plants that don’t take up a lot of space. You’ll also want to make sure you choose plants that will thrive in your climate.
Tomatoes – Tomato plants can grow quite large, but there are also dwarf varieties available. Choose a variety that will do well in your climate and soil type.
Cucumbers – Cucumber plants can also take up a fair amount of space, but there are compact varieties available as well. Again, choose a variety that will do well in your particular climate and soil type.
Peppers – Pepper plants come in all sorts of shapes and sizes, so you’re sure to find one that will fit nicely into your garden. Select a variety that will do well in your climate and soil type.
Beans – Beans are another great option for small gardens. There are many different types of beans, so choose one that will grow well in your climate and soil type.
Squash – Squash plants come in all sorts of shapes and sizes, so you’re sure to find one that will fit nicely into your garden. Select a variety that
Assuming you have a 20×20 plot of land for your garden, the first thing you need to do is break it up into sections. One section should be devoted to fruits and vegetables, one to herbs, and one to flowers. This will help you determine how much space each type of plant needs and keep your garden organized.
Next, you need to start preparing the soil. This involves tilling the soil, removing any rocks or debris, and adding compost or other organic matter. Once the soil is ready, you can start planting your seeds or transplants.
When planting, be sure to follow the instructions on the seed packet or transplant label. Each plant has different needs in terms of sunlight, water, and space. Once everything is in the ground, give your garden a good soaking with a hose or watering can.
Now that your plants are in place, it’s time to sit back and enjoy watching them grow! Be sure to check on them regularly and water as needed. With a little care and attention, your 20×20 garden will soon be bursting with life!
It’s time to start planting, assuming you’ve already prepared your soil. Plant the larger plants first, then fill in with smaller plants. Water your plants on a regular basis, especially when they are first established. Mulch helps to retain moisture and keeps weeds at bay. Fertilize as directed on the package, usually every few weeks. Finally, remember to enjoy your bounty!
Taking In The Results (Or Vegetables) Of Your Labor
It’s finally time to reap the benefits of your efforts! Following the steps in our guide, you should have a lovely and abundant vegetable garden to enjoy for months to come. Here are a few pointers to help you get the most out of your harvest:
-Pick vegetables early in the morning for the best flavor. -Don’t let fruits or vegetables overripen on the vine – they’ll lose flavor and nutrients. -Before eating, thoroughly wash your produce. -Use a sharp knife or garden shears to avoid bruising delicate fruits and vegetables. -Get creative in the kitchen – try new recipes or experiment with different preparation methods.
With a little care and attention, you can enjoy fresh, delicious vegetables from your own backyard all season long!
Conclusion
A 20×20 vegetable garden layout is a great way to get the most out of your gardening space. With this step-by-step guide, you now have all the information and tools necessary to create a lush, productive vegetable garden that can provide healthy produce for months. From selecting plants to creating efficient watering systems, these tips will ensure you have an amazing garden that brings abundance year after year!
Gardening bucket For Beginners: 7 Ideas To Get You Started
If you’re looking for a fun, easy, and affordable way to start growing your own plants and vegetables, then bucket gardening might be the perfect solution. Bucket gardening is an incredibly versatile form of container gardening that allows you to grow almost any type of plant in almost any size space.
Whether you have a small balcony or a large backyard, bucket gardening can help bring life to any area with minimal effort. In this blog post, we will explore the basics of bucket gardening for beginners, including ideas on how to get started and what types of plants are best suited for this type of garden. With these 7 ideas, you’ll be well on your way to creating a vibrant and beautiful backyard oasis!
Gardening bucket For Beginners
What is bucket gardening?
Bucket gardening is a type of gardening that is done using a bucket or container instead of a traditional garden plot. This type of gardening is perfect for those who do not have a lot of space to garden, or for those who want to grow their own food but do not have the time or energy to maintain a large garden. Bucket gardens are also great for people who live in apartments or condos and do not have access to outdoor space.
There are many benefits to bucket gardening, including the fact that it is very easy to set up and does not require a lot of maintenance. Additionally, bucket gardens are very versatile and can be used to grow a wide variety of plants, fruits, and vegetables.
When it comes to gardening, there are many different ways to do it. One popular method is called bucket gardening. This involves using buckets or other containers to grow plants.
There are several benefits to bucket gardening. One benefit is that it is a great way to save space. If you have limited space in your yard or garden, you can still have a successful garden by using buckets.
Another benefit of bucket gardening is that it is very versatile. You can grow a variety of plants in buckets, including vegetables, fruits, and flowers. Plus, you can move the buckets around easily if you need to.
Lastly, bucket gardening is relatively low-maintenance. Once you set up your garden, you won’t have to do much to take care of it. Simply water your plants regularly and fertilize them every few weeks, and they should thrive.
Bucket gardening is a great way to grow your own fruits, vegetables, and herbs. If you are new to bucket gardening, here are some tips to get you started.
Choose the right size bucket. The size of the bucket will depend on the plants you want to grow. For example, if you want to grow tomatoes, you will need a 5-gallon bucket.
Create drainage holes in the bucket’s bottom.This is an important step because it will help prevent your plants from drowning.
Fill the bottom of the bucket with gravel or rocks for drainage. Again, this is an important step because it will help prevent your plants from drowning.
Add soil to the bucket. You can use any type of potting mix or garden soil. Just make sure it is well-draining so that your plants don’t drown.
Plant your seeds or starts in the soil and water them well. Be sure to check on your plants regularly and water as needed so that they don’t dry out.
Bucket gardening is a great way to garden if you have limited space, or if you want to grow plants that need a lot of water. Here are some tips for success with bucket gardening:
Choose the right size bucket. Buckets come in all different sizes, so it’s important to choose one that is the right size for the plants you want to grow. If you’re growing large plants, you’ll need a larger bucket.
Make drainage holes in the bucket’s bottom. This will aid in the drainage of extra water and keep your plants from becoming soggy.
Fill the bucket with a good-quality potting mix. This will give your plants the nutrients they need to thrive.
Water regularly, and fertilize monthly. Plants in buckets need more frequent watering than those in the ground, so make sure to keep an eye on them and water as needed. Fertilizing monthly will also help them to grow healthy and strong.
Don’t forget about pest control! Just because your plants are in containers doesn’t mean they’re immune to pests. Be sure to check them regularly for signs of pests, and take action accordingly if you find any problems.
Bucket gardening is a great way to get your thumb green without having to commit to traditional garden beds. With the 7 ideas we’ve shared here, you can easily create a beautiful and practical bucket garden for yourself or someone else. If you still have questions about how to start bucket gardening, don’t hesitate to reach out! We’d be more than happy to help guide you through setting up your own special little slice of greenery heaven.
Gardening is a great way to get creative and enjoy some fresh air. But when you live in Texas, the heat can make it hard to come up with ideas for projects that will be successful in the scorching summer months. That’s why we’ve compiled a list of 10 easy and creative Texas gardening ideas that are sure to provide you with plenty of inspiration. From container gardens to raised beds, these garden project ideas are perfect for novice and expert gardeners alike. Read on to learn more about how you can make the most of your gardening space!
Vertical Gardening
If you’re looking for a creative way to spruce up your home or garden, consider vertical gardening. Vertical gardens are a great way to add interest and dimension to your space without taking up too much room. Plus, they’re perfect for small spaces or areas with limited sunlight.
gardening in texas
There are a few things to keep in mind when planning your vertical garden. First, choose plants that will thrive in your climate and space. Consider the amount of sunlight and water each plant needs, as well as its mature size. It’s also important to select plants that have similar growing habits so they don’t compete for resources.
Once you’ve selected your plants, it’s time to get started! There are a variety of ways to create a vertical garden, so choose the method that best suits your space and budget. Trellises, lattices, and walls are all great options for supporting your plants. You can also purchase ready-made planters or build your own using recycled materials.
Vertical gardens are a fun and easy way to add greenery to any space. With a little planning and creativity, you can create a beautiful garden that will transform your home or outdoor area.
Indoor Herb Gardens
If you don’t have a lot of outdoor space for gardening, or if you simply want to bring some greenery indoors, an indoor herb garden is a great option! Herbs are relatively easy to grow indoors, and they can add a lot of flavor to your cooking. Plus, they look pretty on a windowsill or countertop.
Here are some tips for growing an indoor herb garden:
Choose the right herbs. Not all herbs do well indoors. Some that do include basil, chives, mint, oregano, parsley, rosemary, and thyme.
Get a good potting mix. Be sure to get a potting mix that is specifically designed for indoor plants. This will help ensure that your herbs get the nutrients they need to thrive.
Provide enough light. Most herbs need at least six hours of sunlight per day in order to grow well. If you don’t have a sunny spot in your home, you may need to get a grow light to provide the necessary light for your plants.
Water regularly. Be sure to keep your herbs watered – but not too much! Overwatering can lead to problems such as root rot and leaf drop.
Container Gardening
if you live in an urban area or simply don’t have a lot of space for a traditional garden, container gardening is a great way to grow your own vegetables, fruits, and flowers. Container gardens are easy to set up and can be placed on patios, balconies, or even indoors.
One of the great things about container gardening is that you can grow just about anything in a pot. Tomatoes, peppers, eggplants, and cucumbers are all popular choices for vegetable gardens, while annuals and perennials make beautiful additions to any patio or deck. Herbs such as basil, rosemary, and thyme also do well in containers.
When choosing containers for your garden, it’s important to select ones that are large enough for the plants you want to grow. Most vegetables need at least a 12-inch pot, while larger plants like tomatoes can require 20 inches or more. It’s also important to choose pots with drainage holes in the bottom to prevent roots from rotting.
Once you have your containers selected, it’s time to fill them with soil. For best results, use a high-quality potting mix that contains organic matter such as compost or peat moss. This will help your plants thrive by providing them with the nutrients they need.
After your pots are filled with soil, it’s time to plant your seeds or start. Be sure to water them well and give
Tomato Cages
If you live in Texas and love to garden, then you know that tomato cages are a must! Tomato cages help to support your tomato plants so that they can grow tall and produce lots of fruit. But buying tomato cages can be expensive, and they can take up a lot of space in your garden. So why not make your own?
Here are some easy and creative ways to make your own tomato cages:
Use old metal hangers. Straighten out the hangers and then shape them into circles. Make sure that the circle is big enough to fit around your tomato plant. Then just slip the hanger over the plant and secure it in place.
Repurpose an old coat rack. An old coat rack can make a great tomato cage! Just take apart the coat rack and then put it back together again so that it forms a cylinder shape. Then slip it over your tomato plant and secure it in place.
Upcycle an old ladder. An old ladder makes great supports for tomato plants! Just lean the ladder against a wall or fence, and then tie the rungs together with twine or wire. Then place your tomato plants at the bottom of the ladder and let them climb up!
Use bamboo stakes. Bamboo stakes are perfect for making DIY tomato cages! Just drive the stakes into the ground around your tomato plant, and then tie them together at the top with twine or wire
Strawberry Jars
Strawberry Jars
If you love strawberries, then you’ll adore this simple gardening idea! All you need is a large glass jar, some potting soil, and of course, strawberry plants. You can find these at your local nursery or even online. Once you have your materials, simply fill the jar with soil and plant the strawberries. Be sure to water them regularly and give them plenty of sunlight. In no time at all, you’ll have fresh strawberries right at your fingertips!
PVC Pipe Planters
PVC pipe planters are a cheap and easy way to add some greenery to your home. Simply cut the length of the PVC pipe to the desired height, then drill holes in the sides for drainage. Fill with soil and plants, and you’re good to go! You can even paint or decorate the pipes to add a personal touch.
Hanging Baskets
Hanging baskets are a great way to add color and life to any space, and they’re especially perfect for small gardens or balconies. If you live in Texas, you’re in luck because there are plenty of tough, heat-loving plants that will thrive in your hanging baskets.
Some of our favorite hanging basket plants for Texas gardens include:
• Mandevilla – A fast-growing vine with beautiful trumpet-shaped flowers, mandevilla is perfect for adding a touch of the tropics to your garden.
• Lantana – Another heat-loving plant, lantana comes in a wide range of colors including orange, pink, red, and yellow. It’s also tolerant of drought conditions, making it ideal for Texas gardens.
• Euphorbia – A succulent with a unique growth habit, euphorbia is an interesting addition to any hanging basket. It’s also very drought-tolerant.
• Geranium – A classic garden plant that’s available in a wide range of colors, geraniums are always a good choice for hanging baskets. They’re easy to care for and will bloom all summer long.
Raised Bed Gardens
Raised bed gardens are a great way to get started with gardening in Texas. By creating a raised bed, you can easily control the soil quality, drainage, and sunlight exposure for your plants. This type of garden is also ideal for small spaces or areas with poor soil quality.
To build a raised bed, you will need some lumber and some basic tools. You can find plans for raised beds online or in garden catalogs. Once you have your materials and tools, follow these steps:
Decide where to put your raised bed. It ought to be situated where there is at least six hours of direct sunlight each day.
Clear the area where you will be building the raised bed. Remove any rocks or debris from the area.
Measure out the size of your raised bed. The most common sizes are 4×4 feet or 8×8 feet.
Using a saw, cut the lumber to the proper size. To ensure that your raised bed is level when completed, make sure that every piece is precisely the same length.
Assemble the frame of your raised bed using screws or nails. Be sure to use rust-resistant fasteners if you live in an area with high humidity levels.
Fill your raised bed with a high-quality soil mix specifically designed for gardening purposes. You can find these mixes at most home improvement stores or online retailers specializing in gardening supplies
Pallet Gardens
Pallet Gardens
If you’re looking for a unique and easy gardening idea, try creating a pallet garden! All you need is an old wooden pallet and some plants, and you can transform it into a beautiful and functional garden.
To start, find a sunny spot in your yard where you want to put your garden. Then, lay the pallet down on its side and secure it to the ground with stakes or bricks. Next, fill the pallet with soil, and plant your favorite flowers, herbs, or vegetables. Water regularly and watch your garden grow!
Mason Jar Gardens
Mason jar gardens are a popular and easy way to add some greenery to your home. They are also a great way to recycle old mason jars!
Here are some tips for creating your own mason jar garden:
Choose the right size jar for your plants. Smaller jars are better for succulents and cacti, while larger jars can accommodate fuller plants.
Make sure your jars have drainage holes in the bottom. This is essential for preventing root rot.
Fill your jars with a good-quality potting mix that is specifically designed for succulents or cacti.
Add some rocks or gravel to the bottom of the jar before adding your potting mix. This will help with drainage.
Plant your succulents or cacti, then water them well. Be sure to wait until the soil is dry before watering again, as too much water can cause root rot.
Gardening is a relaxing and enjoyable activity, but it can also be challenging if you’re limited in space. If you’re tight on outdoor space or have an apartment with limited outdoor access, vertical gardening can be the perfect solution. Vertical gardening is becoming increasingly popular as people look for ways to make the most of their limited spaces. This type of gardening allows you to create a beautiful and vibrant garden in even the smallest of spaces. In this blog post, we’ll explore some of the basics of vertical gardening and how you can get started at home.
how to do vertical gardening at home
The Benefits of Vertical Gardening
Vertical gardening is an excellent way to save space in your garden, as well as add interest and height. There are many benefits to growing vertically, including the following:
You can grow a lot of plants in a small space.
Vertical gardens are easy to maintain.
They look great and can add value to your home.
Vertical gardens can be used to grow fruit and vegetables, as well as ornamental plants.
They are perfect for small gardens or balconies.
If you are thinking of starting a vertical garden, why not give it a go? You may be surprised at how easy it is, and how much you enjoy it!
The Best Plants for Vertical Gardening
Vertical gardens are a great way to add a splash of greenery to your home without taking up too much space. If you’re thinking of starting a vertical garden, here are some of the best plants to use:
Creeping Jenny (Lysimachia nummularia)
Creeping Jenny is a fast-growing plant that will quickly cover any bare walls or fences. It has beautiful yellow flowers that bloom in summer, and its trailing stems make it perfect for hanging baskets or cascading over the edge of a pot.
Boston Fern (Nephrolepis exaltata)
Boston ferns are classic houseplants that look great in any indoor space. They’re easy to care for and thrive in humid conditions, making them ideal for bathrooms or kitchens. When grown in a hanging basket, their long fronds will cascade down beautifully.
Devil’s Ivy (Epipremnum aureum)
Devil’s ivy is another fast-growing plant that’s perfect for covering bare walls or filling empty spaces on shelves. It has glossy green leaves that are splashed with white, cream, or yellow variegation. Like creeping Jenny, it thrives in humid conditions and is also happy being pot-bound, so it doesn’t need frequent repotting.
Swedish Ivy
How to Start Vertical Gardening at Home
Vertical gardening is a great way to add interest and dimension to your yard without taking up a lot of space. If you’re thinking of starting a vertical garden at home, here are a few things to keep in mind:
Choose the right plants. Not all plants are suitable for vertical gardening – you’ll need to select species that can handle being grown in close proximity to one another, and that don’t require deep root systems. Succulents, air plants, and herbs are all good choices for vertical gardens.
Find the right location. Vertical gardens can be placed either indoors or outdoors, but make sure to choose a spot that gets plenty of light. If you’re growing plants that require more sun, like tomatoes, place your garden in a south-facing location.
Create a support system. Your plants will need something to climb on or hang from – trellises, wires, lattices, or even recycled materials like old fencing or pallets can work well as supports. Make sure whatever you use is sturdy enough to hold up your plants without tipping over.
Plant and water regularly. Once you have your vertical garden set up, it’s important to care for your plants just as you would with any other type of garden – water them regularly (but don’t overwater), fertilize if needed, and monitor for pests or diseases. With proper
Conclusion
Vertical gardening can be an enjoyable and rewarding experience, especially when done at home. With the right combination of soil, sunlight, plants, and a watering system in place, your vertical garden will be sure to thrive for years to come. Plus, with a little creativity, you can turn your garden into a work of art that showcases your love for nature. So what are you waiting for? Get started on creating your own vertical green oasis today!