Discover the art of vertical straw bale gardening, a sustainable and innovative way to grow your favorite plants. Learn how to create a thriving garden using straw bales.
Straw bale gardening is a cool way to grow stuff, and it’s better for the Earth. Instead of using dirt, you use straw bales. In this article, we’ll learn all about it and why it’s awesome.
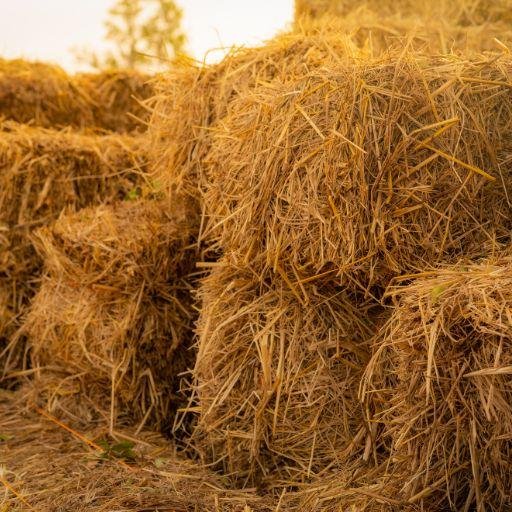
Bale gardening what is straw-
Straw is a kind of dried plant material that’s left behind after grains like wheat, rice, or barley are harvested. It looks like long, skinny, and hollow tubes. People often use straw as bedding for animals, to make straw hats, or in gardening.
In this gardening, instead of using soil in the ground, gardeners use these straw bales as a kind of container to grow plants. They’re like plant beds made of straw. The straw bales help the plants grow by providing support and a place for their roots to spread out. It’s a creative way to garden without traditional soil.
is straw bale garden easy?
Yes, a straw bale garden is generally considered to be relatively easy, especially for beginners and those with limited gardening space. Here’s why it’s considered easy:
No Need for Good Soil: You don’t need to worry about having perfect soil in your yard. Straw bales provide a clean slate for gardening, and you don’t have to dig or amend the soil.
Fewer Weeds: Straw bales act as a natural weed barrier, so you’ll spend less time pulling weeds compared to traditional gardening.
Good Drainage: Straw bales offer excellent drainage, which helps prevent overwatering and root rot issues.
Better for Your Back: Since the gardening is done above ground level on the bales, there’s less bending and kneeling, making it easier on your back and joints.
Versatile: You can grow various plants in straw bales, from vegetables to flowers, making it a flexible gardening option.
Reusability: With proper care, straw bales can be reused for several growing seasons, saving you time and money.
However, it’s essential to follow the necessary steps like conditioning the straw bales correctly and providing regular care to ensure a successful straw bale garden. While it’s generally easier than traditional gardening, like any gardening method, it does require some effort and attention.
Straw Bale Gardening
Where Straw Bale Gardening Came From
People have been using straws to help their plants for a long time. It’s an old trick that’s become a new way to garden.
Taking care of your straw bale garden is easy. You water your plants, watch out for bugs, and give them plant food when they need it. You can also use the same straw bales again next year.
Welcome to the world of vertical straw bale gardening, an exciting and eco-friendly method for growing plants. In this guide, we’ll explain everything about this unique way of gardening, from getting started to taking care of your garden. Let’s begin this green journey together.
This is a way of growing plants using straw bales as your planting bed. It’s an excellent option if you have limited space or poor soil. The straw bales become both your plant containers and the soil. In this section, we’ll talk about why it’s becoming so popular and the benefits it offers.
Choosing where to put your straw bale garden is super important. We’ll help you pick the perfect spot by considering things like sunlight, water drainage, and how easy it is to reach. A good location sets the stage for a healthy garden.
Before you start planting, you need to get your straw bales ready. We’ll show you how to condition and set them up for your plants. This step is essential for creating a good environment for your garden to grow.
Selecting the right plants for your straw bale garden is a big decision. Whether you love colorful flowers, tasty vegetables, or fragrant herbs, we have recommendations and tips to help you choose the best plants for your garden.
Now that your straw bales are ready, it’s time to start planting. We’ll cover the basics, like how far apart to plant your seeds, how much to water, and how to keep bugs away. You’ll learn how to take care of your garden from the very beginning.
Keeping Your Garden Healthy
Taking care of your garden is an ongoing job. In this section, we’ll talk about what you need to do every day and throughout the year to make sure your garden stays happy and healthy.
Helping the Environment
Straw bale garden isn’t just beautiful; it’s also good for the environment. Find out how it helps reduce waste, saves resources, and promotes eco-friendly gardening practices.
Pros and cons of straw bale gardening
Pros
No Soil Needed: You don’t need good soil because the straw bales provide the growing medium. This is great if your yard has poor soil.
Less Back Strain: You don’t have to bend over as much because the garden is raised, which can be easier on your back.
Weed Control: Straw bales suppress weeds, so you’ll spend less time weeding your garden.
Good Drainage: Straw bales have good drainage, which helps prevent root rot in your plants.
Warmer Soil: The straw bales heat up as they decompose, giving your plants a warm and cozy place to grow.
Accessible: Perfect for people with limited mobility because you can set up your garden at a comfortable height.
Recycling: You’re reusing straw, which is an eco-friendly way to garden.
Cons
Initial Setup: Conditioning the straw bales takes some time and effort. You need to water and fertilize them for a few weeks before planting.
Watering Needs: Straw bales can dry out quickly, especially in hot weather, so you’ll need to water them often.
Limited Plant Depth: Some deep-rooted plants may struggle to grow in straw bales.
Decomposition: Over time, the straw bales will break down, and you’ll need to replace them, which can be an ongoing expense.
Less Support: Tall or heavy plants may need additional support because straw bales can be less stable than traditional soil.
Learning Curve: If you’re new to straw bale gardening, there’s a bit of a learning curve to get the best results.
In summary, this gardening can be a fantastic solution for many gardeners, especially those with poor soil or limited mobility. However, it does require some initial effort and ongoing maintenance, so weigh the pros and cons to see if it’s the right choice for you.
Conclusion
This is a cool way to grow your own plants. With our help, you can start your garden adventure. Try this unique technique and watch your garden thrive in ways you never expected.
Can I use any straw for straw bale gardening?
Yes, you can use straw, but it’s better than hay because it has fewer weed seeds.
How often should I water my straw bales?
Water when the top of the bale feels dry, usually when it hasn’t rained for a while.
Can I grow vegetables and flowers together in one bale?
Absolutely! Many people do this successfully.
Do I need to add fertilizer?
Yes, your plants will appreciate some extra nutrients. We’ll explain how to do it right.
Can I try straw bale gardening in the city?
Yes, it’s great for small spaces, like balconies or urban gardens.
Can I reuse the straw bales?
You can use them for a season or two, but eventually, they’ll break down. You can turn them into compost.
What are the disadvantages of straw bale gardens?
Limited Water Retention: Straw bales have poor water retention capacity compared to traditional soil, making it necessary to water them frequently. Uneven Moisture Distribution: Water doesn’t disperse uniformly in straw bales, often resulting in uneven moisture levels. Quick Drying: Straw bales tend to dry out rapidly in hot weather, necessitating frequent watering.
What can I grow in a straw bale garden?
Tomatoes Peppers Cucumbers Zucchini Beans Lettuce Spinach Kale Radishes Carrots
How long do straw bales last for gardening?
The longevity of straw bales in gardening can vary depending on several factors, including the quality of the bales, environmental conditions, and how well you maintain them. On average, straw bales used for gardening can last for one to two growing seasons.
How do you condition straw bales for gardening?
Conditioning straw bales for gardening is a crucial step that prepares them to serve as a suitable growing medium for your plants
Are you a passionate gardener with a great sense of humor? Do you find joy in both nurturing your plants and sharing a good laugh? If so, you’re in for a treat! In this article, we will explore the world of funny gardening memes. From witty puns to relatable situations, these humorous images and captions are sure to bring a smile to your face. Join us on this delightful journey as we delve into the realm of gardening humor.
Best Self-Cleaning Dog Pad 2023: Keep Your Home Clean-BrilliantPad
Gardening is a beloved hobby that allows us to connect with nature, nurture plants, and create beautiful landscapes. However, it doesn’t always have to be serious and laborious. Infusing humor into gardening can make the experience even more enjoyable and lighthearted. This is where funny gardening memes come into play.
In recent years, memes have taken the internet by storm, becoming a popular form of entertainment and communication. Gardening memes, specifically tailored for plant enthusiasts, have emerged as a way to share laughter and camaraderie within the gardening community. These humorous images, often accompanied by clever captions, capture the shared experiences and idiosyncrasies of being a gardener.
No-Dig Gardening for Beginners: A Simple Guide to Growing Healthy Plants Without Tilling
Learn how to start your own No-Dig Gardening for Beginners. Discover the benefits of this low-maintenance, eco-friendly approach to gardening and get tips on how to grow healthy plants without tilling the soil.
Are you a beginner gardener looking for a low-maintenance, eco-friendly way to grow healthy plants? Then look no further than no-dig gardening! This simple and sustainable gardening technique involves building up layers of organic material on top of the soil instead of tilling it. Not only does it save you time and effort, but it also improves soil health and reduces weed growth. In this article, we’ll give you a step-by-step guide to starting your own no-dig garden, as well as answer some frequently asked questions about this method.
No-Dig Gardening for Beginners
How to Start a No-Dig Garden
Step 1: Choose a Suitable Site H3: Factors to Consider
When choosing a site for your no-dig garden, there are a few factors to consider:
Sunlight: Most vegetables and fruits require at least 6 hours of sunlight per day, so choose a site that gets plenty of sun.
Drainage: Make sure the site has good drainage to prevent waterlogged soil.
Access: Choose a site that is easily accessible and close to a water source.
Size: Decide how big you want your garden to be and make sure the site is large enough to accommodate it.
Step 2: Gather Materials H3: What You’ll Need
To start your no-dig garden, you’ll need the following materials:
Cardboard or newspaper: to lay on top of the soil and suppress weeds.
Compost: to create a nutrient-rich growing medium.
Mulch: to retain moisture and regulate temperature.
Seeds or seedlings: to plant in your garden.
Step 3: Build Your Garden H3: How to Layer
Once you have your materials, it’s time to start building your garden. Follow these steps:
Lay cardboard or newspaper on top of the soil to suppress weeds.
Add a layer of compost on top of the cardboard or newspaper. This will be your growing medium.
Add a layer of mulch on top of the compost to retain moisture and regulate temperature.
Plant your seeds or seedlings in the mulch.
Benefits of No Dig Gardening
Healthier Soil
No-dig gardening improves soil health by allowing beneficial microorganisms to thrive. Tilling disrupts the soil structure and destroys these microorganisms, which can lead to soil compaction and nutrient depletion.
Reduced Weed Growth
By suppressing weeds with cardboard or newspaper and mulch, no-dig gardening reduces the need for herbicides and manual weeding.
Low-Maintenance
No-dig gardening requires less time and effort than traditional gardening methods. Once you’ve built your garden, you simply need to add compost and mulch periodically and water your plants.
Eco-Friendly
No-dig gardening is a sustainable and eco-friendly gardening method. It reduces soil erosion, conserves water, and minimizes the use of fossil fuels by eliminating the need for tilling.
What is the No-Dig Gardening Method?
The no-dig gardening method, as the name suggests, involves gardening without tilling the soil. Instead of digging up the soil, you create a layer of organic material on top of the soil, also known as the “no-dig garden bed.” This layer of organic matter serves as a mulch that enriches the soil with nutrients and improves soil structure. This method is an excellent way to promote soil health and increase the biodiversity of your garden.
Benefits of the No-Dig Gardening Method
One of the main advantages of the no-dig gardening method is that it requires less physical labor than traditional gardening methods. You do not have to till the soil or weed the garden bed, which can save you a lot of time and effort. Additionally, the no-dig gardening method promotes soil health and reduces soil erosion, making it an eco-friendly approach to gardening.
Implementing the No-Dig Gardening Method
To implement the no-dig gardening method, you first need to prepare the soil by removing any weeds or grass from the area you want to garden in. Then, you should create a layer of organic matter on top of the soil, such as compost, leaves, or straw. This layer should be about six inches deep and should cover the entire area you want to garden in.
After creating the no-dig garden bed, you can plant your vegetables or flowers directly into the organic matter. The organic matter will provide the plants with all the necessary nutrients and help retain moisture in the soil.
Maintenance of the No-Dig Garden Bed
One of the best things about the no-dig gardening method is that it requires minimal maintenance. You do not have to till the soil or weed the garden bed regularly, which can save you a lot of time and effort. However, you should still add more organic matter to the garden bed annually to maintain its structure and provide your plants with enough nutrients.
Conclusion
The no-dig gardening method is an eco-friendly and efficient approach to gardening that promotes soil health and reduces soil erosion. By creating a layer of organic matter on top of the soil, you can enrich the soil with nutrients and improve soil structure. This method requires minimal maintenance and can save you a lot of time and effort in the long run.
Benefits of Digging Your Soil
Digging your soil has several benefits that can improve your garden’s overall health and productivity. Here are some of the most significant advantages of digging your soil:
Loosens the Soil When you dig your soil, you loosen it up, making it easier for air, water, and nutrients to penetrate the soil. This helps to promote healthy root growth, which is essential for a thriving garden.
Improves Drainage By loosening the soil, you also improve its drainage. This means that excess water can drain away more easily, reducing the risk of waterlogged soil and root rot.
Controls Weeds When you dig your soil, you expose weed seeds to air and sunlight, which can prevent them from germinating. This can help to reduce the number of weeds in your garden and make it easier to keep them under control.
Reduces Soil Compaction Soil compaction can occur when the soil is too tightly packed, making it difficult for roots to grow and absorb nutrients. Digging your soil can help to alleviate compaction, making it easier for your plants to thrive.
Drawbacks of Digging Your Soil
While digging your soil has several benefits, there are also some drawbacks to consider. Here are some of the most significant disadvantages of digging your soil:
Destroys Soil Structure Digging your soil can destroy its structure, making it harder for air and water to move through the soil. This can lead to soil compaction, which can be detrimental to your plant’s health.
Brings Up Weed Seeds While digging can help to control weeds, it can also bring up new weed seeds from deeper into the soil. This can lead to an increase in weed growth and make it more challenging to keep them under control.
Disrupts Microbes Digging your soil can disrupt the delicate balance of microbes in your soil, which can be harmful to your plants. Microbes play an essential role in breaking down organic matter and releasing nutrients into the soil.
Benefits of Not Digging Your Soil
Now let’s explore the benefits of not digging your soil. Here are some of the most significant advantages of this method:
Maintains Soil Structure By not digging your soil, you can maintain its structure, which is crucial for healthy plant growth. The soil structure allows air and water to move through the soil, which is essential for nutrient absorption.
Promotes Microbial Activity Not digging in your soil can promote microbial activity, which is beneficial for your plants’ health. Microbes play an essential role in breaking down organic matter and releasing nutrients into the soil.
Reduces Soil Erosion Not digging your soil can help to reduce soil erosion, which can be a problem in areas with heavy rainfall or high winds. Soil erosion can wash away valuable nutrients and make it difficult for plants to grow.
Drawbacks of Not Digging Your Soil
While there are several benefits to not digging your soil, there are also some drawbacks to consider. Here are some of the most significant disadvantages of this method:
Can Lead to Soil Compaction-Not digging your soil can lead to soil compaction, which can be detrimental to your plant’s health. Compacted soil makes it difficult for roots to grow and absorb nutrients, which can stunt their growth.
Requires More Work Upfront If you choose not to dig your soil, you’ll need to do more work upfront to prepare your garden beds. This may involve adding organic matter, such as compost or manure, to the top layer of soil to provide nutrients for your plants.
May Be Less Effective for Heavy Soils If you have heavy clay soil, not digging it may not be as effective as digging. Heavy soils can become compacted, making it difficult for water and nutrients to penetrate the soil. In this case, digging your soil may be necessary to improve drainage and promote healthy root growth.
Requires Consistent Maintenance If you choose not to dig your soil, you’ll need to consistently maintain it to ensure that it remains healthy and productive. This may involve adding compost or other organic matter to the top layer of soil each year and using a mulch to help retain moisture.
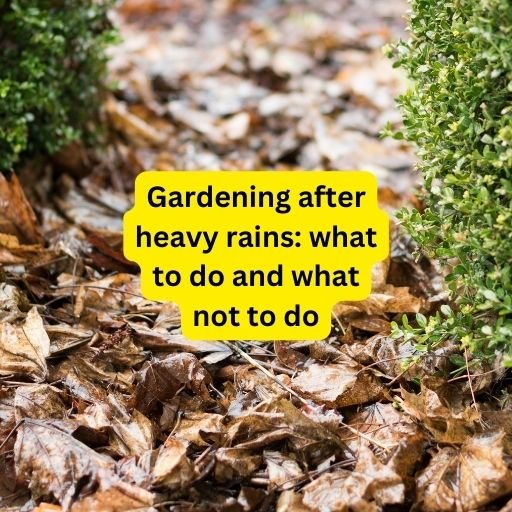
Gardening is a fulfilling hobby, but heavy rains can wreak havoc on your garden. Whether it’s flooded soil, waterlogged roots, or diseased plants, rain can cause many issues for your garden. To keep your garden healthy and beautiful, here are some do’s and don’ts to follow after heavy rains.
Do Drain Flooded Soil
If heavy rains have caused flooding in your garden, you need to drain the soil as soon as possible. Flooded soil can lead to root rot, which can kill your plants. You can drain the soil by digging a trench or using a pump. If you’re unable to drain the soil quickly, consider moving your plants to a higher area.
Gardening after heavy rains
Don’t Overwater Your Plants
After heavy rains, it may seem counterintuitive, but it’s important not to overwater your plants. Overwatering can lead to waterlogged roots, which can also cause root rot. Be sure to check the soil moisture levels regularly and water your plants only when the soil is dry to the touch.
Do Remove Debris
After heavy rains, it’s important to remove any debris from your garden. Debris can harbor disease and pests, which can harm your plants. Use a rake or your hands to remove leaves, sticks, and other debris from your garden.
Don’t Plant New Seeds or Transplants
If you’ve had heavy rains, it’s best to wait a few days before planting new seeds or transplants. Planting in waterlogged soil can lead to poor root development and can cause the seeds or transplants to rot. Wait until the soil has drained and is dry to the touch before planting.
Do Check for Diseases and Pests
Heavy rains can cause diseases and pests to spread in your garden. Check your plants regularly for signs of disease, such as yellowing leaves, wilting, or mold. If you see any signs of disease, remove the infected plants and dispose of them properly to prevent the disease from spreading.
Don’t Forget to Fertilize
After heavy rains, your plants may need a boost of nutrients to recover. Fertilize your plants with a balanced fertilizer, such as 10-10-10. This will help your plants recover and grow stronger.
Do Prune Damaged Branches
If heavy rains have caused damage to your plants, it’s important to prune any damaged branches. Pruning will help your plants recover and will promote new growth. Be sure to make clean cuts and avoid leaving stubs, which can harbor disease.
In conclusion, following these dos and don’ts after heavy rains will help keep your garden healthy and beautiful. Whether it’s draining flooded soil, removing debris, or fertilizing your plants, taking these steps will help your garden recover from heavy rains and thrive.
5 Reasons Your Dog Is Lazy And What To Do About It
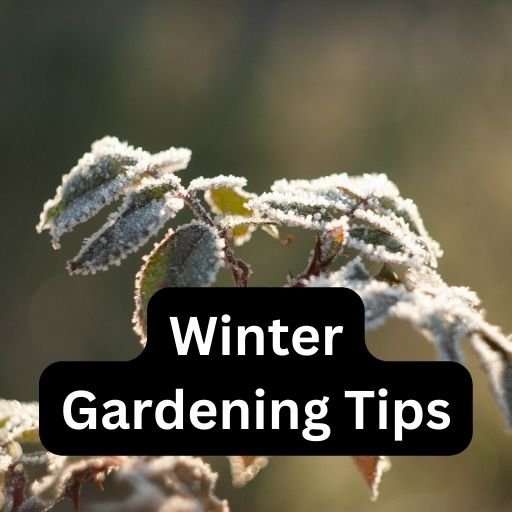
Winter Gardening Activities to Enjoy in the Off-Season
Winter can be a challenging time for gardeners, but it doesn’t mean the gardening season has to come to a complete halt. In fact, winter can be the perfect time to plan and prepare for the coming spring and summer growing seasons. Here are some winter gardening activities that can be enjoyed in the off-season.
Indoor Seed Starting
Starting seeds indoors is a great way to get a head start on the growing season. This can be done in a sunny window, under grow lights, or in a greenhouse. It’s important to choose the right soil and containers, as well as provide proper water, light, and temperature conditions. This can be a fun and rewarding project for both experienced and beginner gardeners.
Winter Pruning
Winter is the perfect time for pruning deciduous trees and shrubs. This helps to encourage new growth and improve the overall health of the plants. It’s also a good opportunity to remove any dead, diseased or damaged branches. When pruning, be sure to use clean and sharp tools to prevent damaging the plant.
Winter Gardening
Composting
Composting is a great way to recycle yard waste and kitchen scraps into rich organic matter for your garden. Winter is a good time to start a compost pile or bin, as cooler temperatures can slow down the decomposition process. Composting can also help reduce the amount of waste sent to landfills and improve the soil structure and fertility of your garden.
Planning for the Next Season
Winter is a great time to plan for the next growing season. This can include researching new plants to try, drawing a garden plan, and ordering seeds and supplies. Winter is also a good time to assess the performance of your existing plants and make any necessary changes to improve their growth and health.
Taking a Garden Tour
Visiting botanical gardens, arboretums, and other public gardens during the winter can be a great way to get inspiration for your own garden. This can also be a good opportunity to learn about new plants and gardening techniques.
In conclusion, there are many winter gardening activities that can be enjoyed in the off-season. Whether you’re starting seeds indoors, pruning shrubs, composting, planning for the next season, or taking a garden tour, there is always something to do in the world of gardening. So don’t let winter slow you down, get out there and get started on your next gardening project!
11 Innovative Ways to Transform Your Garden This Winter
Winter doesn’t have to be a time when your garden goes into hibernation. There are many ways to keep your garden thriving, even when the temperatures are low. In this article, we present 25 creative and practical ideas for how to enjoy your garden this winter.
1. Create a Winter Wonderland
Turn your garden into a winter wonderland by adding holiday lights and decorations. String fairy lights around trees and bushes, hang wreaths on your gate and front door, and place candle-lit lanterns along paths and walkways. The addition of sparkling lights and festive decorations can transform even the simplest of gardens into a magical winter wonderland.
2. Build a Winter Greenhouse
If you have the space and the resources, consider building a winter greenhouse. A greenhouse allows you to extend the growing season and grow your favorite plants all year round. You can even enjoy fresh herbs and vegetables during the winter months.
3. Add Warmth with Fire Pits and Chimineas
Nothing beats sitting by a warm fire on a chilly winter evening. Install a fire pit or chiminea in your garden to create a cozy outdoor space. Invite friends and family to gather around the fire for an evening of hot cocoa, s’mores, and good conversation.
4. Create a Winter Garden Bed
Plant a winter garden bed with a variety of beautiful blooms that thrive in the colder months. Pansies, primroses, and hellebores are just a few of the many flowers that will bring color and life to your garden during the winter.
5. Add a Winter Water Feature
A water feature can add a sense of tranquility to your garden, even during the winter. A bird bath, fountain, or even a simple stone basin filled with water will provide a source of water for birds and other wildlife. The sound of running water will also create a peaceful atmosphere in your garden.
6. Incorporate Winter-Friendly Trees and Shrubs
Plant winter-friendly trees and shrubs in your garden to provide year-round interest. Holly trees are known for their bright red berries and evergreen leaves, while dogwood trees produce beautiful red stems during the winter months.
7. Add a Winter Vegetable Garden
Plant a winter vegetable garden to enjoy fresh produce during the colder months. Carrots, kale, and radishes are just a few of the many vegetables that will thrive in a winter garden.
8. Create a Winter Wildlife Habitat
Attract wildlife to your garden by creating a winter wildlife habitat. Provide food, water, and shelter for birds and other wildlife, and watch as your garden comes to life.
9. Use Winter Containers
Use winter containers to bring a pop of color to your garden during the winter months. Fill pots and containers with evergreen cuttings, branches, and berries to create beautiful arrangements that will last all winter long.
10. Add Winter-Friendly Ground Cover
Plant winter-friendly ground cover in your garden to keep the soil covered and prevent erosion. Ivy, periwinkle, and wintercreeper are just a few of the many options that will thrive during the winter.
11. Create a Winter Pathway
Install a winter pathway in your garden to provide a safe and attractive way to walk around. Use stones, bricks, or pavers to create a path that will stand up to the winter elements
Garden Design Tips for Winter
Winter is the time when the beauty of the garden becomes muted and dull. But with the right garden design tips, you can turn your winter garden into a stunning landscape. Here are some practical and effective ways to make the most of your garden during the winter months.
Make Use of Evergreens
Evergreens are a great way to add color and texture to your garden in the winter. They provide a constant source of green throughout the year and can help to break up the monotony of the winter landscape. Consider planting evergreens like pine, spruce, or holly in your garden to bring a pop of color to your winter garden.
Incorporate Winter Bloomers
Winter bloomers like witch hazel, snowdrops, and winter jasmine add a touch of color to your winter garden. These plants provide a much-needed source of color in the winter and can help to brighten up the landscape. When selecting winter bloomers, choose plants that are native to your area for the best results.
Create Garden Features
Garden features like bird feeders, bird baths, and birdhouses can add interest to your winter garden. These features can provide a source of food and shelter for birds, making your garden a more attractive and welcoming place for wildlife.
Use Lighting to Your Advantage
Lighting is an effective way to add interest to your garden in the winter. Outdoor lighting can help to highlight garden features, create mood and atmosphere, and create a warm and inviting environment in your garden. Consider using outdoor lighting fixtures like lanterns, string lights, or solar lights to bring your winter garden to life.
Add Texture with Ground Covers
Ground covers like mulch, stones, and bark can add texture and depth to your winter garden. These materials can help to break up the monotony of the winter landscape and create a warm and inviting atmosphere. Consider incorporating ground covers into your garden design to add interest and texture to your winter garden.
Conclusion
By following these garden design tips, you can turn your winter garden into a stunning landscape that will provide you with joy and beauty throughout the year. With a little effort, you can create a winter garden that will be a source of pride and satisfaction for years to come.
Growers Guide: Tips for Winter Gardening
Winter gardening can be a challenging task, but with the right preparation and knowledge, you can successfully grow a variety of crops in the colder months. Here are some tips to help you get started.
Choose the Right Crops
Not all crops are well-suited for winter gardening. Cool-season vegetables, such as lettuce, spinach, and kale, are more tolerant of cold temperatures and can thrive in the winter months. These crops are also fast-growing, so you can harvest them quickly and have fresh produce on hand.
Provide Adequate Light
Light is a critical factor for winter gardening. With fewer hours of daylight and lower light intensity, it’s essential to provide supplemental lighting to your plants. This can be done using grow lights or a greenhouse. Grow lights can mimic natural light and provide the necessary spectrum of light for your plants to grow.
Maintain Proper Soil Temperature
Soil temperature is crucial for seed germination and plant growth. In the winter months, soil temperatures can drop below the ideal range for many crops. To counteract this, consider using raised beds or container gardening. These methods allow you to control the temperature of the soil and provide a warm environment for your plants.
Watering and Irrigation
Winter gardening can be a challenge when it comes to watering your plants. Cold temperatures and frozen soil can make it difficult to water your plants, but it’s crucial to keep them hydrated. Consider installing a drip irrigation system to ensure your plants are getting enough water, even in the colder months.
Protect Your Plants from the Cold
Extreme cold temperatures can damage or kill your plants. To protect them, consider using row covers, cold frames, or greenhouses. These structures provide insulation from the cold and allow you to regulate the temperature for your plants.
Use Quality Soil and Fertilizer
The quality of your soil and fertilizer is critical for successful winter gardening. Make sure to use high-quality, well-draining soil, and consider adding organic matter such as compost or mulch to your soil to improve its structure and fertility. Choose a balanced fertilizer that provides the necessary nutrients for your plants to grow strong and healthy.
In conclusion, winter gardening can be a rewarding and productive activity with the right preparation and knowledge. By following these tips, you can successfully grow a variety of crops in the colder months and enjoy fresh produce year-round.
Winter Gardening: How to Grow a Thriving Garden in the Cold Months
Winter gardening can be a challenge, but with the right preparation and knowledge, you can have a productive and beautiful garden, even in the colder months. Here are some tips to help you get started.
Choose the Right Plants
Not all plants are well-suited for winter gardening. Cool-season plants, such as pansies, violas, and kale, are more tolerant of cold temperatures and can thrive in the winter months. These plants are also fast-growing, so you can enjoy their beauty quickly.
Provide Adequate Light
Light is a critical factor for winter gardening. With fewer hours of daylight and lower light intensity, it’s essential to provide supplemental lighting to your plants. This can be done using grow lights or a greenhouse. Grow lights can mimic natural light and provide the necessary spectrum of light for your plants to grow.
Maintain Proper Soil Temperature
Soil temperature is crucial for seed germination and plant growth. In the winter months, soil temperatures can drop below the ideal range for many plants. To counteract this, consider using raised beds or container gardening. These methods allow you to control the temperature of the soil and provide a warm environment for your plants.
Watering and Irrigation
Winter gardening can be a challenge when it comes to watering your plants. Cold temperatures and frozen soil can make it difficult to water your plants, but it’s crucial to keep them hydrated. Consider installing a drip irrigation system to ensure your plants are getting enough water, even in the colder months.
Protect Your Plants from the Cold
Extreme cold temperatures can damage or kill your plants. To protect them, consider using row covers, cold frames, or greenhouses. These structures provide insulation from the cold and allow you to regulate the temperature for your plants.
Use Quality Soil and Fertilizer
The quality of your soil and fertilizer is critical for successful winter gardening. Make sure to use high-quality, well-draining soil, and consider adding organic matter such as compost or mulch to your soil to improve its structure and fertility. Choose a balanced fertilizer that provides the necessary nutrients for your plants to grow strong and healthy.
In conclusion, winter gardening can be a rewarding and beautiful activity with the right preparation and knowledge. By following these tips, you can have a productive and thriving garden, even in the colder months.
7 Creative Water Gardening Ideas To Bring Life To Your Outdoor Space
Water gardening is all about adding life and character to your outdoor space. Whether you’re looking for a show-stopping centerpiece or a peaceful spot for reflection, water gardening has something for everyone. From simple bird baths to more elaborate water features, there are plenty of creative ideas out there that can help bring life and beauty to your outdoor area. In this blog post, we will explore 7 creative water gardening ideas that can transform an ordinary outdoor space into an oasis of tranquility. Read on to learn more!
If you’re looking for a creative way to spruce up your outdoor space, consider a container water garden. Container water gardens are easy to set up and maintain, and they can be customized to fit any size space.
To get started, you’ll need a container (or multiple containers) that can hold water. Planters or pots are a good option, but you can also get creative and use recycled materials like barrels or old tires. Once you have your container (or containers), add some rocks or gravel to the bottom for drainage. Then, fill the container with potting soil and plant your chosen aquatic plants.
Water gardens are a great way to add visual interest to your outdoor space and create a relaxing oasis. Plus, they’re perfect for small spaces since they don’t take up much room. With just a little bit of planning, you can easily create a beautiful container water garden that will transform your outdoor area into a tranquil retreat.
Waterfalls are one of the most popular features in water gardens. They can be used to create a focal point, add movement and sound, and provide a naturalistic look. There are many different ways to incorporate a waterfall into your garden, and the following are just a few ideas to get you started.
One of the simplest ways to add a waterfall is with a pre-formed pond kit. These kits come with everything you need to create a small pond, including a liner, pump, and all the necessary plumbing. You can then add rocks or other materials around the pond to create your desired look.
If you have more space available, you could build a larger pond and incorporate a waterfall into it. This can be done by excavating a hole for the pond and lining it with waterproof material. Then, you can build up rock walls around the perimeter of the pond to create your waterfall. Once again, all necessary pumps and plumbing will need to be installed before filling the pond with water.
Another option is to create a stand-alone waterfall without an accompanying pond. This can be done by constructing a rock wall or using pre-formed concrete blocks to support the weight of the water as it falls from its source (usually a hose or pipe). Stand-alone waterfalls are often used in conjunction with other water features such as koi ponds or streams.
Finally, don’t forget that waterfalls can also be created indoors! If you have an unused
Whether you’re looking to add a water feature to your garden for aesthetic or functional purposes, there are a variety of fountains to choose from that can bring life to your outdoor space. Solar-powered fountains are a great option if you’re looking for something eco-friendly, while electric or battery-operated fountains offer more flexibility in terms of placement. If you have a larger budget, consider a professionally installed fountain – the options are endless!
No matter which type of fountain you choose, be sure to place it in an area that gets plenty of sun and has good drainage. Once you’ve found the perfect spot, sit back and relax as you enjoy the calm sound of trickling water.
Pondless water features are a popular choice for many homeowners because they are easy to maintain and can be customized to fit any space. There are many different types of pondless water features, so you can find one that fits your style and needs.
If you are looking for a low-maintenance option, consider a pondless waterfall. Pondless waterfalls don’t require any chemicals or filtration, so they are very easy to care for. You can customize the size and shape of your pondless waterfall to fit your space, and they can be installed above-ground or in-ground.
If you want a water feature that will attract wildlife, consider a pondless stream. Pondless streams are a great way to provide water for birds and other animals, and they can add a beautiful focal point to your landscaping. Like pondless waterfalls, pondless streams are easy to care for and can be customized to fit your space.
Pondless fountains are another option if you want a water feature that is easy to maintain. Pondless fountains come in many different styles, so you can choose one that fits your taste. They range from simple tabletop fountains to more elaborate designs that include LED lights and bubbling stones. Most pondless fountains only need to be filled with fresh water once a week, so they are very low maintenance.
When it comes to water gardening, there are many different ways to add life to your outdoor space. One way is to install a rain garden. Rain gardens are a great way to keep your yard from flooding, and they also help to filter out pollutants from runoff water. They can be created using a variety of different plants, and they can be customized to fit any size yard.
Another creative water gardening idea is to add a pondless waterfall. Pondless waterfalls are a great way to add the sound of running water to your garden without having to worry about maintenance or safety. They can be created with a variety of different materials, and they can be customized to fit any budget.
Finally, you might want to think about including a fountain or birdbath in your landscape. In addition to giving birds a place to drink and wash, birdbaths and fountains enhance the beauty and appeal of your yard. You can pick a fountain that suits your needs because they come in a range of forms and sizes.
Bog Gardens
A bog garden is a type of water garden that is created by planting vegetation in a shallow bowl or tray filled with fresh or stagnant water. Bog gardens are often used to cultivate aquatic plants such as water lilies, irises, and sedges.
Bog gardens can be created using a variety of different methods, but the most common method is to fill a container with soil and then add water until the soil is saturated. Once the soil is saturated, the container can be placed in a sunny spot outdoors and planted with aquatic plants.
Bog gardens are relatively easy to care for, but there are a few things to keep in mind. First, it’s important to make sure that the container you use has adequate drainage so that excess water can escape. Second, the plants in your bog garden will need to be watered regularly – at least once per week – and fertilized every few weeks. Lastly, it’s important to remove any dead leaves or other debris from the water surface on a regular basis to prevent stagnation.
Living Walls
Living walls are a creative way to add life to your outdoor space.
They can be used to create privacy, add color and interest, and even help purify the air.
Living walls can be created using a variety of plants, including succulents, ferns, vines, and creepers.
They can be hung on fences, trellises, or other support structures, or they can be freestanding.
With a little creativity, living walls can be an attractive and functional addition to any outdoor space.
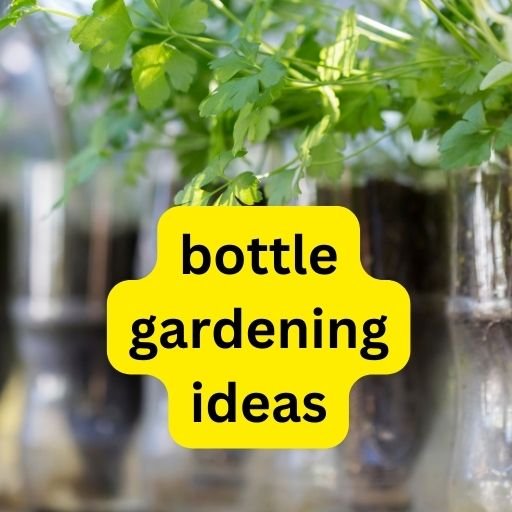
Gardening is a great way to add some beauty and life to your home. But with all the plant pots, planters, and window boxes out there, it can be difficult to find something truly unique. Have you ever considered using glass bottles for your gardening projects? Glass bottles aren’t only aesthetically pleasing—they also provide an eco-friendly way to get creative with your plants. In this blog post, we’ll explore ten creative ways you can use glass bottles for your garden. From hanging gardens to terrariums, there are plenty of ideas here that will give your outdoor space a unique touch. Read on to learn more!
If you’re looking for a creative way to spruce up your outdoor space, consider a glass bottle garden. Bottle gardens are easy to create and care for, and they add a unique touch to any patio or deck.
To get started, all you need are some empty glass bottles, some soil, and some plants. Choose plants that will do well in small spaces and that don’t require a lot of water. Once you have your materials, simply fill each bottle with soil and plant your chosen plants. Water regularly and enjoy your one-of-a-kind garden!
Hanging gardens are a beautiful way to add a touch of greenery to any space, indoors or out. Glass bottles are the perfect way to create a hanging garden, as they can be hung easily and allow light to reach the plants inside.
To create a glass bottle hanging garden, start by choosing a sunny spot for your garden. Then, select a variety of plants that will do well in the conditions where you plan to hang your bottles. Once you have your plants, pot them in small pots or soil-filled bags, and then place them inside the glass bottles. Hang your bottles from hooks or shelves using fishing line or wire, and water your plants regularly.
With a little care, your glass bottle hanging garden will thrive and provide you with enjoyment for many years to come.
Wall gardens are a creative way to add greenery to your home without taking up too much space. They can be hung on a wall, fence, or even a window. All you need is a few empty glass bottles, some soil, and some plants.
To create a walled garden, start by choosing your plants. Succulents and cacti are good choices for wall gardens because they don’t require much water or care. Once you’ve selected your plants, it’s time to prepare your bottles.
Start by drilling a hole in the bottom of each bottle. This will allow water to drain out so that your plants don’t drown. Next, fill each bottle with soil and plant your succulents or cacti. Water them well and then place them in their desired location.
Wall gardens are a great way to add some green to your home without taking up too much space. With just a few empty glass bottles and some plants, you can create a beautiful and unique garden that will brighten up any room.
If you don’t have a lot of space for a garden, or if you simply want to add a touch of greenery to your home, indoor gardening is a great option. And what better way to do it than with some creative glass bottle gardening?
Glass bottle gardens are easy to make and can be as simple or elaborate as you like. All you need is a few empty bottles, some plants, and a little bit of creativity.
To get started, simply choose the plants you want to use. Succulents work well in glass bottles because they don’t require a lot of soil or water. Cacti are also a good option. Once you’ve chosen your plants, pot them up in the bottles using some potting mix. Be sure to leave enough room at the top of the bottle for watering.
Once your plants are potted up, you can get creative with how you arrange them. You could group several bottles together to create a mini-garden, or arrange them around your home as unique decoration pieces.
Water your plants regularly, and give them plenty of sunlight. In no time at all, you’ll have your very own indoor oasis!
If you love spending time outdoors, then incorporating glass bottles into your garden décor is a must! There are so many creative ways to do this and we’ve rounded up some of our favorites for you.
One way to add a pop of color is to fill glass bottles with brightly colored paints or even just plain old water. Then, arrange them along the edge of your garden beds or line them up on shelves. Another fun idea is to create a mini herb garden in recycled wine bottles. Simply add some soil and your favorite herbs, then place them in a sunny spot in your yard.
For a more rustic look, try using mason jars or other types of canning jars. Fill them with sand and sea shells or small stones, then use them as planters for succulents or other small plants. Or, get really creative and turn them into hanging lanterns! All you need is some wire and a tea light candle.
No matter what style you’re going for, there’s definitely a way to incorporate glass bottles into your gardening plans. So get out there and start exploring!
Herb gardens
Herb gardens are a great way to add fresh, flavorful herbs to your cooking. They are also beautiful and fragrant, making them a perfect addition to any home.
There are many different ways to create an herb garden. One popular method is to use glass bottles. Glass bottles can be repurposed into beautiful and unique planters for your herbs.
Here are some tips for creating a glass bottle herb garden:
Choose the right size bottle. Make sure the bottle is large enough to accommodate the roots of your chosen herbs.
Clean the bottles thoroughly. Remove any labels or residue from the inside and outside of the bottles. Rinse well with water.
Drill drainage holes in the bottom of each bottle. This will help ensure that your plants do not become waterlogged.
Fill the bottles with potting soil and plant your herbs. Water well and place in a sunny location.
Enjoy your fresh, homegrown herbs!
Fruit and vegetable gardens
Fruit and vegetable gardens are a great way to get fresh produce without having to go to the store. You can grow your own fruits and vegetables in your backyard or on your patio. If you have a green thumb, you can even grow them in containers.
One of the best things about growing your own fruits and vegetables is that you know exactly what has gone into them. You can control the number of pesticides and herbicides that are used, ensuring that your food is as healthy as possible. Plus, you’ll save money by not having to buy produce at the store.
If you’re thinking about starting a fruit or vegetable garden, there are a few things you need to consider. First, you need to choose the right location. Make sure it gets plenty of sunlight and has good drainage. Then, decide what kind of plants you want to grow. Tomatoes, peppers, cucumbers, and zucchini are all great choices for beginners.
Once you’ve chosen your plants, it’s time to get started planting! You can either start from seed or buy seedlings from a nursery. If you’re starting from seed, be sure to plant them in sterile soil and water them regularly. Once they’ve germinated, thin out the seedlings so that each plant has enough room to grow.
If you’re using seedlings, be careful not to damage the roots when transplanting them into your garden beds. Water them well after planting and keep
Children’s gardens
Children’s gardens
Glass bottle gardens are a fun and creative way to get kids involved in gardening. By using recycled materials, you can create a garden that is not only eco-friendly but also unique and stylish. Here are some tips for creating a glass bottle garden that your kids will love:
Choose colorful bottles in different sizes and shapes. Clear bottles work well too, as they allow children to see the roots of the plants growing inside.
Fill the bottles with soil, then add some small stones or gravel for drainage.
Plant seeds or seedlings in the bottles, and water regularly. Place the bottles in a sunny spot so that the plants can grow.
Once the plants have grown, help your kids to decorate their glass bottle gardens with paint, stickers, or other fun embellishments.
Butterfly gardens
If you’re looking for a creative and unique way to spruce up your garden, why not try a butterfly garden? Butterfly gardens are a great way to add color and life to your outdoor space, and they’re relatively easy to care for.
To create your own butterfly garden, start by selecting a sunny spot in your yard that gets at least six hours of sunlight per day. Then, choose a variety of flowers that will bloom at different times throughout the growing season. Some good options for butterfly-attracting plants include:
It’s time to start planting after you’ve chosen your plants! So that the butterflies have space to fly about, make sure to allow plenty of space between each plant. For them to perch on, you may also add some rocks or logs to your garden.
With just a little bit of effort, you can create a beautiful butterfly garden that will bring joy to you and these lovely creatures all season long!
Conclusion
You don’t need a lot of space or money to start your own creative glass bottle garden. With these 10 ideas, you can have a beautiful and unique display right on your windowsill with minimal effort. Turn any dull corner into something special with the help of old bottles, some soil, and some small plants. Glass bottle gardening is the perfect way to add some life and charm to any home without breaking the bank!
Creative Milk Jug Gardening Ideas: A Fun Way To Grow Your Garden In 2023
When it comes to growing your own food, there are many different ways that you can do it. One popular way is through milk jug gardening. This type of gardening is a great way to recycle old milk jugs and give them a new purpose. It is also a fun way to grow your own food.
There are many different ways that you can set up a milk jug garden. You can either hang the jugs from a fence or trellis, or you can place them on the ground. If you hang them, make sure that they have drainage holes in the bottom so that the water can drain out. You will also need to punch some holes in the sides of the jugs for air circulation.
Milk Jug Gardening Ideas
Fill each jug with potting soil and then add your plants. Water regularly and keep an eye on your plants. When they are big enough, you can transplant them into your regular garden bed or container garden.
Milk jug gardening is a great way to recycle old milk jugs and create something beautiful at the same time! Give it a try today!
Why milk jug gardening is a fun and easy way to grow your garden
Growing your own food is a fun and rewarding experience, but it can be a lot of work. If you’re looking for an easy and fun way to grow your own food, milk jug gardening is a great option!
Milk jugs are perfect for growing small plants and herbs. They’re easy to set up and take care of, and you can put them anywhere in your yard or garden. Plus, they add a bit of whimsy to your garden!
Here are a few tips for getting started with milk jug gardening:
Choose the right size milk jug for your plants. Smaller plants will do well in 1-quart jugs, while larger plants will need 2-gallon jugs.
Drill holes in the bottom of the milk jug for drainage.
Fill the jug with potting soil and plant your seeds or transplants.
If you are looking for a fun and creative way to grow your plants, then milk jug gardening may be the perfect solution for you! With milk jug gardening, you can grow a variety of plants in any size container, including milk jugs.
Some of the best plants to grow in milk jugs include tomatoes, peppers, cucumbers, squash, and eggplants. These vegetables are all relatively easy to grow and will produce a good yield in most cases. You can also experiment with other vegetables or even flowers if you so desire.
To get started, simply cut the bottom off of a milk jug and poke a few holes in the sides for drainage. Fill the jug with potting soil and then plant your seeds or seedlings inside. Water as needed and place the jug in a sunny spot. When your plants are ready to harvest, simply cut the top off of the milk jug and enjoy your fresh fruits or vegetables!
If you’re looking for a fun and creative way to grow your garden, milk jug gardening is a great option! Here’s how to get started:
Choose the right size milk jug for your plants. If you’re growing larger plants, like tomatoes, you’ll need a gallon-sized jug. For smaller plants, like herbs, a quart-sized jug will suffice.
Drill drainage holes in the bottom of your milk jug. This is critical to preventing root rot.
Fill your milk jug with a quality potting mix. Be sure to pack it in tightly so that it doesn’t settle too much when you water it.
Water your milk jug garden regularly, being careful not to overwater. Too much water can also lead to root rot.
When it’s time to harvest your crops, simply cut the bottom off of the milk jug and enjoy!
Tips for success with milk jug gardening
If you’re looking for a fun and creative way to grow your garden, milk jug gardening is a great option! Here are some tips for success:
Choose the right size milk jug. For best results, choose a gallon-sized jug.
Cut holes in the bottom of the jug for drainage.
Fill the jug with soil, leaving about an inch of space at the top.
Water regularly, until the soil is moist but not soggy.
Place your plants inside the jug, and watch them grow!
Conclusion
Milk jug gardening is a great way to get creative with your home garden this year. Whether you are looking for an alternative to traditional planters or just want to recycle something that would otherwise go into the landfill, milk jugs offer a fun and inexpensive option. With our tips and ideas, you should be able to transform your milk jugs into beautiful planters and keep your plants healthy all summer long! So why not give it a try?
Custom Woodworking10×16 Shed Plans You Can Easily Follow10×16 Shed Plans You Can Easily FollowCustom WoodworkingThe benefits of earthwormsShade Gardening Ideas Gardening With Cinder Blocksrose gardening ideasGarden Stone IdeasTropical Gardening Ideas Retaining Wall Gardening Ideas
10 Essential Tips For Planting and Home Gardening Successfully
Planting and home gardening can be a great way to relax, de-stress, or simply add an extra touch of beauty to your home. But it’s not always easy to get things just right. If you’re new to gardening or just want to perfect your technique, these 10 essential tips for planting and home gardening successfully are sure to help you create the beautiful outdoor space of your dreams. From understanding soil chemistry and pH levels to choosing the best plants for your region and climate, this blog post will give you all the information you need for a successful garden this season.
Select the Right Plants
There are a few things to consider when selecting plants for your home garden. First, think about what kinds of plants you like and what will grow well in your climate. If you live in an area with a lot of suns, pick plants that enjoy the full sun. If you have a shady backyard, look for plants that prefer partial or full shade. It’s also important to consider the size of the plant when it is fully grown. Make sure you have enough space in your garden for each plant to reach its mature size.
Planting and Home Gardening
Once you’ve selected the right plants for your garden, it’s time to get them in the ground! Follow these tips for planting success:
loosen the roots before planting
Construct a hole twice as wide as the root ball.
backfill the hole with loose soil
water deeply after planting
Prepare the Soil
Prepare the Soil
The first step to successful planting and home gardening is preparing the soil. This may seem like a daunting task, but with a little know-how and the right tools, it can be easy.
Checking the pH of your soil is the first thing you should do. Around 7.0 is considered neutral for plants. You can either take a sample of your soil to your county Extension office for testing or buy a soil testing kit at your neighborhood hardware or nursery store.
Knowing your soil’s pH will allow you to make any necessary adjustments. Add lime to your soil to improve the pH if it is excessively acidic. The pH can be lowered by adding sulfur if it is overly alkaline.
After adjusting the pH, you need to add organic matter to improve drainage and aeration and help hold nutrients in the soil. You can use compost, manure, peat moss, or other organic materials. Be sure to work these materials into the top 8-10 inches of soil.
Fertilize Properly
Fertilizing your plants properly is essential for healthy growth and abundant blooms. Use a fertilizer high in nitrogen for leafy greens, and a balanced fertilizer for flowering plants. Be sure to follow the directions on the fertilizer package, as too much fertilizer can damage your plants. Apply fertilizer to the soil around your plants, being careful not to get any on the leaves or stems. Water thoroughly after applying fertilizer.
Water Deeply and Frequently
One of the most important things you can do to ensure the success of your home garden is to water deeply and frequently. This will help to encourage strong roots, which are essential for a healthy plant. Watering deeply also helps to prevent drought stress and minimizes the chances of diseases developing.
When watering your garden, it is best to do so in the morning so that the plants have time to dry off before nightfall. If you water in the evening, the leaves will stay wet overnight, which can encourage fungal growth. Whenever possible, use rainwater or collected water, as this will be less likely to contain chemicals that can harm your plants.
If you are using a sprinkler system, make sure that each plant receives enough water by running it for at least 30 minutes per week. If you are hand-watering, focus on getting the water down to the root zone of the plant. This may require watering several times per week, depending on the weather and your soil type.
Mulch to Conserve Moisture
Mulch is an important tool for conserving moisture in your garden. A layer of mulch helps to prevent evaporation from the soil, keeping your plants hydrated. Mulch also reduces watering needs by insulating the soil and slowing down the rate at which water evaporates. Apply a 2-3 inch layer of mulch around your plants, making sure to keep it away from the stems.
Prune for Health and Appearance
Pruning is an essential gardening task that helps maintain the health and appearance of your plants. Pruning promotes new growth, removes diseased or damaged leaves and branches, and can improve the overall shape of your plants. The best time to prune most plants is in late winter or early spring before new growth begins.
There are a few different ways to prune your plants, depending on the type of plant and the desired results. For example, shearing is a method of pruning where you trim off all of the plant’s leaves or branches evenly. This is often done to create a specific shape or size. Topping is another type of pruning where you remove the topmost portion of the plant. This can be done for several reasons, including controlling the plant’s height or encouraging branching. Deadheading refers to removing dead or dying flowers from a plant. This can promote new growth and extend the blooming season.
No matter what type of pruning you’re doing, it’s important to use sharp, clean tools to avoid damaging your plants. Be sure to sterilize your tools between uses to prevent the spread of disease. When in doubt, it’s always best to consult with a gardening expert before undertaking any major pruning projects.
Avoid Over-Fertilizing
If you’ve ever had a garden that produced more weeds than vegetables, chances are you made the mistake of over-fertilizing. When it comes to fertilizing your plants, less is definitely more. Over-fertilizing can actually do more harm than good, leading to yellowing leaves, stunted growth, and even death.
When it comes to fertilizer, always err on the side of caution and use less rather than more. It’s much easier to add more fertilizer if needed than it is to try to fix the problems caused by over-fertilizing. If you’re not sure how much fertilizer to use, ask your local nursery or gardening center for advice.
Inspect Your Plants Regularly
It is important to inspect your plants regularly for pests and diseases. Be sure to check the undersides of the leaves, as this is where most pests hide. If you see any pests or diseases, be sure to treat them immediately.
Use Pest Control Methods
When it comes to pests, there are a few key things to remember: prevention is key, and early detection is critical. The best way to prevent pests is to start with healthy plants. Inspect your plants regularly, and if you see any signs of pests, take action immediately. There are a variety of pest control methods available, so find the one that works best for you and your garden.
One of the most important things you can do to prevent pests is to start with healthy plants. Inspect your plants regularly for signs of pests, and take action immediately if you see anything suspicious. Healthy plants are less likely to be attacked by pests, and they’re also more likely to recover from an attack if one does occur.
There are a variety of pest control methods available, so find the one that works best for you and your garden. Some common methods include physical barriers (such as fencing), chemical controls (such as insecticides), biological controls (such as ladybugs), and cultural controls (such as crop rotation).
Remember, prevention is key when it comes to pests. By taking some simple steps like inspecting your plants regularly and using pest control methods appropriately, you can keep your garden healthy and free of unwanted visitors!
Enjoy Your Garden!
If you’re like most people, you probably have a love-hate relationship with your garden. You may enjoy the beauty and bounty that it provides but dread the work required to keep it looking its best. Luckily, there are a few simple tips that can help make gardening a more enjoyable experience.
One of the most important things to remember when gardening is to take your time and enjoy the process. Relax and take in the fresh air while you work on making your garden beautiful. Don’t be afraid to stop and smell the roses (or any other flowers in your garden)!
Another great tip for enjoying your garden is to focus on the tasks that you actually enjoy doing. If you don’t like weeding, try planting more drought-resistant plants that don’t require as much maintenance. Or, if you love working with your hands, consider adding some container gardens to your yard. Regardless of what you choose to do, make sure it’s something that you’ll actually look forward to doing.
Finally, don’t be afraid to ask for help when it comes to gardening. Whether it’s hiring someone to help with the heavy lifting or simply asking a friend for advice, there’s no shame in admitting that you need a little assistance from time to time. By enlisting the help of others, you can ensure that your garden is something that you truly enjoy spending time in.
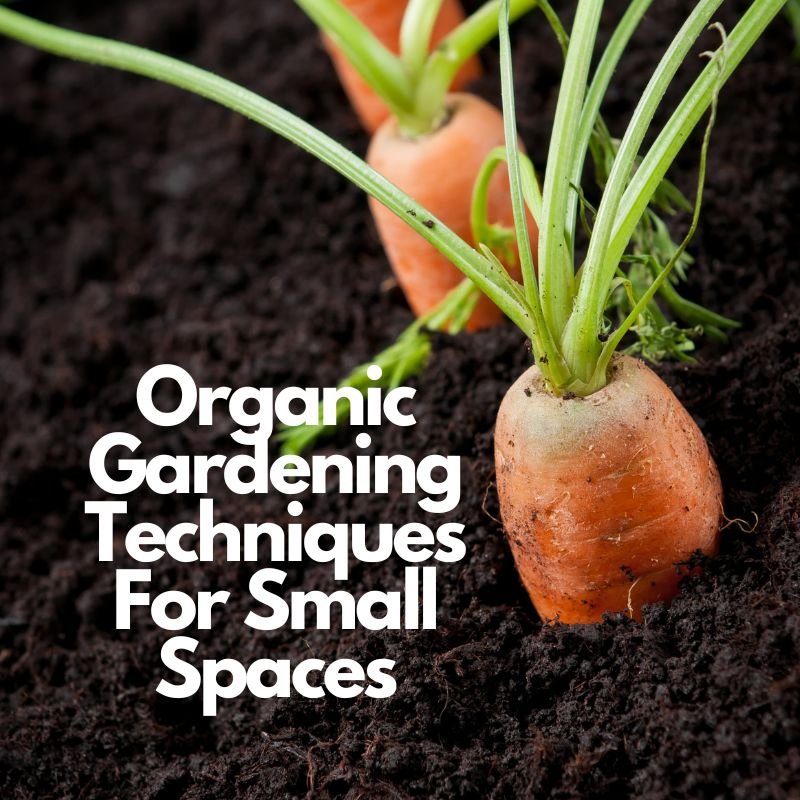
The idea of gardening can be daunting for those with limited space. After all, it’s easy to think that you need a large garden to produce fresh fruits and vegetables. The truth is, with some creative thinking, even the smallest spaces can be used to grow your own organic produce. All you need are the right techniques, tools, and knowledge! In this blog post, we will explore 10 organic gardening techniques that are perfect for small spaces. From container gardens to vertical gardens and more, read on to learn how you can start your very own urban farm.
Garden Planning
Garden Planning
Before you start planting, it is important to plan your garden carefully. Decide what vegetables or fruits you want to grow, and choose a location that gets plenty of sunlight. If you have limited space, consider growing plants in containers or raised beds.
Once you have a general idea of what you want to grow, it is time to start preparing the soil. For organic gardens, this means adding compost or other organic matter to improve the quality of the soil. You can also use a mulch to help conserve moisture and keep weeds at bay.
Organic Gardening Techniques
When it comes time to plant, be sure to follow the instructions on the seed packet or plant label. This will help ensure that your plants get the care they need to thrive. With a little planning and care, you can enjoy a bountiful harvest of fresh, organic produce from your very own backyard!
Soil Preparation
Soil Preparation
Organic gardening involves using natural techniques to grow plants. This means working with the environment, rather than against it. One of the most important aspects of organic gardening is preparing the soil.
This can be done through a number of different methods, but some basic tips include:
-Before you begin planting, test your soil. This will help you determine which nutrients need to be supplemented and which are already present.
-Work on improving drainage if necessary. This can be done by adding organic matter or amending the soil with sand or other materials.
-Make sure your soil has a pH of between 6 and 7. Most plants thrive in this range.
By taking the time to properly prepare your soil, you’ll create a much more hospitable environment for your plants. In turn, this will lead to healthier plants that are better able to resist pests and diseases.
Composting
Composting
If you have limited space for gardening, composting is a great way to make the most of your organic waste. By composting your kitchen and garden waste, you can create nutrient-rich soil that will help your plants thrive.
There are many different ways to compost, so be sure to do some research to find the method that best suits your needs. If you live in an apartment or other small space, there are several methods of indoor composting that can be easily implemented.
Once you have set up your composting system, be sure to regularly turn or stir your compost to aerate it and speed up the decomposition process. With a little effort, you can easily create nutrient-rich soil that will help your plants grow and flourish.
Crop Rotation
One of the most important organic gardening techniques is crop rotation. This involves growing different types of crops in different areas of your garden each year. Crop rotation helps to improve soil fertility, prevent pests and diseases, and increase crop yields.
It is best to rotate crops on a three- or four-year cycle. For example, you could grow potatoes in one area of your garden for one year, then beans in that same area the following year. In the third year, you would move the potatoes to a different part of the garden and grow oats in their place. Then, in the fourth year, you would return the potatoes to their original spot and grow corn in the new area where the beans were grown previously.
When planning your crop rotation, it is important to take into account the needs of each type of plant. Some plants need more nitrogen than others, so it is important to rotate them with plants that fix nitrogen from the air into the soil (such as legumes). Other plants may be heavy feeders and deplete the soil of certain nutrients, so it is important to follow them with crops that add nutrients back into the soil (such as green manure crops).
By following a crop rotation schedule, you can ensure that your plants are getting the nutrients they need while also preventing pest and disease problems.
Cover Crops
Cover Crops
Cover crops are an important tool for organic gardeners. They help to improve soil health, prevent erosion and can provide nutrients for your plants. There are many different types of cover crops, so it is important to choose the right one for your needs. Clover, alfalfa, rye grass, and buckwheat are a few examples of typical cover crops.
When selecting a cover crop, it is important to consider what you want to achieve. For example, if you are trying to improve soil health, you might choose a leguminous crop like alfalfa or clover. These plants fix nitrogen in the soil, which can be beneficial for other plants. If you are trying to prevent erosion, you might choose a grassy crop like ryegrass or Bermuda grass. These plants have deep roots that help hold the soil in place.
Once you have selected a cover crop, you will need to sow the seeds. This can be done by hand or with a seed drill. Make sure to plant the seeds at the recommended depth and spacing for the particular crop. Once the seeds have germinated, they will need to be kept well-watered until they are established.
After the cover crop has grown for several weeks or months (depending on the type), it can then be incorporated into the soil through tilling or mowing. This will add organic matter and nutrients to your soil, which will benefit your other plants
Intercropping
One of the great things about organic gardening is that it doesn’t require a lot of space. In fact, many organic gardening techniques can be used in small spaces. One such technique is intercropping.
Intercropping is a method of growing two or more crops in the same space. This can be done by planting different crops in alternating rows, or by planting them in the same row but at different depths. Intercropping can also be done by growing two crops together in the same pot.
There are many benefits to intercropping, including increased yield, reduced pest pressure, and improved soil health. Additionally, intercropping can provide a more diverse and interesting harvest.
If you’re interested in trying intercropping in your garden, there are a few things to keep in mind. First, make sure that the plants you choose will grow well together. Some plants have incompatible root systems or require different amounts of water or sunlight. Second, consider the mature size of the plants when planning your spacing. Finally, pay attention to the timing of your plantings so that you can harvest both crops at their peak ripeness.
With a little planning, intercropping can be a great way to get the most out of your small garden space.
Mulching
One of the simplest and most efficient ways to enhance your garden is through mulching. It aids with weed control, moisture retention, and summer soil cooling.
There are many different types of mulch available, but for small spaces, organic options are often the best. Here are a few of our favorite organic mulches:
Compost: This is an excellent choice for mulching because it provides nutrients to the soil as it breaks down.
Wood chips: Wood chips make an excellent mulch for small gardens because they help to suppress weeds and retain moisture.
Straw: Straw is another great option for suppressing weeds and retaining moisture. It also adds a bit of extra insulation to the soil.
Water Conservation
One of the most important things you can do to be more sustainable in your gardening is to conserve water. There are a number of ways to do this, and the best approach depends on your climate and garden setup.
In general, mulching heavily and deeply around plants helps to reduce evaporation and keep moisture in the soil. If you have an irrigation system, make sure it’s properly maintained and set up to water only as much as your plants need. Use a rain gauge to track how much rainfall you’re getting so you can adjust your watering accordingly.
In hot, dry climates, consider planting drought-tolerant plants or those that don’t require as much water. Grouping plants together also helps because they can shelter each other from the sun and wind, reducing evaporation even further. And finally, don’t forget about collecting rainwater! This is an easy way to save water that would otherwise be lost to evaporation.
Pest Management
Pest management is a critical component of organic gardening, particularly in small spaces. By taking proactive steps to control pests, you can avoid the use of harmful chemicals and protect your plants from damage.
There are a number of effective pest management techniques that can be used in small spaces. One of the most important is to keep your garden clean and free of debris. This will help to minimize the places where pests can hide and breed. Regularly removing dead leaves and plant matter will also help to make your garden less attractive to pests.
In addition, it’s important to choose plants that are resistant to pests. Some vegetables, for example, are more susceptible to insect damage than others. When selecting plants for your garden, research which varieties are most resistant to common pests in your area.
Finally, there are a number of natural pest control products available that can be used safely in small spaces. These include things like diatomaceous earth, neem oil, and Bacillus thuringiensis (BT). By using these products judiciously, you can effectively control pests without resorting to harmful chemicals.
Conclusion
Organic gardening is a great way to get the most out of a small space. From vertical gardens to composting, there are plenty of techniques you can use to make the most of organic gardening in your home or yard. With these 10 tips and techniques, you’ll be able to easily create an oasis with minimal effort that will look beautiful and yield delicious produce!
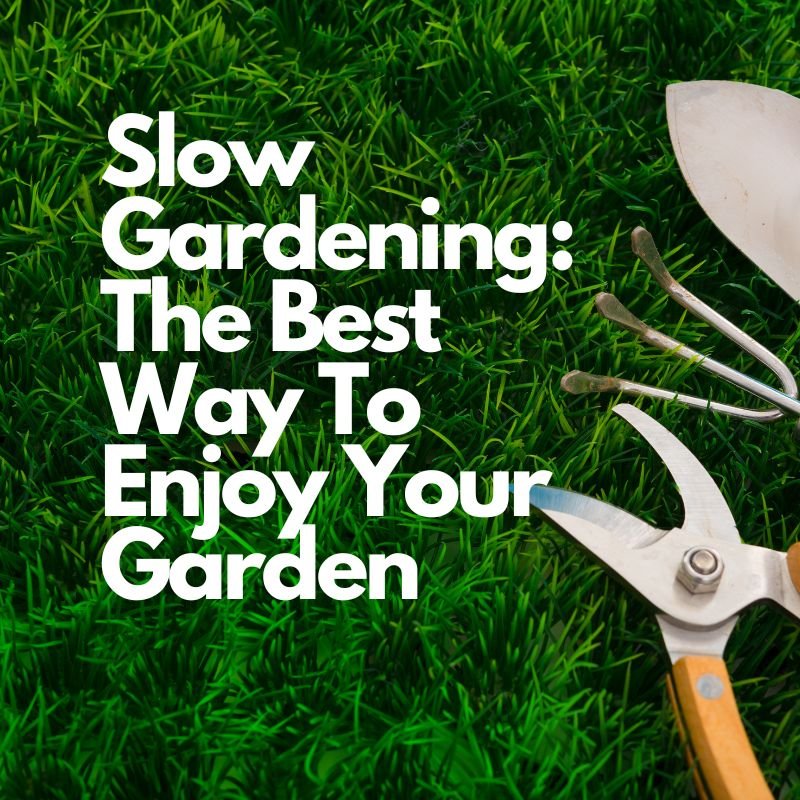
Gardening can be a time-consuming and laborious task, but it doesn’t have to be. With the right approach, you can enjoy your garden and the fruits of your labor without having to put in too much effort. That’s where slow gardening comes into play. Slow garden is a method of caring for plants that focus on reducing stress and enjoying the process rather than focusing on speed and productivity. It’s an approach that encourages patience, observation, and appreciation. In this blog post, we will discuss what slow gardening is, its benefits, and how you can get started with this mindful approach to gardening.
Slow Gardening
Slow gardening is all about taking the time to enjoy your garden and appreciate all that it has to offer. It’s about savoring the moments, whether you’re spending an hour weeding or simply admiring the view.
Slow gardening is about connecting with nature and getting back to the simple things in life. It’s about enjoying the process as much as the end result. And it’s about creating a space that brings you peace and happiness.
If you’re looking for a way to slow down and enjoy your garden more, then slow gardening is for you!
Slow gardening is a way of enjoying the garden that allows you to savor the experience and appreciate the small things. It is a type of gardening that can be done at any pace, and it doesn’t necessarily mean taking things slow all the time. You can still have moments of frenzied activity if you want, but overall, slow gardening is about enjoying the process as much as the results.
Some of the benefits of slow gardening include:
It can help improve your mental health – According to studies, spending time in nature can help reduce stress levels and improve moods. Gardening is a great way to get outside and enjoy some fresh air while surrounded by beautiful plants and flowers.
It can be used as a form of exercise – Gardening is a moderate form of physical activity that can help you stay active and fit. Even simple tasks like pulling weeds or raking leaves can give you a good workout.
It can save you money – With a little planning and patience, you can grow your own food which can save you money at the grocery store. Homegrown fruits and vegetables often taste better than store-bought versions too!
It teaches patience and appreciation – Slowing down to enjoy your garden can teach you to appreciate the smaller things in life. Watching a plant grow from seed to flower takes time and patience, but it is so rewarding when you see the final result.
How to Get Started with these Gardening
Slow gardening is a great way to enjoy your garden and get the most out of your planting. By taking your time and enjoying the process, you can create a beautiful space that will last for years. Here are some tips on how to get started with slow gardening:
Start small. Don’t try to do too much at once. Pick one area of your garden to focus on, and slowly add new plants and features as you have time.
Plan ahead. Before you start planting, take some time to plan out what you want to grow. This will help you save time and money in the long run.
Take your time. Don’t rush the process. Enjoy watching your plants grow and change over time.
Be patient. Slow gardening takes patience, but it is worth it in the end!
What Plants are Best for these Gardening?
These gardening is all about enjoying your garden and taking the time to appreciate the plants you have. There are no rules when it comes to slow gardening, but if you’re looking for some ideas on which plants are best for slow gardening, here are a few of our favorites:
Perennials – Perennials are great for slow gardening because they come back year after year, so you can enjoy them for many years to come.
Native plants – Native plants are adapted to your local climate and conditions, so they’re generally easier to care for and more likely to thrive in your garden.
Herbs – Herbs are perfect for slow gardening because they’re easy to grow and can be used in many different ways (in cooking, as medicine, etc.).
Fruit trees – Fruit trees take time to mature and produce fruit, but once they do, you’ll be able to enjoy fresh fruit from your own backyard for years to come.
Shade-loving plants – If you have a shady spot in your garden, there are still plenty of beautiful plants that will thrive there. Slow gardening is all about finding the right plant for the right spot in your garden, so don’t be afraid to experiment!
Alternatives to Slow Gardening
There are many different ways to garden, and no single method is perfect for everyone. If you find that slow gardening is not working for you, there are a few alternatives that you may want to consider.
One alternative is raised bed gardening. This method can be faster than traditional gardening, as it involves less weeding and soil preparation. Raised beds can also be easier to protect from pests and diseases.
Another option is container gardening. This is a great choice for people who live in apartments or other small spaces. Container gardens can be placed on balconies, patios, or even indoors.
Hydroponic gardening is another possibility. This method uses nutrient-rich water instead of soil, so it can be very efficient. Hydroponic gardens can be set up indoors or outdoors.
Finally, you could try vertical gardening. This is a great way to maximize space in a small area. Vertical gardens can be made using trellises, hanging baskets, or shelves.
Slow Gardening benefits 2023
The modern world is constantly pushing us to do more, faster and better. We’re obsessed with productivity, efficiency, and speed. In this fast-paced environment, slow gardening can be a refreshing change. Slow gardening is a gentle approach to gardening that focuses on enjoying the process rather than rushing through it. It encourages people to take their time, appreciate nature and savor the moment. Slow gardening not only has physical benefits but also mental health benefits as well. Read on to learn about how slow gardening can benefit you in 2023 and beyond!
What is Slow Gardening?
Slow Gardening is a response to the fast pace of life and the resulting loss of connection with the natural world. It is a way of gardening that emphasizes quality over quantity and encourages us to slow down, enjoy the process, and appreciate the results.
Slow gardening can take many forms, but all share a few key principles: working with nature, taking the time to enjoy the garden, and valuing quality over quantity. These principles help us create gardens that are beautiful, sustainable, and enjoyable to spend time in.
The Benefits of Slow Gardening
Slow gardening is a method of gardening that emphasizes quality over quantity. This type of gardening can have many benefits, including reducing stress, improving mental health, and providing a sense of accomplishment.
Slow gardening can help reduce stress by providing a space to relax and unwind. The slow pace can also help clear your mind and allow you to appreciate the small things in life. This type of gardening can also improve mental health by providing an outlet for creativity and self-expression. The sense of accomplishment that comes from completing a project can also boost self-esteem and confidence.
Slow Gardening Tips
Slow gardening is about savoring the small moments and enjoying the process of growing your own food. Here are some tips to help you get started:
Start small. Don’t try to do too much too soon. Pick one or two crops that you really want to grow, and start with a small plot of land.
Take your time. Don’t rush through the gardening process. Enjoy watching your plants grow, and take time to learn as you go.
Be patient. Growing food takes time, so don’t expect instant results. Relax and enjoy the journey!
Conclusion
In conclusion, slow gardening has a lot of benefits for both experienced and novice gardeners. Not only does it provide an opportunity to savor every moment with your plants, but it also helps promote sustainability through reduced water usage and pesticide use. Slow gardening can help you create a beautiful flower or vegetable garden that is sure to delight you in the years to come. So why not start today and reap the rewards of slow gardening by 2023?
Conclusion
Slow gardening is an easy, stress-free way to make the most of your garden. There’s no need to rush or try to do it all at once; instead, take time every day to enjoy your garden and appreciate what you have created. When practiced regularly, slow gardening can help us feel more connected with nature and add tranquility and joy to our lives. What are you waiting for? Get out there and start your own slow gardening journey today!
The 10 Best Gardening Tips To Try Out This New Year
The new year is here and for many, that means it’s time to start thinking about gardening. For those who are new to gardening, the prospect of setting up and caring for a garden can be intimidating. But don’t worry! With a few helpful tips and tricks, you’ll be well on your way to having a thriving garden in no time. Whether you’re looking to create an outdoor oasis or just add a few potted plants to brighten up your windowsill, these 10 best gardening tips will help get you started on the right foot this year.
Best Gardening Tips
Start with a plan
A successful garden starts with a solid plan. Begin by mapping out your garden space and deciding which plants you’d like to grow. Research what each plant needs in terms of sunlight, water, and soil type to ensure they will thrive in your garden. Once you have your plan ready, it’s time to start planting!
Don’t forget to mulch
Mulching is one of the most important gardening tasks you can do to improve your garden’s health and appearance. It helps prevent weed growth, conserve water, and keep your plants’ roots cooler in summer. Use a layer of mulch two to four inches deep over the entire garden bed. Be sure to apply it evenly and keep it away from plant stems.
Fertilize regularly
If you want your garden to thrive, it’s important to fertilize regularly. This will help ensure that your plants are getting the nutrients they need to grow strong and healthy.
There are a few different ways to fertilize your garden. You can use commercial fertilizer, compost, or manure. Whatever method you choose, be sure to follow the instructions carefully so that you don’t overdo it.
Fertilizing your garden on a regular basis will help you achieve beautiful results that you’ll be able to enjoy all season long.
Water wisely
If you want a healthy garden, it’s important to water wisely. Plants can suffer just as much from overwatering as from underwatering.The key is to water deeply and less often. This encourages roots to grow deep, making them more drought-tolerant. Water in the morning so leaves has time to dry before nightfall, which reduces the risk of fungal diseases. And, always use a hose with a shut-off valve so you don’t waste water.
Add some color
Adding color to your garden is a great way to make it more inviting and enjoyable. There are many ways to do this, including adding flowers, foliage, and even colorful accessories.
One way to add color to your garden is by planting flowers. This can be done by creating a border of colorful annuals or adding a few potted plants around the perimeter of your garden. Another way to add color is through the foliage. Try adding some brightly colored leaves or plants with variegated leaves. You can also add color by using accessories such as birdbaths, sculptures, or even brightly colored garden furniture.
Use compost
If you’re looking to have a successful gardening year, one of the best tips is to use compost. Compost helps improve drainage and aeration in your soil, which is crucial for plant growth. It also helps retain moisture, which can be beneficial during periods of drought. Additionally, compost provides essential nutrients for your plants and can help suppress weeds. To get started, simply add some compost to your garden beds and till it into the soil.
Get rid of pests naturally
There are a few things you may do if you want to get rid of pests in your garden naturally. To start, check to see if you’re overwatering your plants. Pests like slugs and snails may find the habitat to be appealing as a result. Instead, give your plants more infrequent, deep waterings. Another option is to use diatomaceous earth, a natural product formed from fossilised algal leftovers.
This powdery substance works by puncturing the exoskeletons of insects, causing them to dehydrate and die. Another option is to plant garlic or chives around your garden, as these can help repel pests like aphids and Japanese beetles. You can also try making a homemade pest spray by mixing water, dish soap, and hot pepper flakes in a spray bottle.
Practice crop rotation
Crop rotation is a great way to improve the health of your soil and prevent pests and diseases from taking over your garden. It involves growing different crops in different areas of your garden each year so that the same crop is not planted in the same spot more than once every three years or so. This helps to break the life cycles of pests and diseases, and also allows the soil to recover from any nutrient depletion that may have occurred.
There are a few things to keep in mind when planning your crop rotation:
The length of your growing season – this will dictate how many crops you can rotate through in a year.
The size of your garden – you need to make sure you have enough space to grow all the different crops you want to rotate.
The needs of your plants – some plants need more nitrogen than others, so you’ll need to take that into account when planning your rotation.
The pests and diseases present in your area – you’ll want to avoid planting susceptible crops next to those that are known for attracting pests or being affected by certain diseases.
If you’re new to crop rotation, start with a simple two-year cycle using just two or three different crops. Once you get the hang of it, you can experiment with longer cycles and more diverse plantings.
Attract wildlife to your garden
If you’re looking for ways to spruce up your garden this year, why not try attracting some wildlife? Creating a habitat for local animals is a great way to add some interest and excitement to your garden, and it can even help the environment. Here are some tips on how to attract wildlife to your garden:
Provide food. One of the best ways to attract wildlife is to provide food for them. Bird feeders are a great way to do this, but you can also plant native flowers and shrubs that will attract insects, which in turn will attract birds.
Provide water. Another way to attract wildlife is by providing water for them. A simple birdbath is a great way to do this, but you can also install a small pond or water feature. Just be sure to use safe, non-toxic materials if you’re planning on adding fish or other aquatic creatures.
Create shelter. Wildlife needs somewhere to hide from predators and escape the elements, so include some dense shrubs or evergreens in your landscape. You could also build a simple birdhouse or bat house to offer additional shelter.
Go native. When selecting plants for your garden, choose native species that are well-adapted to your area’s climate and soil conditions. Not only will this be better for the environment, but it will also make it easier for local wildlife to find food and shelter in your garden.
Keep your garden clean and tidy
It’s important to keep your garden clean and tidy so that your plants can grow and flourish. Here are some tips to help you achieve this:
-Gardeners should remove any plants that are dead or dying.This will prevent them from spreading diseases to other plants.
-Regularly weed your garden beds. This will stop competing weeds from stealing nutrients and water from your plants.
-Remove branches from trees and shrubs that are dead or decaying. This will promote new growth and prevent pests from infesting the plant.
-Keep the leaves raked up and off the ground. This will prevent mold and mildew from growing on them, which can harm your plants.
Growing a vibrant and healthy garden doesn’t happen overnight. It takes time, effort, and dedication to make sure your plants get the best care possible. One of the most important things to consider is the type of soil you are using for your garden. If you want to achieve optimal results, it’s essential to choose the right soil for the job. In this blog post, we’ll be exploring the best gardening soil tips to help you create a thriving garden! We’ll discuss what type of soil is best for different types of plants, as well as how to prepare and maintain it throughout the year. Read on for all the details!
What is the best gardening soil?
When it comes to gardening, the quality of your soil can make a big difference in the health and appearance of your plants. But with so many different types of soils available, how do you know which one is right for your garden?
Here are a few tips to help you choose the best gardening soil for your needs:
Know your plant’s needs. Different plants have different soil requirements, so it’s important to choose a soil that will meet the specific needs of the plants you’re growing. For example, if you’re growing roses, you’ll need a rose-specific soil mix that contains extra nutrients and organic matter.
Consider your climate. The climate in your garden will also play a role in determining which soil is best suited for your plants. If you live in an area with hot summers and cold winters, for instance, you’ll need a soil that can withstand extreme temperature changes.
Test your soil’s drainage. Good drainage is essential for healthy plant growth, so it’s important to choose a soil that drains well. To test drainage, simply dig a hole in the ground and fill it with water. If the water drains away within 24 hours, then the drainage is good. However, if the water takes longer than 24 hours to drain away, then the drainage is poor and you’ll need to look for a different type of soil.
Amend sandy or clay soils as needed. Sandy soils tend to drain
How to make your own garden soil
If you want to have a healthy garden, you need to start with good quality soil. Here are some tips on how to make your own garden soil:
Checking your soil is the first step. Take a sample of your soil to a nearby nursery or Cooperative Extension office to accomplish this. They will be able to advise you on the soil’s nutrient deficiencies and the necessary amendments.
Once you know what amendments you need, it’s time to start prepping your soil. This means adding organic matter like compost or manure. You can also add inorganic amendments like sand or perlite if your soil is too dense.
After you’ve added all the amendments, it’s time to till or dig up your soil. This will help mix everything together so that your plants can get the nutrients they need from the soil.
The last step is to mulch your garden beds. This will help keep the weeds down and help retain moisture in the soil.
What are the benefits of gardening soil?
Any garden needs good soil, it’s essential. Your choice of soil can have a significant impact on the health and beauty of your plants.
There are many different types of gardening soils available, each with its own set of benefits. Here are some of the most popular types of gardening soils and their benefits:
Compost: Compost is a great source of nutrients for your plants. It helps improve drainage and aeration in the soil, and it also helps to suppress weeds.
Peat moss: Peat moss is another great source of nutrients for your plants. It helps improve drainage and aeration in the soil, and it also helps to hold moisture in the soil, which is beneficial for plant growth.
Perlite: Perlite is a light volcanic rock that enhances soil aeration and drainage. Additionally, it supplies the nutrients and trace components that plants require for wholesome development.
Vermiculite: Vermiculite is a mineral that helps to improve drainage and aeration in the soil, as well as providing essential minerals and trace elements that plants need for healthy growth.
How to use gardening soil in your garden
If you’re looking to add some healthy soil to your garden, there are a few things you need to know. First, you’ll need to know what kind of gardening soil will work best for your plants. There are many different types of soils, each with their own unique benefits.
Next, you’ll need to determine how much soil you need. This will depend on the size of your garden and the type of plants you’re growing. Once you have an idea of how much soil you need, it’s time to get started adding it to your garden.
The first step is to loosen up the existing soil in your garden. This can be done with a shovel or by tilling the soil with a rototiller. Once the soil is loose, mix in the gardening soil until it’s evenly distributed throughout the area.
After the gardening soil is mixed in, it’s time to start planting! Be sure to follow the instructions on the packaging for each plant, as some may require more or less water than others. With proper care and attention, your garden will thrive in no time!
Conclusion
Gardening soil is a crucial component of any successful gardening project. By following these tips, you can be sure that your soil is healthy and well-suited to growing whatever plants you’ve chosen. Whether you are just starting out or have been gardening for years, taking the time to get your soil right will ensure that your garden flourishes with life and beauty. Happy planting!
how to make the best vegetable garden soil
Growing your own vegetables is a great way to reduce your carbon footprint, as well as save money on groceries. But for a vegetable garden to thrive, it’s crucial that you have the right soil. The soil in which you grow your veggies can determine their taste and texture, as well as their overall health. But how do you know what type of soil is best? In this blog post, we will explore the basics of soil composition and provide tips on how to make the best vegetable garden soil. Read on to learn more!
What is garden soil?
Garden soil is a vital component to any successful vegetable garden. The best garden soil is loose, well-drained, and rich in organic matter. It should also be fairly neutral in terms of pH.
To achieve these characteristics, many gardeners mix their own garden soil from different components. A typical mix might include topsoil, compost, peat moss, sand, and/or vermiculite.
Of course, you can also simply buy premixed garden soil from your local nursery or garden center. Just make sure to read the labels carefully to ensure you’re getting a quality product.
The importance of healthy garden soil
The quality of your vegetable garden soil has a direct impact on the health and vigor of your plants. Crops grown in nutrient-rich, well-drained soil are more resistant to pests and diseases, and better able to withstand drought and other environmental stresses.
Healthy garden soil is also essential for optimal plant growth. Plants need a variety of nutrients to flourish, including nitrogen, phosphorus, potassium, calcium, magnesium, and sulfur. These nutrients are found in organic matter such as compost and manure. By adding organic matter to your garden soil on a regular basis, you will ensure that your plants have everything they need to grow strong and produce an abundance of healthy fruits and vegetables.
How to make the best vegetable garden soil
The soil in your vegetable garden is very important for the success of your plants. The soil is the foundation for your plants, and it needs to be healthy and rich in nutrients in order for your plants to thrive. There are a few things that you can do to make sure that you have the best possible soil for your vegetable garden.
One of the most important things that you can do for your soil is to add organic matter. Organic matter includes things like compost, leaves, and grass clippings. This organic matter will help to improve the texture of your soil and also add some essential nutrients.
Another thing that you can do to improve the quality of your soil is to add some lime. Lime will help to balance the pH of your soil and make it more hospitable for plants. You can get lime at any garden center or nursery.
You should also make sure that you are regularly testing the pH of your soil and adjusting accordingly. The ideal pH for most vegetables is between 6.0 and 7.0. You can test the pH of your soil with a simple at-home kit or by sending a sample off to a lab.
Finally, remember that healthy soils need to be well-drained. If your soils are too wet or too dry, it can cause problems for your plants. Make sure that you are watering regularly and monitoring the moisture levels so that you can adjust as needed.
What to add to your garden soil
To make the best vegetable garden soil, you should add a mix of organic matter and amendments to your garden bed. Amendments help improve drainage, aeration, and nutrient retention in the soil.
Organic matter can be added to your soil in the form of compost, manure, or leaves. You can also use a cover crop or mulch to add organic matter to your soil. Amendments help improve the structure of your soil and provide nutrients for your plants. The type of amendment you use will depend on the needs of your plants and the condition of your soil.
Some common amendments include:
Compost: Compost is made from decomposed organic matter and is full of nutrients that are beneficial for plants. It helps improve drainage and aeration in the soil while also increasing its ability to hold moisture.
Manure: Manure is rich in nutrients and helps improve the fertility of the soil. It can also help loosen compacted soils and improve drainage.
Leaves: Leaves are an excellent source of organic matter and can be used as mulch or added to compost piles. They help improve drainage and aeration while also increasing the soil’s ability to hold moisture.
Cover crops: Cover crops are planted after the main crop has been harvested. They help replenish nutrients in the soil and prevent erosion. Leguminous cover crops, such as clover or alfalfa, also fix nitrogen in the soil which is beneficial for
Composting
Composting is an excellent way to create nutrient-rich soil for your vegetable garden. The process of composting involves breaking down organic matter, such as leaves and food scraps, into a rich soil amendment. To make the best compost for your garden, follow these tips:
Choose the right location. Compost should be located in an area that is convenient for you to access and where it will not be in the way.
Create the right mix. A good mix of ingredients for compost includes green (nitrogen-rich) materials like grass clippings and kitchen scraps, and brown (carbon-rich) materials like dead leaves and twigs.
Add water. Compost needs to be moist in order to break down properly, so be sure to add water to your pile as needed.
Turn the pile regularly. Aerating the compost pile will help speed up the decomposition process.
Garden soil recipes
When it comes to creating the best soil for your vegetable garden, there are a few key ingredients you’ll need to add to your garden bed. First, you’ll need to add some organic matter to help improve the drainage and aeration of the soil. You can do this by adding compost, manure, or even vermiculite or perlite.
Next, you’ll need to add some sort of fertilizer to your soil. This will provide the essential nutrients that your plants need to grow healthy and strong. You can use either organic or chemical fertilizers, but be sure to read the labels carefully and follow the directions.
Finally, you’ll need to make sure that your soil is pH balanced. Most vegetables prefer a slightly acidic soil with a pH between 6.0 and 7.0. You can test your soil’s pH level with a simple home test kit or by sending a sample off to a lab for testing. If your soil is too alkaline or too acidic, you can adjust the pH level by adding lime or sulfur to the bed.
By following these simple steps, you can create the perfect environment for growing healthy and delicious vegetables in your own backyard!
Conclusion
All in all, making the best vegetable garden soil is not a difficult task. With some patience and determination, you can create an optimal environment for growing your favorite vegetables. Ensure that you choose quality compost and add enough nutrients to your soil mix to give your plants plenty of nourishment. Finally, use proper weeding techniques to keep pests away from your garden and improve its overall health. Good luck with growing healthy veggies!
what to put on bottom of raised garden bed?
When building a raised garden bed, you’ll want to invest in good soil to avoid wasting your time and money on plants.TIP: To increase the height of the raised garden bed, only use wood that is untreated (i.e. not pressure-treated) and make sure it is free of any chemicals or toxins before installation.
what to plant in summer?
Summer is the best time to plant trees and shrubs but it can also be a good time to plant many vegetables. The problem with planting vegetables in summer is that the heat will make them very susceptible to disease and pests, so it is not a good idea in general.
how to make the best vegetable garden soil?
The most important thing to remember when starting your vegetable garden is to start by getting the best possible soil. If you don’t have good soil, its almost impossible to grow great vegetables. (1) The first step in achieving this is what is called “tilling” of your vegetable garden. Tilling is a process that mixes the different layers of the soil so that rich topsoil moves down below the hard clay and rocks. Usually tills are performed with a horse or tractor which turns over the entire surface of the garden area. (2) Another way to get great soil is by turning it every year after each harvest in order to loosen it up and allow air, water, and nutrients to get down deep into it.
how to design a flower garden?
Your flower garden design should be based on what you want to achieve. If you want it to look beautiful with a lot of flowers, then your design should focus on color and variety of flowers. If you want to maximize fragrance, then choose plants with strong scents. If you want to attract butterflies or bees, consider planting nectar-rich plants like orange trees, daffodils and sunflowers.
Gardening ResolutionsWhich plant gives more oxygen, and why?How do you grow a sapota tree?prune a silver oak treeCan cacti grow in pots indoors?fertilize your lawnDo air purifiers harm house plants?easy garden vegetablestransplant a young plantCan I grow an agarwood tree in my garden?Is it good to have a bilva tree at home?How do I take care of a bamboo plant?Does roof gardening affect the building?What indoor plant produces the most oxygen?Do indoor plants filter out toxins?DIY landscape design ideasoutdoor landscape ideasdo coffee grounds keep squirrels awaykeep squirrels out of flower pots
Grow bags have many benefits, including the fact that they can be placed in an area where there is limited space, and because they’re lightweight and easily transported, they are perfect for gardeners who don’t want to spend a lot of time tending to their garden. However, before you start your next outdoor project, make sure you read this article and learn all about grow bags!
5 Reasons to Grow Bags For An Organic Gardening
Why Grow Bags?
Grow bags are an excellent way to garden organically. They are made from a breathable fabric that allows roots to grow freely while aerating the soil and preventing compaction. This results in healthier plants with more robust root systems. Additionally, grow bags can be reused for several years, which makes them a more sustainable option than traditional pots or planters.
Types of Grow Bags
There are two types of grow bags: fabric and plastic. Fabric grow bags are made from a breathable material, such as felt, that allows air and water to circulate around the roots of your plants. This promotes healthy root growth and prevents the roots from becoming waterlogged. Plastic grow bags are typically made from recycled materials and can be reused multiple times. They offer superior drainage and aeration, which is ideal for plants that require lots of water, such as tomatoes.
Pros and Cons of Grow Bags
Growing plants in grow bags has a number of advantages over traditional gardening methods. Perhaps the most obvious benefit is that grow bags can be moved around easily, which is great for gardeners who have limited space or who want to change up their garden layout frequently. Grow bags also require less water than other types of gardens, and they improve drainage and aeration while preventing soil compaction.
On the downside, grow bags can be more expensive than other gardening methods, and they may not last as long as some other options. Additionally, because they are lightweight, grow bags can blow away in strong winds unless they are anchored down securely.
How to Use Grow Bags for An Organic Garden
If you’re looking to start an organic garden, grow bags are a great option. They’re easy to use and allow you to control the soil quality and drainage for your plants. Plus, they can be moved around easily, which is great if you have a small space or want to change up your garden layout. Here’s how to use grow bags for an organic garden:
Choose the right size to grow a bag for your plants. If you’re not sure, ask at your local nursery or gardening store.
Fill the grow bag with an organic potting mix. You can find this at most gardening stores or online.
Water the mix until it’s moist but not soggy. Then add your plants and give them plenty of water.
Place the grow bag in a sunny spot and water regularly, as needed. Be sure to check the soil moisture levels so you don’t overwater or underwater your plants.
When it’s time to harvest your crops, simply lift up the grow bag and enjoy!
What You Need to Know About Growing in a Grow Bag
Grow bags are an excellent way to garden organically. They offer many benefits over traditional gardening methods, including improved drainage and aeration, reduced compaction, and better root growth. Grow bags are also easier to set up and maintain than in-ground gardens.
If you’re new to organic gardening, or if you’re looking for an easy and efficient way to grow your own food, grow bags may be the perfect solution for you. Here’s what you need to know about growing in a grow bag:
Select a high-quality grow bag. Look for a bag made from breathable fabric, such as burlap or canvas. Avoid plastic bags, which can suffocate roots and lead to overheating.
Fill your grow bag with a mix of organic compost and soil. You can find organic compost and soil at most garden centers or online retailers.
Plant your seeds or seedlings according to the instructions on the packet. Be sure to water regularly – at least once a day – during the growing season.
When your plants are big enough, fertilize them with an organic fertilizer according to the package directions. This will help them thrive and produce bumper crops!
Harvest your fruits and vegetables when they’re ripe and enjoy the fruits of your labor!
Conclusion
If you’re looking for a way to have an organic garden that is both productive and easy to maintain, grow bags are a great option. With just a few simple tips, you can be well on your way to enjoying the fruits (and vegetables) of your labor. Thanks for reading!
Growing carrots might seem like a hard task at first, but it’s actually not as difficult to do as you might have thought! In this article, we’ll highlight some easy tips for growing your very own carrots in your garden.
Carrot Planting Tips
Carrot Planting Tips
When you are ready to plant your carrots, there are a few things to keep in mind to ensure a bountiful harvest. Pick a sunny area of your yard with well-drained soil first. Carrots do not do well in waterlogged soil, so be sure to avoid any low-lying areas that may be prone to flooding. Once you have selected your planting spot, use a hoe or trowel to loosen the soil to a depth of about 12 inches. This will help the carrot roots penetrate the soil more easily.
Next, it’s time to actually plant the seeds. You can either sow them directly into the ground or start them indoors in pots and then transplant them outdoors later. If you are sowing the seeds directly, space them about 1/2 inch apart and press them gently into the soil. Water the area lightly and keep the soil moist until the seeds germinate, which usually takes 7-10 days. Once they have sprouted, thin out the seedlings so that they are spaced about 2-3 inches apart.
carrot gardening tips
If you started your carrots indoors, wait until they have grown several inches tall before transplanting them outdoors. Be careful not to damage their delicate roots when transplanting them into your garden bed. Water them well after planting and keep an eye on them as they adjust to their new surroundings outside. With proper care, your carrots should be ready to harvest in 60
Types of Carrots
There are many different types of carrots that you can grow in your garden. Some of the most popular types include:
-Nantes Carrots: Nantes carrots are a type of heirloom carrot that is named after the city of Nantes in France. They are long and slender, with a deep orange color.
-Chantenay Carrots: Chantenay carrots are another type of heirloom carrot, originating from the Chantenay region of France. They are shorter and stubbier than Nantes carrots, with a lighter orange color.
-Imperator Carrots: Imperator carrots are the most common type of carrot grown commercially. They are long and slender like Nantes carrots but have a brighter orange color.
-Danvers Carrots: Danvers carrots are an heirloom variety that originated in the town of Danvers, Massachusetts. They are intermediate in size between Nantes and Chantenay carrots and have a deep orange color.
Soil Requirements for Growing Carrots
Soil Requirements for Growing Carrots
Carrots are root vegetables, and as such, they require well-drained, loose soil in order to grow properly. The soil should also be high in organic matter, as carrots are heavy feeders. If your soil is lacking in organic matter, you can amend it with compost or manure before planting.
When it comes to pH, carrots prefer slightly acidic to neutral soil, with a pH of 6.0 to 7.0 being ideal. If you’re unsure of your soil’s pH, you can have it tested by your local cooperative extension office.
It’s time to plant once you’ve prepared your soil! Carrots can be directly seeded into the garden, or started indoors and then transplanted later. If you live in an area with a short growing season, starting seeds indoors is often the best option.
When to Plant Carrots
The best time to plant carrots is in the early spring, as soon as the ground can be worked. Carrots are a cool-weather crop and can tolerate frost, so you can plant them as early as two weeks before the last average frost date in your area. Sow carrot seeds directly in the garden; they do not transplant well. Use a garden hoe or your fingers to make shallow furrows in the soil about ¼ inch deep. Space the furrows 3 inches apart and sow the carrot seeds thinly along the length of each furrow. Cover lightly with soil and keep evenly moist until germination. Once the seedlings emerge, thin them to 3 inches apart.
How to Harvest Carrots
How to Harvest Carrots
Carrots are root vegetables that can be harvested from late spring through early fall, depending on the variety. The best time to harvest carrots is when they are about 8 inches long and 1 to 2 inches in diameter. Baby carrots can be harvested as soon as they are big enough to eat.
To harvest, loosen the soil around the carrot with a garden fork or trowel. Gently lift the carrot out of the ground, taking care not to damage the roots. Rinse off any dirt and debris, then trim the greens back to 1 inch above the root. For several weeks, carrots can be kept in a cold, dry environment.
Conclusion
Growing carrots in your garden is a great way to get fresh, healthy vegetables for your family. With a little bit of planning and care, you can grow carrots that are delicious and nutritious. We hope our tips have helped you get started on growing your own carrots. If you have any questions or need more information, be sure to check out our website or contact us for help.
5 Gardening Safety Tips That Will Save You A Headache
Gardening is therapeutic, enjoyable, and healthy. It’s also not without risk. Here are 5 gardening safety tips to help you get the most out of your garden while having fun and avoiding avoidable gardening mishaps.
Protecting Yourself from Bugs
There are a few things you can do to protect yourself from bugs while gardening:
Gardening Safety Tips
-Wear light-colored clothing. Bugs are attracted to dark colors, so wearing light-colored clothing will help keep them away.
-Apply bug repellent. Before you start gardening, apply a bug repellent to your skin and clothes. This will help keep bugs from biting or landing on you.
-Stay in the sun. Bugs are attracted to heat and darkness, so staying in the sun will help keep them away.
-Keep your garden clean. A tidy garden is less attractive to bugs than a messy one. So, make sure to keep your garden free of debris and weeds.
Tips to Prevent Injuries
Always warm up before starting any gardening activity. A simple five-minute stretch routine can help loosen your muscles and prepare your body for the work ahead.
Take breaks often, especially if you feel fatigued. It’s crucial to pay attention to your body’s needs and take breaks when needed.
Use the proper tools for the job. Make sure you have the right tools for the task at hand, and that they are in good working condition.
Wear protective gear when necessary. If you’ll be using power tools or working with poisonous plants, be sure to wear the appropriate safety gear.
Be aware of your surroundings. Watch out for tripping hazards, such as uneven ground or roots, and keep an eye out for dangerous wildlife.
Avoiding Poisonous Plants
There are a few poisonous plants that are commonly found in gardens and yards.
Among the most prevalent poisonous plants are:
• Foxglove (Digitalis purpurea) – all parts of the plant are poisonous, and ingestion can cause vomiting, diarrhea, convulsions, and heart problems.
• Hemlock (Conium maculatum) – all parts of the plant are poisonous, and ingestion can cause paralysis and death.
• Nightshade (Solanum nigrum) – all parts of the plant are poisonous, and ingestion can cause vomiting, diarrhea, confusion, and seizures.
• Rhubarb (Rheum rhabarbarum) – the leaves of the plant are poisonous, and ingestion can cause kidney damage.
To avoid contact with these plants, wear gloves when working in the garden and keep children and pets away from areas where these plants are growing.
Properly Using Tools for Gardening
When it comes to gardening, having the proper tools can make all the difference. Using the wrong tool for the job can not only make it more difficult to get the job done, but it can also be dangerous. Here are some tips on how to properly use tools for gardening:
always read the label before using any gardening tool, and follow the instructions carefully;
when using power tools, such as a lawnmower or hedge trimmer, be sure to wear appropriate safety gear, including eye and ear protection;
never leave tools lying around where children or pets could trip over them or injure themselves on them;
sharpen your gardening tools regularly to keep them in good condition and prevent injuries from dull blades;
when not in use, store your tools in a dry, safe place out of reach of children and animals.
Staying Safe with Children
When it comes to gardening, safety should always be a top priority—especially if you have young children. Luckily, following a few simple tips can help keep everyone safe while you enjoy your time outdoors.
Here are some gardening safety tips to keep in mind:
• Keep tools and chemicals out of reach. Store them in a shed or garage, and make sure they’re properly labeled.
• Be careful with power tools. Always follow the manufacturer’s instructions, and keep children away from areas where you’re using them.
• Wear protective gear when needed. This includes gloves, goggles, and sunscreen.
• Supervise children at all times. Explain the dangers of certain plants and insects, and teach them not to touch anything without permission.
By following these tips, you can help create a safe environment for everyone to enjoy.