Essential Tools for Home Gardening: A Guide to Equipping Your Garden
Leave a reply
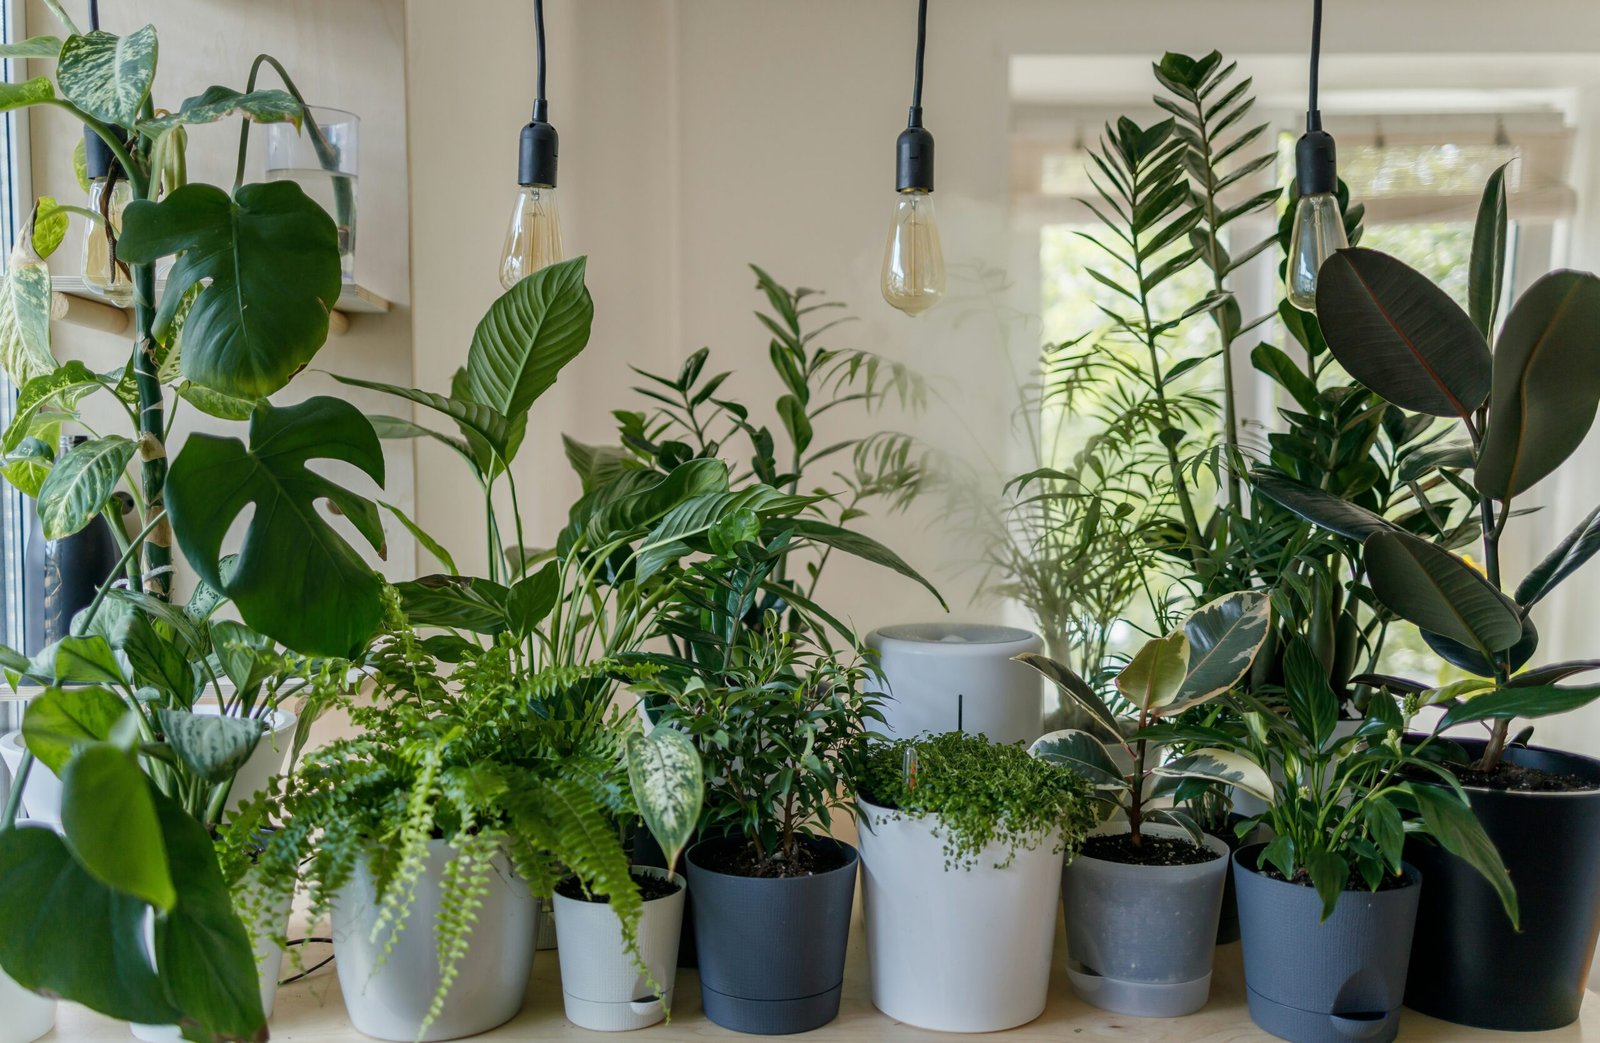
Gardening is a wonderful hobby that can be enjoyed by people of all ages. While many people choose to have a garden outside, there are also numerous benefits to gardening inside your house. In this blog post, we will explore some of the benefits of indoor gardening and how it can enhance your life.
One of the most significant benefits of indoor gardening is the improvement in air quality. Plants naturally absorb carbon dioxide and release oxygen through the process of photosynthesis. By having plants in your house, you can increase the oxygen levels and reduce the carbon dioxide levels, creating a healthier environment for you and your family.
Furthermore, plants can also help to remove toxins from the air. They act as natural air purifiers, absorbing harmful pollutants such as formaldehyde, benzene, and trichloroethylene. These toxins are commonly found in household items such as furniture, carpets, and cleaning products. By having indoor plants, you can effectively filter out these toxins and improve the overall air quality in your home.
Not only do plants remove toxins from the air, but they also release moisture into the atmosphere through a process called transpiration. This can help to increase humidity levels in dry indoor environments. Dry air can cause various health issues such as dry skin, irritated eyes, and respiratory problems. By having indoor plants, you can naturally increase the humidity in your home, creating a more comfortable and healthy living space.
Moreover, certain types of indoor plants have been found to have specific air-purifying properties. For example, the snake plant, also known as Sansevieria, is known for its ability to remove toxins like formaldehyde and benzene from the air. The peace lily, on the other hand, is effective in removing harmful substances like ammonia and xylene. By incorporating a variety of indoor plants with different air-purifying capabilities, you can create a comprehensive air filtration system within your home.
In addition to improving air quality, indoor plants can also have a positive impact on mental health. Research has shown that being around plants can reduce stress levels, improve mood, and increase feelings of calmness and relaxation. The presence of greenery indoors can create a soothing and peaceful atmosphere, which is especially beneficial for those living in urban areas with limited access to nature.
Overall, indoor gardening offers numerous benefits, and improved air quality is just one of them. By incorporating plants into your home, you can create a healthier and more enjoyable living environment for you and your loved ones.
Gardening has been proven to be a great way to reduce stress and promote relaxation. The act of tending to plants and watching them grow can be incredibly therapeutic. It allows you to focus on the present moment and forget about the stresses and worries of daily life.
In addition, the presence of plants in your house can have a calming effect on your mind and body. Studies have shown that being around nature can lower blood pressure, reduce anxiety, and improve overall mood. Indoor gardening provides you with a constant connection to nature, even when you are indoors.
Whether you are sowing seeds, watering plants, or simply admiring their beauty, gardening can be a form of meditation that brings peace and tranquility to your life.
Furthermore, gardening can also be a way to escape the digital world and reconnect with the natural world. In today’s fast-paced society, we are constantly bombarded with technology and screens. Taking the time to step outside and engage with the earth can be a refreshing break from the digital overload.
When you garden, you are not only nurturing plants but also nurturing yourself. It is a way to practice self-care and prioritize your mental well-being. The physical activity involved in gardening can also release endorphins, which are natural mood boosters.
Moreover, gardening can provide a sense of accomplishment and fulfillment. Watching your plants thrive and grow can give you a sense of pride and satisfaction. It is a reminder that with care and patience, beautiful things can flourish.
In conclusion, gardening is not just a hobby or a way to beautify your surroundings. It is a powerful tool for stress relief, relaxation, and overall well-being. So, next time you feel overwhelmed or in need of a break, step outside and get your hands dirty. Your mind and body will thank you.
Gardening in your house can have a positive impact on your mental well-being. Taking care of plants and watching them thrive can give you a sense of accomplishment and purpose. It provides you with a daily routine and a reason to get up and take care of something.
Furthermore, indoor gardening can also help to improve cognitive function. Studies have shown that being around plants can enhance memory, concentration, and attention span. The presence of greenery in your house can create a more stimulating and productive environment.
In addition, gardening can also be a creative outlet. It allows you to express yourself through the arrangement of plants, the choice of containers, and the design of your indoor garden. This creativity can boost your self-esteem and provide a sense of fulfillment.
Moreover, gardening has been found to reduce stress and anxiety levels. The act of tending to plants and being in nature has a calming effect on the mind and body. It can help to lower cortisol levels, which is known as the stress hormone, and promote the release of endorphins, which are natural mood boosters.
Additionally, indoor gardening can provide a sense of connection to nature, especially for those who live in urban areas with limited access to green spaces. Bringing nature indoors can create a sense of tranquility and serenity, making your home a peaceful sanctuary.
Furthermore, gardening can also be a form of mindfulness practice. As you engage in the process of planting, watering, and nurturing your plants, you can fully immerse yourself in the present moment. This can help to reduce racing thoughts and promote a sense of calm and relaxation.
Lastly, indoor gardening can also have social benefits. It can be a shared activity that brings families and friends together. You can involve your loved ones in the process, from choosing the plants to caring for them. This can strengthen bonds and create lasting memories.
Indoor gardening can also have numerous benefits for your physical health. It can encourage you to be more active and engage in physical activity. Whether it is watering plants, pruning, or repotting, gardening requires movement and can help you stay fit.
In addition, having plants in your house can also improve the humidity levels. Plants naturally release moisture into the air through a process called transpiration. This can help to prevent dry skin, irritated eyes, and respiratory problems that are often associated with dry indoor environments.
Furthermore, indoor gardening can also provide you with access to fresh herbs, fruits, and vegetables. You can grow your own organic produce right in your house, ensuring that you have a constant supply of nutritious and delicious food.
When you have fresh herbs at your fingertips, you can enhance the flavors of your meals and experiment with new recipes. Imagine plucking a handful of fresh basil leaves from your indoor herb garden to make a homemade pesto sauce or garnish a Caprese salad. Not only will your dishes taste better, but you will also benefit from the nutritional value of the herbs.
Similarly, growing your own fruits and vegetables indoors allows you to enjoy the freshness and taste of homegrown produce. Imagine biting into a juicy, ripe tomato that you nurtured from a tiny seedling. The satisfaction of knowing exactly where your food comes from and the lack of harmful pesticides and chemicals can give you peace of mind and contribute to your overall well-being.
Moreover, indoor gardening can also be a therapeutic activity that promotes relaxation and reduces stress. The act of tending to plants, watching them grow, and caring for their needs can be incredibly rewarding and calming. It provides a sense of purpose and accomplishment, allowing you to disconnect from the demands of daily life and find solace in nature.
In summary, indoor gardening offers a multitude of physical health benefits. From increased physical activity to improved humidity levels and access to fresh, nutritious food, it is a holistic approach to enhancing your well-being. So why not bring the beauty of nature indoors and start your own indoor garden today?
In today’s fast-paced and technology-driven world, it can be easy to lose touch with nature. Indoor gardening provides you with an opportunity to reconnect with the natural world and bring a piece of it into your house.
By surrounding yourself with plants, you can create a calming and soothing environment that reminds you of the beauty and serenity of nature. Indoor gardens can be a refuge from the hustle and bustle of everyday life, allowing you to find peace and tranquility.
In addition, gardening can also help to instill a sense of responsibility and respect for the environment. It reminds us of the importance of taking care of our planet and encourages us to live more sustainably.
When you engage in indoor gardening, you become more attuned to the rhythms of nature. You learn to observe and understand the needs of different plants, such as their watering and sunlight requirements. This process of nurturing and tending to plants can be incredibly rewarding, as you witness their growth and development over time.
Furthermore, indoor gardening allows you to experience the wonders of nature up close. You can marvel at the intricate patterns of a flower’s petals, the delicate veins of a leaf, or the vibrant colors of a ripe fruit. These small details that often go unnoticed in our busy lives suddenly become a source of awe and inspiration.
Indoor gardening also offers a unique opportunity to connect with the seasons. As you care for your plants, you become aware of the changes in temperature, humidity, and daylight that affect their growth. You can adapt your gardening practices accordingly, ensuring that your plants thrive in each season.
Moreover, indoor gardening provides a sense of continuity and stability. In a world where everything seems to be constantly changing, tending to your indoor garden can be a grounding and therapeutic activity. It allows you to create a sense of stability and routine as you care for your plants day after day.
Overall, indoor gardening offers a multitude of benefits beyond just adding greenery to your home. It reconnects you with nature, fosters a sense of responsibility towards the environment, and provides a source of beauty, inspiration, and stability in your life. So why not embark on this journey and create your own indoor garden today?

Before embarking on the journey of creating a roof garden, it is essential to carefully plan and design your space. Start by assessing the structural integrity of your roof to ensure it can support the weight of a garden. Consult with a professional architect or structural engineer to determine if any reinforcements are needed.
Next, consider the purpose and functionality of your roof garden. Are you looking to create a tranquil oasis for relaxation, a vibrant space for entertaining, or a productive area for growing your own fruits and vegetables? Understanding your goals will help guide the design process.
Take into account the climate and weather conditions of your region. Different plants thrive in different environments, so select vegetation that is well-suited to your area. Consider factors such as sunlight exposure, wind patterns, and rainfall levels when choosing your plants.
Another important aspect to consider is the layout and structure of your roof garden. Determine if you want raised beds, containers, or a combination of both. Incorporate seating areas, pathways, and focal points to create a visually appealing and functional space.
Additionally, think about the irrigation system for your roof garden. Since the roof is not directly exposed to rainfall, you will need to provide a reliable water source. Consider installing a drip irrigation system or using self-watering containers to ensure your plants receive adequate hydration.
Lastly, don’t forget to check local building codes and regulations before starting your roof garden project. Some areas may have restrictions on the height or size of structures, as well as requirements for safety measures such as railings or barriers.
By carefully planning and designing your roof garden, you can create a space that not only meets your needs but also enhances the overall aesthetic and functionality of your home.
Another important factor to consider when assessing the feasibility of a roof garden is the drainage system. A proper drainage system is crucial to prevent water from accumulating on the roof and causing damage. Make sure that your roof has a functional and efficient drainage system in place. If not, you may need to install one before proceeding with the garden project.
The type of material used for your roof is also a significant consideration. Some materials, such as metal or concrete, are more suitable for supporting the weight of a garden compared to others. Consult with a professional to determine if your roof material is suitable for a roof garden or if any modifications need to be made.
Before starting any construction or modification on your roof, it is essential to check local regulations and obtain any necessary permits. Some areas may have specific guidelines or restrictions when it comes to roof gardens, so it’s crucial to comply with these regulations to avoid any legal issues.
Lastly, consider the cost implications of creating a roof garden. This project may require an initial investment for materials, plants, and professional services. Assess your budget and determine if you can afford the expenses associated with a roof garden. Additionally, consider the long-term maintenance costs that may be required to keep the garden thriving.
Consider the irrigation and drainage system for your rooftop garden. Since rooftop gardens are exposed to direct sunlight and high temperatures, it is crucial to have a proper irrigation system in place to ensure that your plants receive adequate water. Drip irrigation or a self-watering system can be effective options for rooftop gardens. Additionally, you must ensure that your garden has proper drainage to prevent water from pooling and causing damage to your roof.
Before proceeding with the construction of your rooftop garden, it is essential to assess the structural integrity of your roof. Consult with a structural engineer or a professional roofing contractor to determine if your roof can support the additional weight of the garden, soil, containers, and any other features you plan to include. Reinforcements may be necessary to ensure the safety and stability of your rooftop garden.
Consider how you will access your rooftop garden and ensure that it is safe for regular use. If there is no existing access, you may need to install a staircase or a ladder. It is essential to prioritize safety by installing handrails, non-slip surfaces, and adequate lighting to prevent accidents. Additionally, consider the privacy of your rooftop garden by adding screens, trellises, or tall plants to create a secluded and intimate space.
When planning your rooftop garden, consider the environmental impact of your choices. Opt for sustainable and eco-friendly practices such as using organic fertilizers, composting, and choosing native plants that require less water and maintenance. Incorporate features like a rainwater harvesting system to collect and reuse rainwater for irrigation, reducing your reliance on municipal water sources.
Before starting the construction of your rooftop garden, check with your local authorities to understand any permits or regulations that may apply. Some cities have specific guidelines for rooftop gardens, including restrictions on the height of structures and the types of plants allowed. Complying with these regulations will ensure that your rooftop garden is legal and safe.
By carefully considering these factors and planning your rooftop garden, you can create a beautiful and functional outdoor space that not only enhances the aesthetics of your building but also provides a peaceful retreat in the midst of the urban environment.
Once your roof garden is installed, it’s important to establish a regular maintenance routine to ensure its health and longevity. Here are some key maintenance tasks to consider:
By following these maintenance practices, you can ensure that your roof garden remains vibrant and thriving throughout the year.
Once your roof garden is installed, it requires regular maintenance to thrive. Here are some essential maintenance tasks:
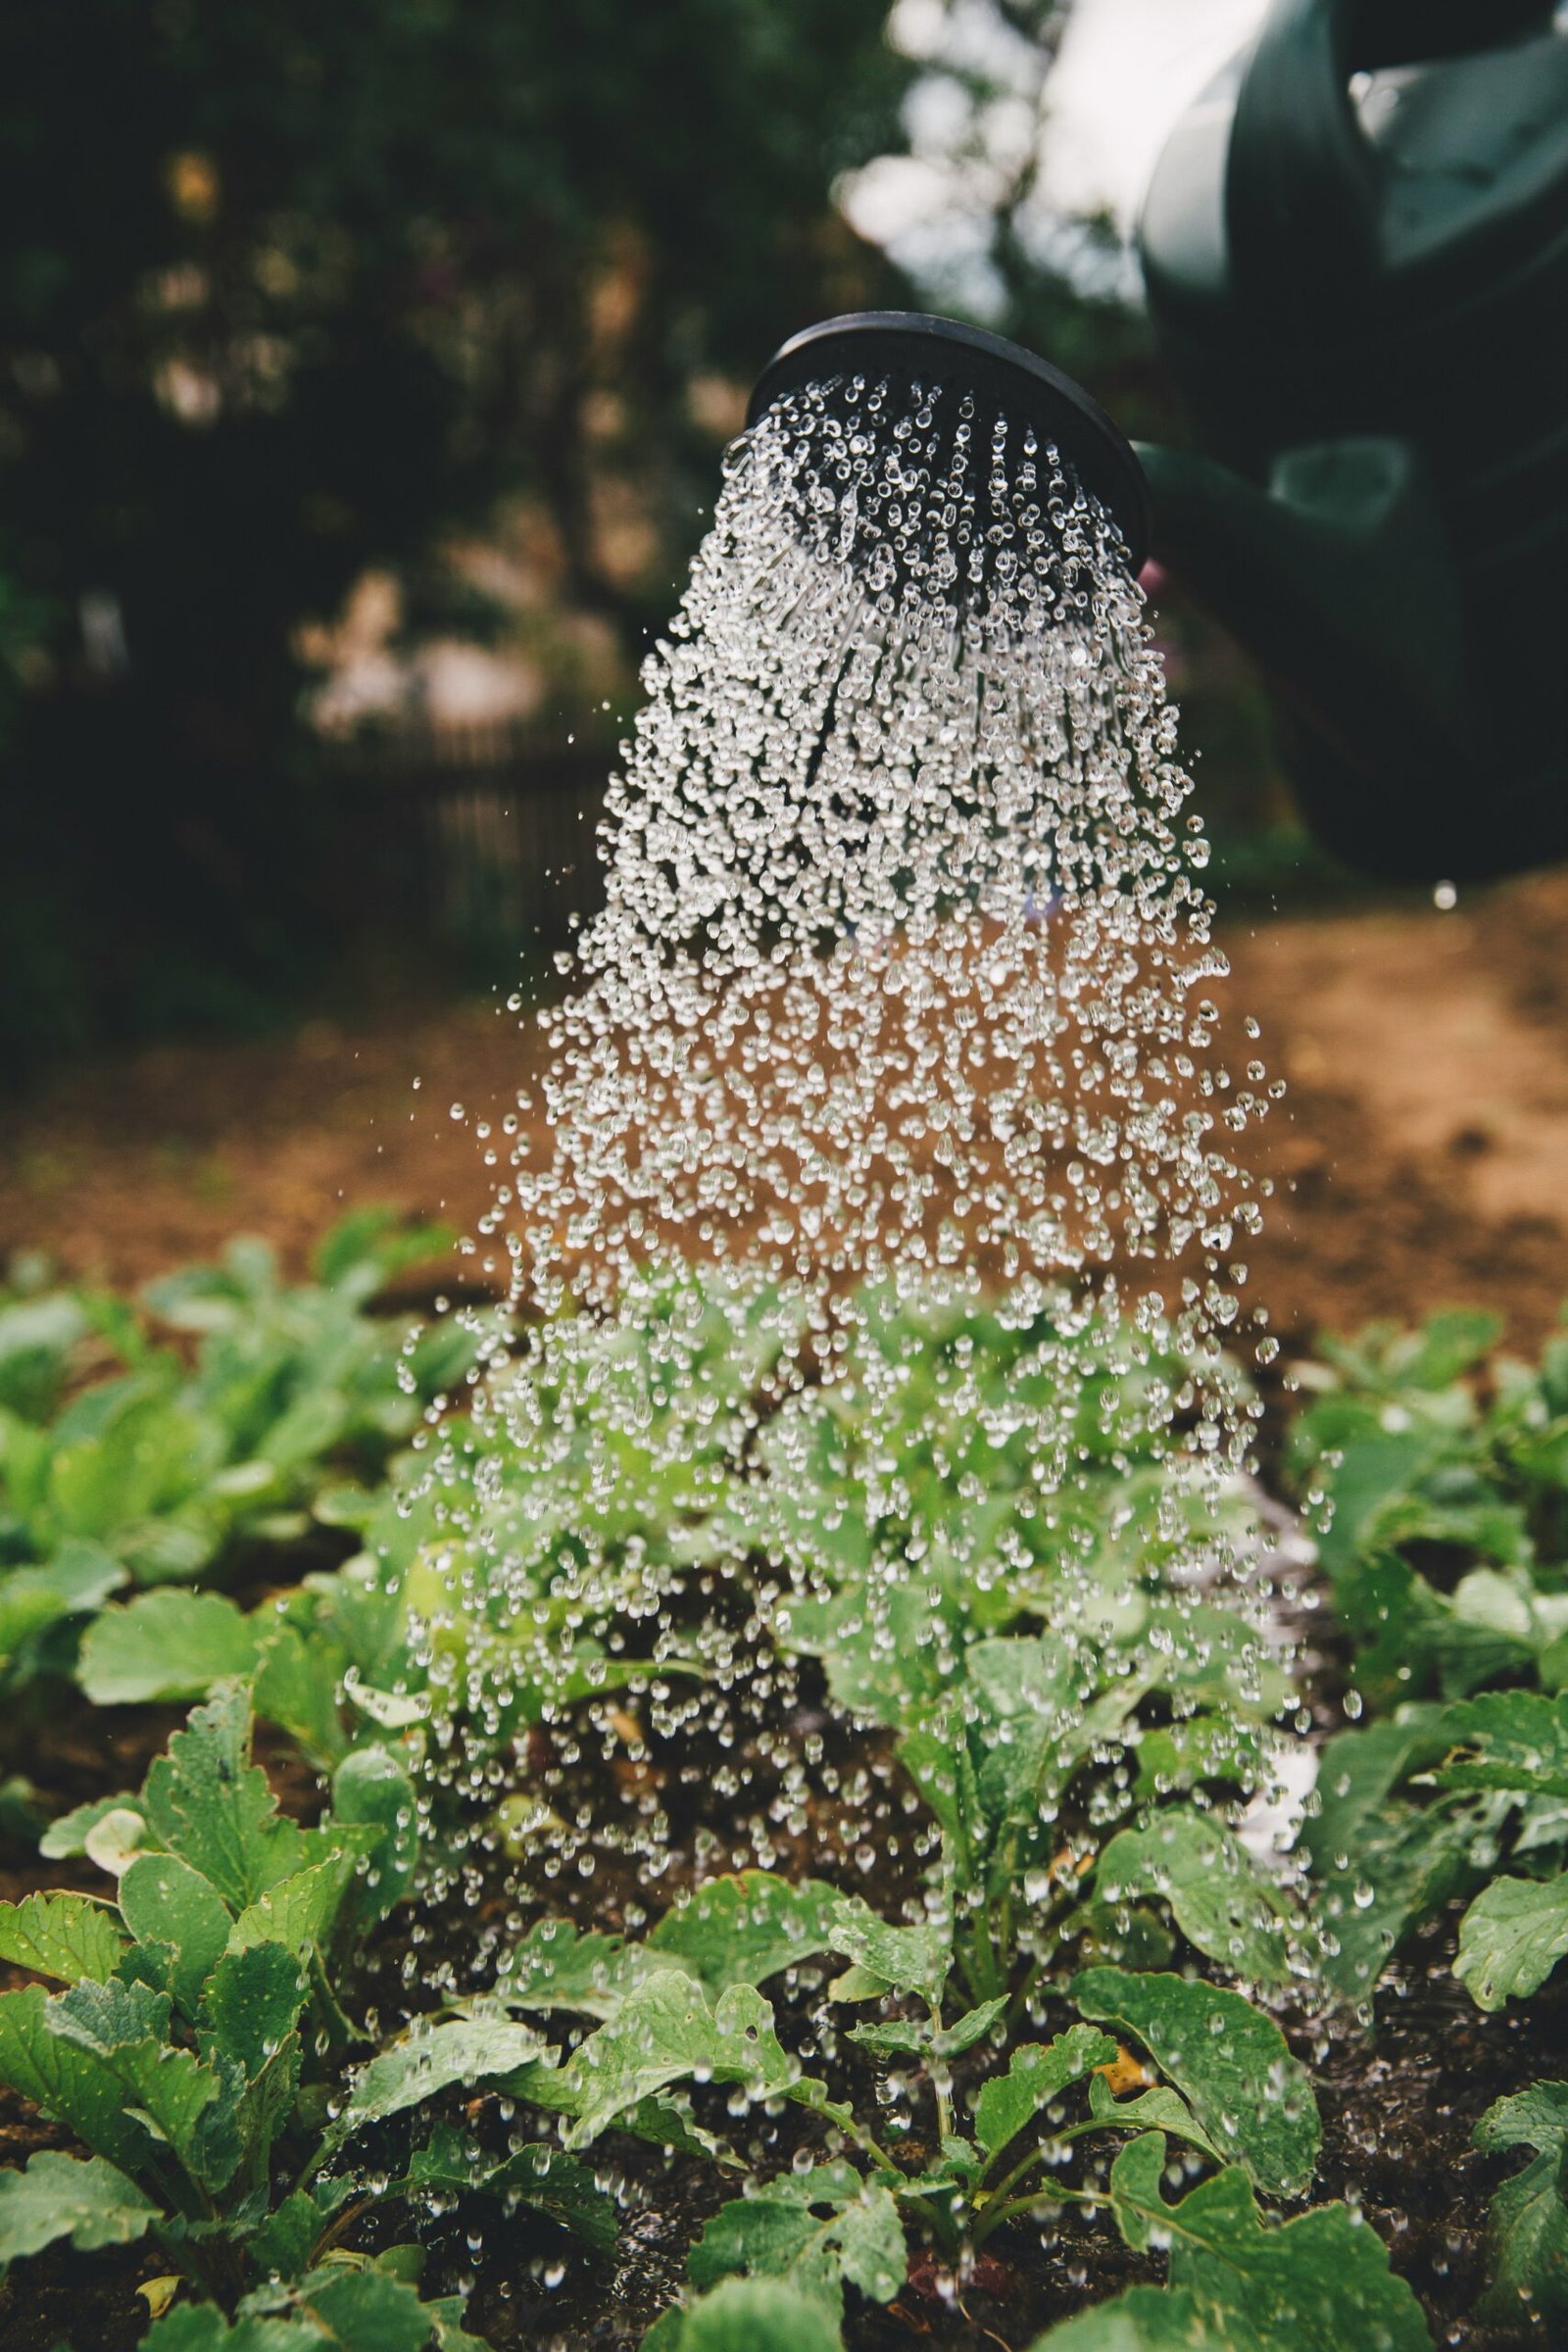
Monitor the moisture levels of your roof garden and water accordingly. Rooftop gardens tend to dry out more quickly than traditional gardens, so regular watering is essential. Consider installing an irrigation system for efficient watering.
During the hot summer months, it is especially important to water your roof garden frequently. The intense heat can quickly evaporate moisture from the soil, leaving your plants thirsty and vulnerable to wilting. Water your garden early in the morning or late in the evening to minimize evaporation and ensure that the water reaches the roots of the plants.
It is also crucial to pay attention to the specific water requirements of different plants in your roof garden. Some plants may need more water than others, so adjust your watering schedule accordingly. Be careful not to overwater, as this can lead to root rot and other water-related issues.
Regularly inspect your roof garden for weeds and remove them promptly to prevent competition for nutrients and space. Weeds can quickly take over a roof garden if left unchecked, so it is important to stay vigilant.
In addition to weeding, pruning is another essential maintenance task for your roof garden. Pruning helps to control the size and shape of your plants, promotes healthy growth, and encourages the development of new blooms and fruits. Remove any dead or damaged branches, and trim back overgrown foliage to keep your roof garden looking neat and tidy.
Feed your plants with a balanced organic fertilizer to provide essential nutrients. Organic fertilizers are derived from natural sources and are safer for the environment compared to synthetic fertilizers. They release nutrients slowly, ensuring a steady supply to your plants over time.
When fertilizing your roof garden, it is important to follow the instructions on the fertilizer packaging. Applying too much fertilizer can lead to nutrient imbalances and damage to your plants. It is also a good idea to test the pH levels of your soil periodically to ensure that it remains within the optimal range for your plants.
Monitor your roof garden for pests and take appropriate measures to control them. Pests such as aphids, snails, and slugs can wreak havoc on your plants if left unchecked.
There are several natural pest control methods that you can employ to minimize the use of chemicals in your roof garden. For example, you can introduce beneficial insects such as ladybugs and lacewings, which feed on common garden pests. You can also use physical barriers like netting or row covers to protect your plants from pests.
If natural methods are not effective, you may need to resort to organic pesticides. These are derived from natural substances and are less harmful to the environment compared to conventional pesticides. However, it is important to use them sparingly and only when absolutely necessary.

The lipstick plant is a visually striking addition to any indoor space. Its vibrant flowers, which can range in color from bright red to pink or orange, add a pop of color that instantly brightens up a room. The trailing vines of the lipstick plant make it an ideal choice for hanging baskets or as a trailing plant on a shelf or mantel.One of the reasons why the lipstick plant is so popular is its ability to thrive in low-light conditions. This makes it an excellent choice for those who have limited access to natural sunlight, such as apartment dwellers or those who live in homes with small windows. The lipstick plant can tolerate a wide range of light conditions, from bright, indirect light to partial shade. However, it is important to note that too much direct sunlight can cause the leaves to burn, so it is best to place the plant in a location where it receives filtered or indirect light.In addition to its adaptability to different light conditions, the lipstick plant is also relatively easy to care for. It prefers well-draining soil and should be watered when the top inch of soil feels dry to the touch. Overwatering can lead to root rot, so it is important to avoid letting the plant sit in water. A regular feeding with a balanced fertilizer during the growing season will help promote healthy growth and abundant flowering.The lipstick plant is a tropical plant, so it thrives in warm and humid conditions. It is best to keep the plant in a room with a temperature range of 60-75 degrees Fahrenheit (15-24 degrees Celsius). If the air in your home is dry, you can increase humidity levels by placing the plant on a tray filled with water and pebbles or by using a humidifier.Propagation of the lipstick plant can be done through stem cuttings. Simply take a 4-6 inch cutting from a healthy stem, remove the lower leaves, and place the cutting in a container filled with moist potting soil. Keep the soil evenly moist and in a warm location, and roots should develop within a few weeks.Overall, the lipstick plant is a beautiful and low-maintenance houseplant that adds a touch of tropical elegance to any indoor space. Whether you choose to hang it in a basket or let it trail down from a shelf, the vibrant flowers and trailing vines of the lipstick plant are sure to bring joy and beauty to your home.
Like any other houseplant, lipstick plants are susceptible to pests and diseases. Common pests that can affect these plants include aphids, spider mites, and mealybugs. Regularly inspect the foliage for any signs of infestation and treat them promptly with insecticidal soap or neem oil.
As for diseases, overwatering can lead to root rot, which can cause the plant to wilt and eventually die. To prevent this, ensure proper drainage in the pot and avoid overwatering. Fungal diseases such as powdery mildew can also occur if the plant is kept in a humid environment with poor air circulation. To prevent this, provide good ventilation and avoid overcrowding the plant.
Lipstick plants are vining plants that naturally trail or climb. Providing them with a support structure, such as a trellis or moss pole, can help them grow upright and prevent them from becoming unruly. Gently tie the vines to the support using soft plant ties or twine to guide their growth.
During the winter months, lipstick plants may enter a period of dormancy where their growth slows down. During this time, reduce watering and fertilization to allow the plant to rest. However, still ensure that the plant receives adequate light and maintain a stable temperature and humidity level.
There are several popular varieties of lipstick plants, each with its own unique characteristics. Some common varieties include:
These are just a few examples, and there are many more varieties available to choose from, each with its own unique beauty.
Overall, growing and caring for lipstick plants can be a rewarding experience. With the right conditions and proper care, these tropical beauties can thrive and add a touch of vibrant color to any indoor space.
Aside from their beauty, lipstick plants offer a range of benefits that make them a great addition to any indoor space. Here are some of the benefits of having a lipstick plant:
Lipstick plants, like many other houseplants, have the ability to purify the air by removing toxins and pollutants. They can help improve indoor air quality, making them especially beneficial for those with respiratory conditions or allergies. The leaves of the lipstick plant act as natural filters, absorbing harmful substances such as formaldehyde and benzene that are commonly found in indoor environments. This not only creates a healthier atmosphere but also reduces the risk of respiratory issues and other health problems caused by poor air quality.
Studies have shown that being around plants can help reduce stress and promote a sense of calm. The presence of a lipstick plant in your home or office can create a soothing environment and contribute to your overall well-being. The vibrant colors and lush foliage of the lipstick plant can evoke feelings of tranquility and relaxation, providing a natural escape from the stresses of daily life. Additionally, caring for plants has been found to have therapeutic effects, allowing individuals to focus on nurturing and tending to their green companions as a form of mindfulness and stress relief.
The vibrant flowers and trailing vines of the lipstick plant make it a beautiful natural décor element. Whether placed in a hanging basket or on a shelf, it adds a touch of color and liveliness to any space. The unique shape and structure of the lipstick plant’s flowers, resembling a tube of lipstick, make it an intriguing and eye-catching addition to any room. The trailing vines can be trained to cascade gracefully over shelves or hang from baskets, creating an elegant and visually appealing display. The versatility of the lipstick plant’s appearance allows it to complement a variety of interior design styles, from modern to bohemian.
Lipstick plants are relatively low-maintenance and easy to care for, making them suitable for both experienced and novice plant owners. With the right conditions and regular care, they can thrive and continue to beautify your space for years to come. These plants prefer bright, indirect light and moderate humidity. They should be watered regularly, allowing the top inch of soil to dry out between waterings. Lipstick plants are also tolerant of a wide range of temperatures, making them adaptable to different indoor environments. Additionally, they can be propagated easily through stem cuttings, allowing you to expand your collection or share the beauty of the lipstick plant with others.
While lipstick plants are generally easy to care for, they can still face a few common issues. Here are some of the problems you may encounter and how to solve them:
If the leaves of your lipstick plant are turning yellow, it may be a sign of overwatering. Check the moisture level of the soil and adjust your watering schedule accordingly. Ensure that the pot has good drainage to prevent water from sitting in the bottom. Additionally, consider the temperature and humidity levels in the environment. High humidity combined with excessive watering can lead to yellowing leaves. If this is the case, you may need to reduce the frequency of watering or provide better ventilation for the plant.
Wilting can be caused by underwatering or exposure to extreme temperatures. Check the soil moisture and adjust your watering routine if needed. It’s important to strike a balance between not overwatering and not underwatering the plant. If the soil feels dry, water the plant thoroughly until the water drains out from the bottom of the pot. On the other hand, if the soil feels consistently wet, you may need to reduce the amount of water you give to the plant. In addition, move the plant to a more suitable location away from drafts or direct heat sources, as these can cause stress and wilting.
If your lipstick plant is not producing blooms, it may be due to insufficient light or improper fertilization. Ensure that the plant is receiving enough bright, indirect light. Lipstick plants thrive in bright, but not direct, sunlight. If the plant is in a low-light area, consider moving it to a spot where it can receive more light. Additionally, adjust the fertilization schedule to provide the necessary nutrients. Use a balanced, water-soluble fertilizer specifically formulated for flowering plants. Apply the fertilizer according to the package instructions, being careful not to over-fertilize as this can lead to leaf burn and other issues.
Like many houseplants, lipstick plants can be susceptible to pests such as spider mites, mealybugs, and aphids. Regularly inspect the plant for any signs of infestation, such as webbing, sticky residue, or tiny insects on the leaves. If you notice any pests, treat the plant with an appropriate insecticide. There are various options available, including organic and chemical-based insecticides. Follow the instructions on the product label carefully and apply the treatment as directed. Isolating the affected plant from other plants can help prevent the spread of pests and minimize the chance of reinfestation.
By being aware of these common issues and knowing how to solve them, you can ensure that your lipstick plant remains healthy and vibrant. With proper care and attention, your lipstick plant will continue to bring beauty and joy to your home or garden.
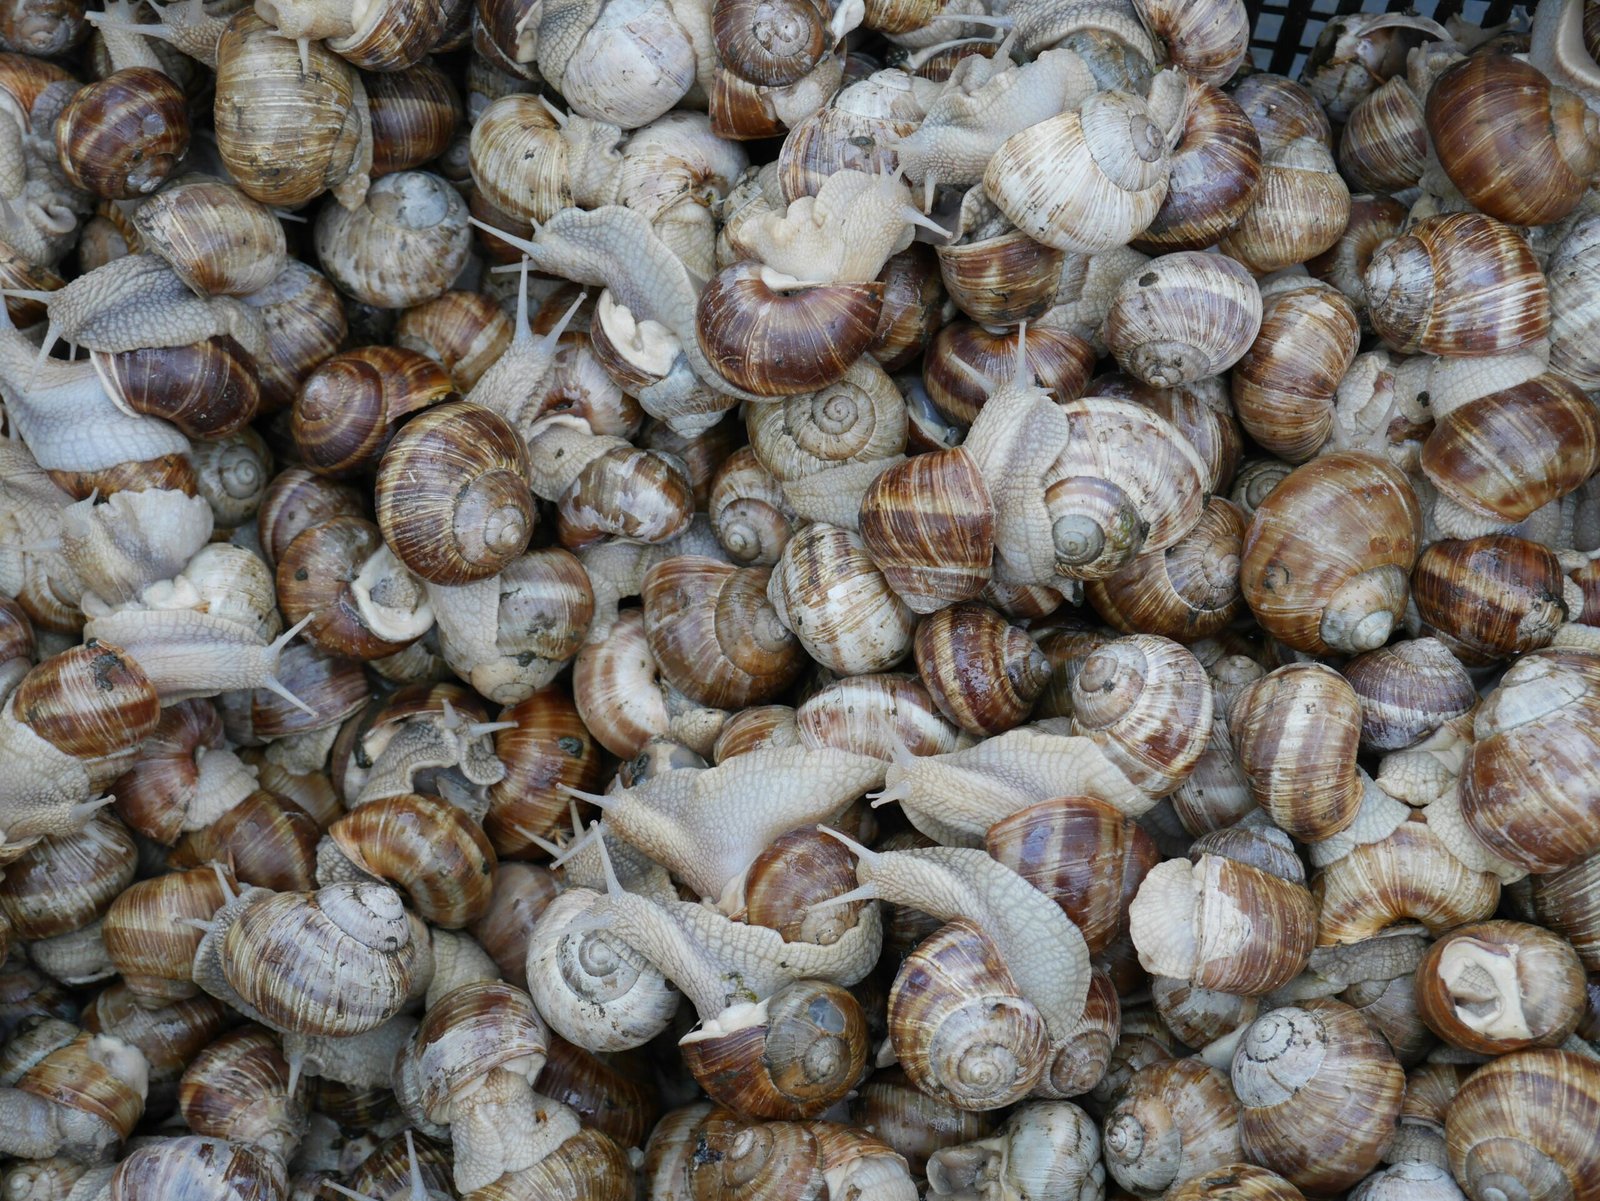
Snails are often seen as garden pests because they have a voracious appetite for plants. They can quickly devour the leaves and stems of various plants, leaving behind a trail of destruction. Gardeners have been known to go to great lengths to protect their plants from these slimy creatures, using barriers, traps, and even chemical pesticides.
However, some experts argue that snails can actually have benefits for gardens. One of the main arguments in favor of snails is their role as decomposers. Snails feed on decaying organic matter, such as dead leaves and plant debris. By consuming this material, they help break it down into smaller particles, which can then be absorbed by the soil. This process contributes to the overall health and fertility of the garden soil.
In addition to their role as decomposers, snails also play a part in the nutrient cycle of a garden. When they consume plant matter, they excrete waste that is rich in nitrogen, phosphorus, and potassium – three essential nutrients for plant growth. As the snail waste decomposes, these nutrients are released into the soil, providing a natural fertilizer for the surrounding plants.
Furthermore, snails can also serve as a food source for other creatures in the garden ecosystem. Birds, frogs, and certain insects, such as ground beetles and fireflies, feed on snails, helping to keep their populations in check. This natural predation can prevent snail outbreaks and reduce the damage they cause to plants.
It’s important to note that not all snails are harmful to gardens. Some species, such as the garden snail (Helix aspersa), are more likely to feed on decaying matter and have a lesser appetite for live plants. These snails can actually be beneficial in maintaining a healthy balance in the garden ecosystem.
In conclusion, while snails can indeed cause damage to plants, they also have important roles to play in the garden. Their role as decomposers and nutrient recyclers can contribute to the overall health of the soil, while also providing food for other garden inhabitants. Therefore, it’s important to consider the broader ecological context when determining whether snails are good or bad for gardens.
While snails can sometimes be seen as pests due to their ability to damage plants, they also provide several benefits to the garden:
As mentioned earlier, snails help break down organic matter, which contributes to the nutrient cycling process. By consuming dead plant material, snails release valuable nutrients back into the soil, making them available for other plants to use.
Snails burrow into the soil, creating small tunnels as they move. These tunnels help to aerate the soil, improving its structure and allowing for better water drainage. This can be particularly beneficial in compacted or heavy clay soils.
Snails have the ability to disperse seeds as they move around the garden. This can help with the natural spread of plants and contribute to the overall biodiversity of your garden.
Snails are sensitive to changes in environmental conditions, including soil health. If you notice an abundance of snails in your garden, it can be an indication that the soil is rich in organic matter and moisture. This can be a positive sign, as it suggests that your garden is in good condition.
However, it is important to note that while snails can provide these benefits, they can also cause damage to plants if their population becomes too large. It is essential to maintain a balance in the garden ecosystem to ensure that the benefits of snails are maximized while minimizing any negative impact they may have.
One way to control snail populations is by creating barriers around vulnerable plants, such as using copper tape or diatomaceous earth. These barriers can help prevent snails from reaching the plants and causing damage. Additionally, encouraging natural predators of snails, such as birds or frogs, can also help keep their population in check.
Overall, snails play a complex role in the garden ecosystem. While they can be seen as pests, they also provide important benefits that contribute to the overall health and biodiversity of the garden. By understanding and managing their population, gardeners can harness the positive aspects of snails while minimizing any potential negative impact.
In addition to physical methods of snail control, implementing certain cultural practices in your garden can help reduce the snail population. One such practice is proper watering. Snails thrive in moist environments, so by watering your plants in the morning and avoiding overhead watering, you can create a less favorable habitat for snails.
Another cultural practice to consider is mulching. While mulch can provide many benefits to your garden, it can also create a hiding place for snails. To minimize their presence, choose mulch materials that are less attractive to snails, such as straw or gravel, and regularly inspect and remove any snails that may be hiding beneath the mulch.
If the snail population in your garden becomes overwhelming, you may consider introducing biological controls. These are organisms that naturally prey on snails and can help keep their population in check. One example of a biological control is the use of nematodes, microscopic worms that infect and kill snails. Nematodes can be purchased and applied to your garden, providing a long-term solution to snail infestations.
It’s important to note that when implementing biological controls, it’s crucial to choose species that are native to your area and will not harm other beneficial organisms in your garden.
Maintaining a well-groomed garden can also aid in snail control. By regularly removing weeds, fallen leaves, and other debris, you eliminate potential hiding places for snails. Additionally, keeping your garden free of excess vegetation and clutter can deter snails from taking up residence.
In conclusion, managing snails in the garden requires a combination of strategies. By employing handpicking, creating barriers, encouraging natural predators, using natural repellents, implementing cultural practices, introducing biological controls, and maintaining a well-groomed garden, you can effectively control the snail population and protect your plants from damage.

Having a garden can be a source of joy and relaxation, but it can also become a challenge when you have cats that love to explore and dig. Cats can cause damage to plants, leave behind unpleasant surprises, and even pose a threat to wildlife. If you’re wondering how to keep your cats out of the garden, there are several effective and humane methods you can try. In this article, we’ll explore some of the most practical and cat-friendly solutions to help you maintain a beautiful garden while keeping your feline friends safe and happy.
One of the first steps you can take to deter cats from entering your garden is to create physical barriers. This can be done by installing a fence around your garden or using chicken wire to create a barrier around individual plants or flower beds. Make sure the fence is tall enough to prevent cats from jumping over and bury the bottom part of the fence a few inches into the ground to prevent them from digging underneath. Additionally, you can use prickly plants such as rosemary or holly bushes around the perimeter of your garden, as cats dislike the texture of these plants and are less likely to try and cross them.
Another effective method to keep cats out of your garden is to provide them with an alternative space to play and explore. Cats are naturally curious animals, and if they don’t have an outlet for their energy, they are more likely to venture into your garden. Consider creating a designated area in your yard where you can set up a sandbox or a scratching post for your cats. This will give them a space of their own where they can dig and play, reducing their desire to explore your garden.
In addition to physical barriers and providing an alternative space, you can also use scent deterrents to keep cats away from your garden. Cats have a strong sense of smell, and there are certain scents that they find unpleasant. For example, citrus fruits such as oranges or lemons have a scent that cats dislike. You can place orange peels or lemon slices around your garden to create a natural barrier. Another option is to use commercial cat repellents that contain natural ingredients such as citronella or lavender. These repellents can be sprayed on the plants or applied to specific areas of your garden to discourage cats from entering.
Finally, it’s important to remember that cats are creatures of habit, and they are more likely to avoid areas that are noisy or unpredictable. Consider using motion-activated sprinklers or wind chimes in your garden to startle cats and deter them from entering. You can also place aluminum foil or chicken wire on the ground, as cats dislike the texture and will avoid walking on it. By creating an environment that is uncomfortable or unpredictable for cats, you can effectively keep them out of your garden.
In conclusion, keeping cats out of your garden doesn’t have to be a daunting task. By implementing a combination of physical barriers, providing an alternative space, using scent deterrents, and creating an uncomfortable environment, you can enjoy a beautiful garden while ensuring the safety and happiness of your feline friends.
One of the best ways to keep your cats out of the garden is to provide them with an alternative space where they can play, explore, and relax. By creating a dedicated area for your cats, you can redirect their attention away from your garden.
Consider setting up a designated cat-friendly zone in your yard or even indoors. This can be a section of your garden with soft soil or sand where your cats can dig and scratch to their heart’s content. You can also add cat-friendly plants and toys to make the space more enticing for them.
When choosing a location for the dedicated space, keep in mind that cats enjoy privacy and a sense of security. Look for an area that is secluded and away from high-traffic areas. This will ensure that your cats feel comfortable and safe while they are in their designated zone.
In addition to providing a space for your cats to play, it’s important to consider their other needs as well. Make sure the area has access to fresh water and shade, especially if it is outdoors. Cats also enjoy perching and climbing, so consider adding a cat tree or shelves for them to explore.
If you have multiple cats, it’s a good idea to create separate spaces for each of them. This will prevent any territorial disputes and ensure that each cat has their own area to enjoy. You can use fencing or other barriers to create individual zones within the larger dedicated space.
By creating a dedicated space for your cats, you are not only keeping them out of your garden but also providing them with a place where they can engage in natural behaviors and fulfill their instincts. This will not only make your cats happier and healthier but also help to preserve the beauty of your garden.
There are various cat deterrents available on the market that can help keep your cats away from your garden. These deterrents work by emitting sounds, smells, or sensations that cats find unpleasant.
One popular cat deterrent is the ultrasonic device. These devices emit high-frequency sounds that are inaudible to humans but can be irritating to cats. The sound frequency is specifically designed to target the sensitive hearing of cats, making it uncomfortable for them to stay in the area. Ultrasonic devices are easy to install and can cover a wide range, making them suitable for large gardens.
Another effective option to deter cats from your garden is motion-activated sprinklers. These sprinklers are equipped with sensors that detect the presence of cats and immediately release a sudden burst of water. The unexpected spray startles the cats and discourages them from entering your garden. Motion-activated sprinklers are not only effective in keeping cats away but also help in conserving water as they only activate when necessary.
If you prefer a more natural approach, you can try using citrus peels, coffee grounds, or vinegar as cat deterrents. Cats dislike the strong smells of these substances and are likely to avoid areas where they are present. Simply scatter citrus peels or coffee grounds around your garden or spray vinegar in strategic locations to create a barrier that cats will find unpleasant.
It is important to note that while these cat deterrents can be effective, they may not work for all cats. Some cats may become accustomed to the deterrents over time or may not be bothered by certain smells or sounds. Therefore, it may be necessary to try different deterrents or combine multiple methods to find what works best for your specific situation.
Installing physical barriers can be an effective way to keep your cats out of the garden. There are several types of barriers you can consider:
– Fencing: Install a cat-proof fence around your garden to prevent your cats from entering. Make sure the fence is tall enough and has no gaps that your cats can squeeze through. A sturdy fence made of materials like wood or metal can provide a physical barrier that cats are unlikely to climb over. Additionally, you can consider adding a cat-proof gate to further enhance the security of your garden.
– Netting: Use netting or mesh to cover your garden beds or specific areas where you don’t want your cats to go. This can help protect your plants while still allowing sunlight and rain to reach them. Ensure that the netting is securely fastened to prevent cats from pushing it aside or getting entangled in it. Consider using a fine mesh that cats cannot easily claw or bite through.
– Spiky surfaces: Cats dislike walking on spiky surfaces, so you can place materials like chicken wire, prickly twigs, or plastic carpet runners with the spikes facing up in areas where you want to deter them. This will make it uncomfortable for cats to walk or sit on those surfaces, discouraging them from entering your garden. However, be mindful of the safety of other animals or children who may come into contact with these spiky materials.
– Motion-activated sprinklers: Another option to consider is installing motion-activated sprinklers in your garden. These sprinklers are designed to detect the presence of cats or other animals and spray a burst of water to deter them. The sudden spray of water can startle cats and discourage them from entering your garden. This can be particularly effective if your cats are persistent and other methods have not been successful.
By implementing these physical barriers, you can create a cat-free zone in your garden, allowing your plants to thrive without the risk of being trampled or used as a litter box. Remember to regularly inspect and maintain these barriers to ensure their effectiveness and make any necessary adjustments as needed.
Cats are curious creatures, and they often venture into the garden because they’re looking for stimulation and entertainment. By providing them with plenty of enrichment and entertainment indoors, you can reduce their desire to explore the garden.
Make sure your cats have access to toys that keep them mentally and physically engaged. Puzzle toys, interactive feeders, and scratching posts can help fulfill their natural instincts and keep them entertained. Additionally, spending quality playtime with your cats can help burn off their excess energy and prevent them from seeking excitement in the garden.
One way to provide enrichment for your cat is by creating an indoor jungle. You can set up shelves, cat trees, and climbing structures that allow your cat to explore vertical spaces. This not only provides exercise but also mimics their natural habitat, where they would often climb trees and survey their surroundings.
Another way to keep your cat entertained indoors is by offering a variety of toys. Cats have different preferences when it comes to toys, so it’s important to have a selection of interactive toys, such as feather wands, laser pointers, and crinkle balls. These toys can mimic the movements of prey and engage your cat’s hunting instincts.
In addition to physical toys, consider introducing puzzle toys that require your cat to use their problem-solving skills. These toys can be filled with treats or kibble, encouraging your cat to work for their food and keeping them mentally stimulated.
Lastly, don’t underestimate the power of playtime with your cat. Spending quality time engaging in interactive play with your furry friend not only strengthens your bond but also provides them with much-needed exercise. Use a variety of toys and play styles to keep things interesting and ensure your cat gets the mental and physical stimulation they need.
By providing a range of enrichment and entertainment options indoors, you can help satisfy your cat’s natural instincts and reduce their desire to explore the garden. Remember to rotate toys regularly to keep things fresh and exciting for your feline companion.
There are several natural substances that cats find unappealing and can help keep them away from your garden:
– Citrus: Cats dislike the smell of citrus fruits. You can scatter orange or lemon peels around your garden or use citrus-scented sprays to deter them. The strong aroma of citrus acts as a natural deterrent, effectively repelling cats from your garden. Additionally, you can create a homemade citrus spray by boiling water and steeping citrus peels in it. Once cooled, strain the mixture and pour it into a spray bottle. Spraying this solution around your garden will effectively keep cats at bay.
– Herbs: Certain herbs, such as lavender, rosemary, and rue, have strong scents that cats dislike. Planting these herbs in your garden can help keep your cats away. Lavender, with its calming fragrance, not only repels cats but also adds a pleasant aroma to your garden. Rosemary, with its woody scent, acts as a natural deterrent, deterring cats from venturing into your garden. Rue, with its pungent smell, is known to repel cats effectively. By strategically placing these herbs in your garden, you can create a cat-free zone while enjoying the benefits of their delightful scents.
– Coleus canina: Also known as the “scaredy-cat plant,” coleus canina emits an odor that cats find offensive. Planting this herb in your garden can act as a natural deterrent. The pungent smell of coleus canina is similar to that of a skunk, which cats instinctively avoid. This plant is known for its ability to keep cats away, making it an excellent addition to your garden if you’re looking to create a cat-free space. Its small purple flowers and attractive foliage also make it a visually appealing choice for your garden.
By incorporating these natural repellents into your garden, you can effectively keep cats at bay without resorting to harmful chemicals or methods. Creating a cat-free space not only protects your plants but also ensures a peaceful and enjoyable outdoor environment for you and your family.
If you want to allow your cats to enjoy the outdoors while keeping them away from your garden, consider building or purchasing a safe outdoor enclosure. These enclosures, also known as catios, provide a secure space where your cats can experience the sights, sounds, and fresh air of the outdoors without being able to roam freely.
A well-designed catio should have sturdy walls, a roof to prevent escape, and plenty of platforms, perches, and toys to keep your cats entertained. It’s important to ensure that the enclosure is escape-proof and that your cats have access to shade and water.
When designing or purchasing a catio, it’s essential to consider the size and needs of your cats. The enclosure should be spacious enough for them to move around comfortably and engage in natural behaviors like climbing and jumping. It’s a good idea to include different levels and hiding spots to mimic the environment they would encounter in the wild.
Additionally, the materials used for the catio should be safe for your cats. Avoid using toxic substances or materials that could harm them if ingested. Opt for durable materials that can withstand the elements and regular use.
Another important aspect to consider is the location of the catio. It should be placed in an area that provides a balance between sunlight and shade. This will allow your cats to enjoy the warmth of the sun while also having a cool spot to retreat to when needed. If possible, position the catio near a window or a door so that your cats can easily access it from inside the house.
Furthermore, it’s crucial to regularly inspect the catio for any potential hazards or damage. Check the walls, roof, and flooring for any signs of wear and tear, and promptly repair or replace any compromised areas. Keep an eye out for sharp edges, loose screws, or other objects that could pose a risk to your cats.
By providing a safe outdoor enclosure, you can give your cats the best of both worlds – the freedom to enjoy the outdoors and the security of a controlled environment. Not only will this enrich their lives, but it will also give you peace of mind knowing that they are protected from potential dangers and hazards.
Gardening is not just a hobby or a way to beautify your surroundings; it is also incredibly beneficial for your health. Engaging in gardening activities can have a positive impact on both your physical and mental well-being. In this article, we will explore the various ways in which gardening can improve your health.
One of the most obvious health benefits of gardening is the physical activity it provides. When you are tending to your garden, you are constantly moving and using various muscle groups. Digging, planting, weeding, and watering all require physical exertion, which helps to strengthen your muscles and increase your overall fitness level. In fact, studies have shown that gardening can be just as effective as other forms of exercise, such as walking or cycling, in improving cardiovascular health and reducing the risk of chronic diseases like obesity and heart disease.
Additionally, gardening can be a great way to get some fresh air and soak up some vitamin D from the sun. Spending time outdoors has been linked to numerous health benefits, including a boost in mood and a reduction in stress levels. The act of being in nature and connecting with the earth can have a calming effect on the mind, helping to alleviate symptoms of anxiety and depression. Furthermore, exposure to sunlight can also increase the production of serotonin, a hormone that is known to improve mood and promote a sense of well-being.
Another benefit of gardening is the opportunity it provides for social interaction. Whether you join a community garden or simply chat with your neighbors about your shared interest in gardening, being part of a gardening community can foster a sense of belonging and connection. This social aspect of gardening can help to combat feelings of loneliness and isolation, which are often associated with poor mental health.
Furthermore, gardening can also have cognitive benefits. It requires planning, problem-solving, and attention to detail, all of which can help to keep your brain sharp and improve cognitive function. Additionally, being surrounded by nature and engaging with the natural world can stimulate creativity and enhance your ability to think outside the box.
In conclusion, gardening is not just a hobby, but a powerful tool for improving your health. From the physical activity it provides to the mental and emotional benefits of being in nature and connecting with others, gardening offers a holistic approach to well-being. So, grab your gardening tools and get ready to reap the many health benefits that gardening has to offer!
When you spend time in a garden, you expose yourself to a variety of bacteria and microorganisms present in the soil. This exposure can actually strengthen your immune system by promoting the production of antibodies and increasing your resistance to certain diseases. Gardening can help build up your body’s natural defense mechanisms, making you less susceptible to common illnesses.
Gardening is not only beneficial for your physical health but also for your mental well-being. Research has shown that engaging in gardening activities can improve cognitive function, memory, and attention span. The combination of physical activity, problem-solving, and sensory stimulation involved in gardening can help keep your brain sharp and reduce the risk of cognitive decline as you age.
Gardening provides a peaceful and tranquil environment that can help reduce stress levels. The soothing sounds of nature, the beauty of the plants, and the act of nurturing and caring for them can all contribute to a sense of calm and relaxation. Spending time in the garden can be a form of meditation, allowing you to focus your mind and let go of daily worries and stressors.
There is a sense of satisfaction and joy that comes from seeing your garden thrive and flourish. The act of planting a seed, nurturing it, and watching it grow can be incredibly rewarding. Gardening has been shown to increase feelings of happiness, contentment, and overall well-being. It gives you a sense of purpose and accomplishment, and can even help combat feelings of loneliness and isolation.
Gardening is not only beneficial for your own health but also for the environment. By growing your own fruits, vegetables, and herbs, you can reduce your carbon footprint and contribute to a more sustainable food system. Gardening also promotes biodiversity by providing habitats for birds, bees, and other beneficial insects. It can help improve air quality, reduce soil erosion, and conserve water by promoting efficient irrigation practices.
In conclusion, gardening offers a wide range of physical benefits that can contribute to a healthier and happier lifestyle. From improved fitness and immune function to reduced stress and enhanced brain function, spending time in the garden can have a positive impact on both your body and mind. So why not grab a shovel and start digging? Your health will thank you!
Gardening is not only beneficial for your physical health but also for your mental and emotional well-being. Here are some of the mental and emotional benefits of gardening:
Gardening has been shown to reduce stress and promote relaxation. The act of nurturing plants and being surrounded by nature can have a calming effect on the mind and help alleviate symptoms of anxiety and depression. Gardening can provide a sense of purpose and accomplishment, boosting your overall mood and well-being.
Gardening involves various cognitive tasks, such as planning, problem-solving, and decision-making. Engaging in these activities can help keep your mind sharp and improve cognitive function. Gardening also provides an opportunity to learn about different plant species and gardening techniques, stimulating your curiosity and expanding your knowledge.
Spending time in nature has been linked to improved mental health and well-being. Gardening allows you to connect with the natural world, observe the changing seasons, and appreciate the beauty of plants and flowers. This connection with nature can help reduce feelings of stress, increase feelings of happiness, and foster a sense of tranquility.
Gardening is a rewarding activity that offers a sense of achievement. Watching your plants grow and thrive, harvesting your own produce, or creating a beautiful garden can boost your self-esteem and provide a sense of accomplishment. This can be particularly beneficial for individuals who may be dealing with low self-esteem or lack of purpose.
Gardening can be a social activity that allows you to connect with others who share similar interests. Joining a gardening club or participating in community gardening projects can provide opportunities for social interaction, fostering a sense of belonging and reducing feelings of loneliness or isolation.
Gardening offers a unique opportunity to practice mindfulness and be present in the moment. As you tend to your plants, you can focus on the task at hand, allowing your mind to quiet and your body to relax. The repetitive actions of planting, weeding, and watering can become a form of meditation, helping to reduce stress and increase feelings of calmness.
In addition, the sights, sounds, and smells of the garden can stimulate your senses and bring you into the present moment. The vibrant colors of flowers, the gentle rustling of leaves, and the sweet scent of blooming plants can all contribute to a sense of tranquility and well-being.
Gardening can also provide a space for emotional expression and healing. The act of nurturing plants can be a metaphor for nurturing oneself, allowing you to channel your emotions into something positive and life-giving. The process of tending to your garden can be a form of self-care, providing a therapeutic outlet for stress, grief, or other emotional challenges.
Additionally, the act of creating and caring for a garden can symbolize growth, resilience, and renewal. As you witness the cycle of life in your garden, from planting to blooming to harvesting, you may find inspiration and hope in your own personal journey.
Overall, gardening offers a multitude of mental and emotional benefits. Whether you have a small balcony garden or a sprawling backyard, the act of tending to plants and connecting with nature can have a profound impact on your well-being. So grab your gardening tools, get your hands dirty, and reap the many rewards that gardening has to offer.

Gardening is not only a hobby but also a form of therapy for many people. It allows individuals to escape the stresses of daily life and immerse themselves in the beauty of nature. By tending to plants and watching them grow, gardeners experience a sense of accomplishment and fulfillment that is hard to find elsewhere.
One of the first things that every aspiring gardener should understand is the importance of soil. Good soil is the foundation for a successful garden. It provides the necessary nutrients and support for plants to grow and thrive. Before starting a garden, it is essential to assess the quality of the soil and make any necessary amendments to improve its fertility.
Another crucial aspect of gardening is understanding the needs of different plants. Each plant has specific requirements for sunlight, water, and temperature. Some plants thrive in full sun, while others prefer shade. Some plants require regular watering, while others are more drought-tolerant. By understanding these needs, gardeners can create the ideal growing conditions for their plants.
Proper watering is another key factor in maintaining a healthy garden. Overwatering can lead to root rot and other diseases, while underwatering can cause plants to wither and die. Finding the right balance can be challenging, but it is crucial for the overall health of the garden. Factors such as climate, soil type, and plant species all play a role in determining how much water a garden needs.
In addition to watering, gardeners must also be vigilant about pests and diseases. Insects, rodents, and other pests can wreak havoc on a garden if left unchecked. Regular inspection and early intervention are essential for preventing infestations and minimizing damage. Similarly, diseases such as fungal infections can quickly spread and devastate a garden. Proper sanitation and the use of organic fungicides can help prevent the spread of diseases.
Finally, one of the most rewarding aspects of gardening is the ability to enjoy the fruits of your labor. Whether it’s harvesting fresh vegetables, picking vibrant flowers, or simply sitting in a beautiful garden, the rewards of gardening are endless. The sense of accomplishment that comes from growing your food or creating a stunning landscape is truly gratifying.
In conclusion, gardening is a delightful and fulfilling activity that offers numerous benefits. By understanding the basics of gardening, such as soil preparation, plant care, pest control, and harvesting, individuals can create and maintain beautiful gardens that bring joy and beauty to their lives.
Gardening can bring people together and foster a sense of community. Community gardens, where individuals come together to cultivate shared plots of land, provide a space for neighbors to connect and collaborate. These gardens often promote social interaction, knowledge sharing, and a sense of belonging. By participating in a community garden, individuals can form relationships, learn from each other, and work towards a common goal of creating a beautiful and productive green space.
Gardening offers endless opportunities for learning and personal growth. Whether you are a seasoned gardener or a beginner, there is always something new to discover and explore. Gardening can teach valuable lessons about biology, botany, ecology, and sustainability. It can also provide practical skills such as planning, problem-solving, and time management. Engaging in gardening activities can be a great way to educate children about the natural world and instill in them a sense of responsibility towards the environment.
Gardening allows individuals to create and enjoy beautiful outdoor spaces. Whether you have a small balcony garden, a backyard oasis, or a sprawling landscape, gardening gives you the opportunity to design and cultivate an aesthetically pleasing environment. By carefully selecting plants, arranging them in visually pleasing patterns, and incorporating elements such as pathways, seating areas, and water features, you can transform your outdoor space into a tranquil and inviting sanctuary.
Gardening has long been recognized as a therapeutic activity that can help reduce stress and anxiety. The act of nurturing plants, watching them grow, and seeing the fruits of your labor can be incredibly rewarding and calming. Gardening provides a sense of purpose and accomplishment, allowing individuals to focus on the present moment and find solace in nature. The rhythmic tasks of planting, weeding, and watering can be meditative, providing a much-needed break from the fast-paced and technology-driven world we live in.
Gardening promotes sustainability by encouraging individuals to adopt eco-friendly practices. By composting kitchen scraps, using organic fertilizers, and conserving water, gardeners can minimize waste and reduce their environmental impact. Furthermore, gardening encourages biodiversity by attracting pollinators and beneficial insects, which play a crucial role in maintaining healthy ecosystems. By embracing sustainable gardening practices, individuals can contribute to the conservation of natural resources and help create a more resilient and sustainable future.
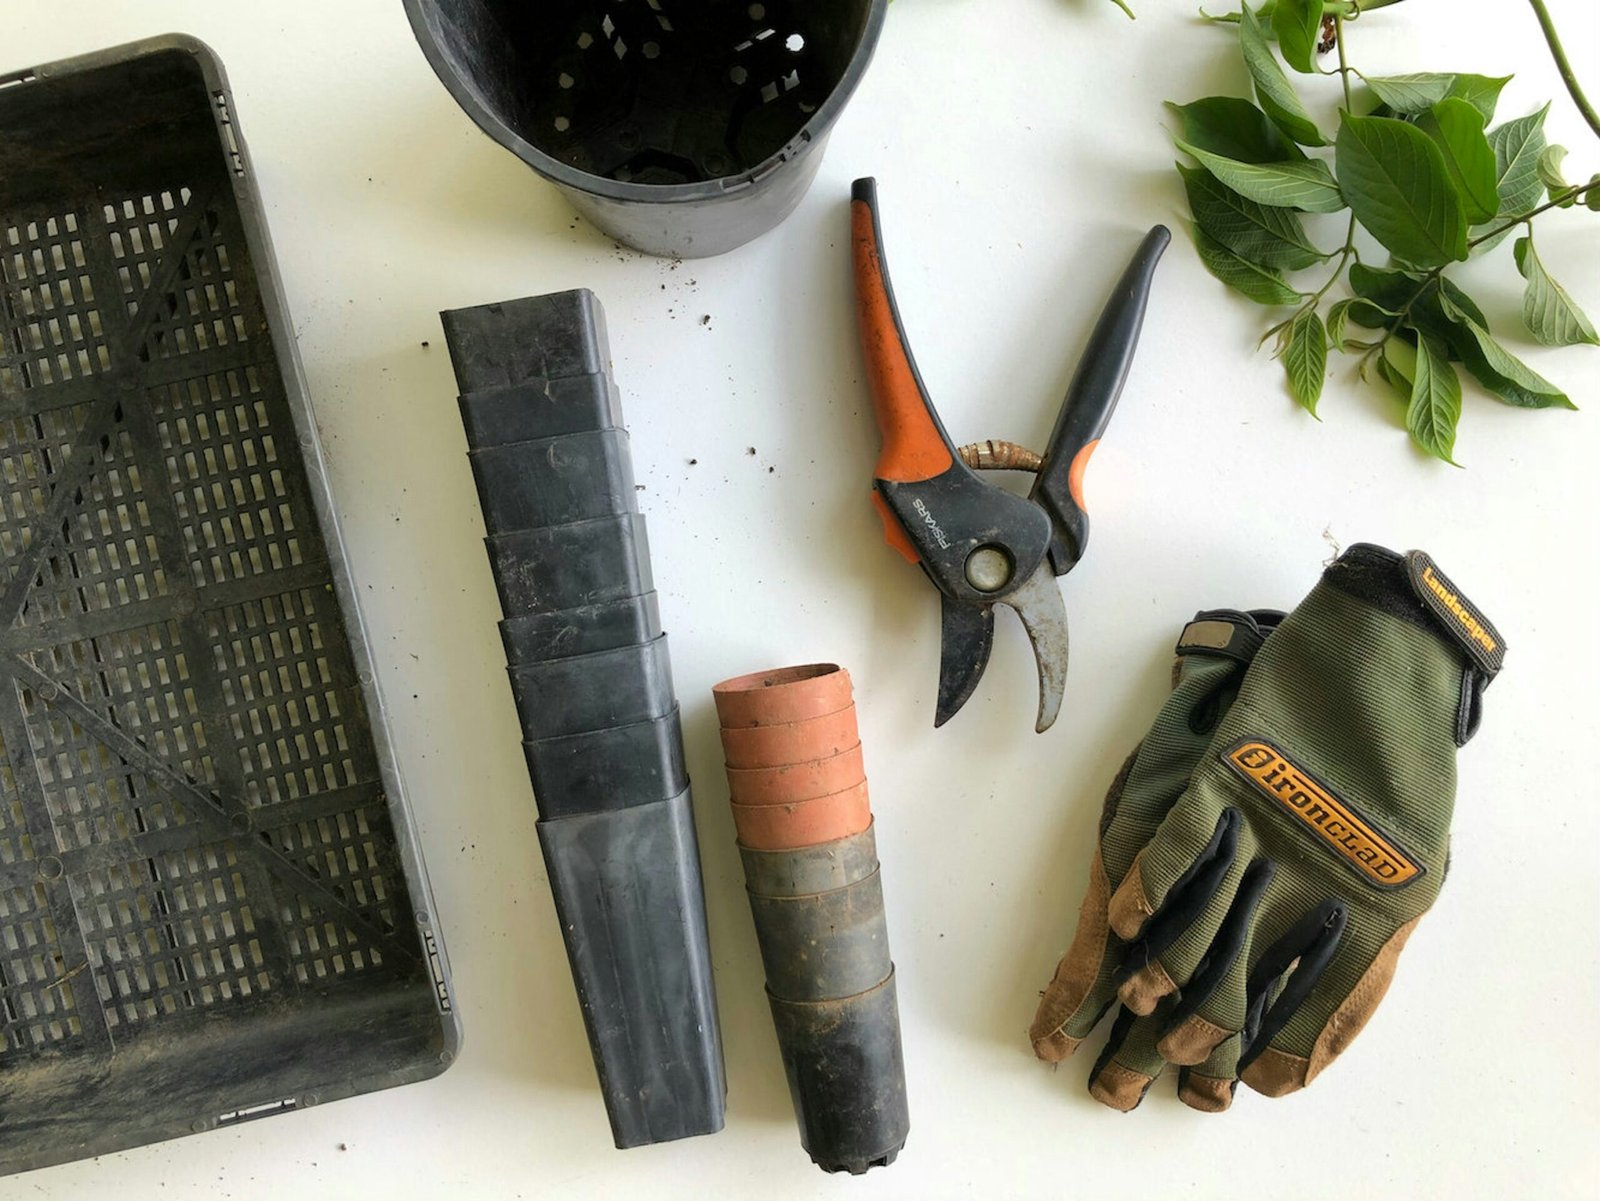
A garden rake is an essential tool for leveling the soil, removing debris, and spreading mulch. It has sturdy tines that help break up clumps of soil and remove rocks or other unwanted materials from the surface.
While pruning shears are great for smaller branches, a pruning saw is necessary for larger, thicker branches. It allows you to make clean cuts without damaging the tree or shrub, promoting healthy growth and preventing disease.
A garden hoe is useful for cultivating the soil, removing weeds, and creating furrows for planting seeds. It has a long handle and a flat blade that can easily break up the soil and remove unwanted vegetation.
A garden spade is a versatile tool that can be used for digging, edging, and transplanting. It has a sharp, flat blade that can cut through soil and roots, making it ideal for creating planting holes or dividing plants.
In addition to pruning shears, garden pruners are a valuable tool for cutting larger branches and stems. They have longer blades and handles, providing more leverage and making it easier to tackle thicker growth.
Garden twine is a handy tool for tying plants to stakes, trellises, or other structures. It helps support the plants and prevents them from falling over or getting damaged by strong winds or heavy fruit.
A garden sprayer is useful for applying fertilizers, pesticides, or herbicides to your plants. It allows for precise and controlled application, ensuring that your plants receive the necessary nutrients and protection from pests or diseases.
Having these essential gardening tools will make your gardening experience more enjoyable and productive. They will help you maintain the health and beauty of your garden, allowing you to grow a wide variety of plants and create a thriving outdoor space.
Now that you have the necessary tools, let’s explore some basic gardening principles that everybody should know:
Most plants require sunlight to grow and thrive. Before planting, assess the amount of sunlight your garden receives throughout the day. This will help you choose the right plants for your space. Full-sun plants need at least six hours of direct sunlight, while shade-loving plants can thrive in areas with limited sunlight.
Good soil is the foundation for a successful garden. Test your soil to determine its pH level and nutrient content. Most plants prefer a slightly acidic to neutral pH (around 6 to 7). If your soil is lacking in nutrients, consider adding organic matter such as compost or well-rotted manure to improve its fertility.
Watering is crucial for plant growth, but it’s important to strike a balance. Overwatering can lead to root rot and other diseases, while underwatering can cause plants to wilt and die. The frequency and amount of water needed depend on factors such as plant type, weather conditions, and soil moisture. Water deeply and less frequently to encourage deep root growth.
Mulching is the process of covering the soil surface with a layer of organic material such as wood chips, straw, or compost. Mulch helps to retain soil moisture, suppress weed growth, regulate soil temperature, and improve soil fertility. Apply a layer of mulch around your plants, leaving a small gap around the stems to prevent rot.
5. Pruning
In addition to providing sunlight, water, and nutrients, plants also benefit from regular pruning. Pruning involves removing dead or overgrown branches, stems, or flowers to promote healthy growth and improve the overall appearance of the plant. It is important to use clean and sharp tools when pruning to prevent the spread of diseases. Different plants have different pruning requirements, so it’s essential to research and understand the specific needs of each plant in your garden.
6. Pest Control
One of the challenges that gardeners face is dealing with pests that can damage or destroy their plants. There are various methods of pest control, including natural and chemical options. Natural methods include using companion plants, such as marigolds, to repel pests, attracting beneficial insects like ladybugs and lacewings, and using organic pest control products. Chemical options, such as pesticides, should be used as a last resort and only when necessary, as they can harm beneficial insects and the environment.
7. Crop Rotation
Rotating crops is an important practice in gardening to prevent the buildup of pests and diseases in the soil. By rotating the location of different plant families each year, you can disrupt the life cycles of pests and reduce the risk of soil-borne diseases. It is best to group plants with similar nutrient requirements together and avoid planting the same crop in the same spot for consecutive years.
By following these basic gardening principles, you can create a thriving and beautiful garden that brings you joy and satisfaction. Remember to observe your plants closely, make adjustments as needed, and enjoy the process of nurturing and growing your own little piece of nature.
Now that you understand the basic principles of gardening, here are some additional tips to help you create a thriving garden:
Before you start planting, take some time to plan your garden layout. Consider factors such as plant compatibility, growth habits, and aesthetic appeal. Group plants with similar water and sunlight requirements together to make watering and maintenance easier.
Think about the overall design of your garden. Will it be a formal garden with neatly arranged rows, or a more informal and natural-looking space? You can also incorporate elements such as paths, seating areas, and focal points to enhance the visual appeal of your garden.
If you are new to gardening, it’s best to start with easy-to-grow plants that are more forgiving. Herbs like basil, mint, and rosemary, as well as vegetables like tomatoes, lettuce, and radishes, are great options for beginners. As you gain experience and confidence, you can gradually expand your plant selection.
Consider the climate and soil conditions in your area when choosing plants. Some plants thrive in full sun, while others prefer partial shade. Similarly, certain plants require well-drained soil, while others can tolerate heavier clay soil. Research the specific needs of the plants you choose to ensure their success.
Rotating crops is an effective way to prevent soil-borne diseases and maintain soil fertility. Avoid planting the same crop in the same location year after year. Instead, rotate your crops in different areas of your garden to reduce the risk of pests and diseases.
For example, if you grow tomatoes in one area of your garden this year, plant them in a different spot next year. This helps prevent the buildup of pests and diseases that can affect tomato plants. Additionally, rotating crops helps balance the nutrient levels in the soil, as different plants have different nutrient requirements.
Maintaining your garden regularly is essential for its long-term health and productivity. This includes tasks such as weeding, pruning, fertilizing, and pest control. Regularly inspect your plants for signs of pests or diseases, and take appropriate action to prevent their spread.
Weeding is important to remove unwanted plants that compete with your garden plants for nutrients and water. Pruning helps shape and control the growth of your plants, while fertilizing provides them with the necessary nutrients for healthy growth. Pest control measures can include organic methods such as hand-picking pests or using natural insecticides.
Gardening is a continuous learning process. Observe how your plants respond to different conditions, experiment with new techniques, and learn from your successes and failures. Joining a gardening community or seeking advice from experienced gardeners can also provide valuable insights and support.
Keep a gardening journal to record your observations, including planting dates, watering schedules, and any issues or successes you encounter. This will help you track your progress over time and make informed decisions for future gardening endeavors.
Remember, gardening is not just about the end result of a beautiful and productive garden, but also about the joy and satisfaction that comes from nurturing plants and connecting with nature. Enjoy the process and embrace the learning journey that gardening offers.


One of the most crucial steps in preparing your vegetable garden is soil preparation. The quality of your soil will directly impact the health and productivity of your plants. Start by removing any weeds or grass from the area where you plan to plant your vegetables. This can be done by manually pulling them out or using a garden hoe to loosen the soil and remove the unwanted plants.
Once the area is clear of weeds, it’s time to improve the soil structure and fertility. Begin by testing the pH level of your soil. Most vegetables thrive in slightly acidic to neutral soil, with a pH range of 6.0 to 7.0. If your soil is too acidic, you can add lime to raise the pH level. On the other hand, if your soil is too alkaline, you can add sulfur to lower the pH level.
Next, incorporate organic matter into the soil to improve its texture and fertility. Organic matter, such as compost, well-rotted manure, or leaf mold, helps to retain moisture, increase nutrient availability, and promote beneficial microbial activity. Spread a layer of organic matter over the soil surface and use a garden fork or tiller to mix it into the top 6 to 8 inches of soil.
In addition to organic matter, you may also need to add supplemental nutrients to your soil. Conduct a soil test to determine the nutrient levels and deficiencies. Based on the results, you can add organic or synthetic fertilizers to provide the necessary nutrients for your vegetables. Follow the recommended application rates and timing to avoid over-fertilization, which can lead to nutrient runoff and environmental pollution.
Lastly, consider adding a layer of mulch to your vegetable garden. Mulch helps to conserve moisture, suppress weeds, and regulate soil temperature. Organic mulches, such as straw, grass clippings, or wood chips, are ideal for vegetable gardens as they slowly break down and contribute to the organic matter content of the soil. Apply a 2 to 4-inch layer of mulch around your plants, making sure to leave a small space around the stem to prevent rotting.
By properly preparing your soil, you are creating a fertile and nutrient-rich environment for your vegetable plants to thrive. This will result in healthier plants, higher yields, and ultimately, a more successful and enjoyable gardening experience.
The first step in preparing your vegetable garden is to select the right location. Vegetables need at least six hours of direct sunlight each day, so choose a spot in your garden that receives ample sunlight. Additionally, ensure that the location has good drainage to prevent waterlogging, as excessive moisture can lead to root rot and other plant diseases.
It’s also important to consider the proximity of your garden to a water source. Vegetables require regular watering, so having easy access to water will make the task more convenient for you.
Once you have chosen the location for your vegetable garden, it’s time to clear the area of any existing vegetation. Remove any grass, weeds, or debris from the site. You can use a shovel or a garden hoe to dig up the grass and weeds, making sure to remove their roots as well.
Clearing the area is essential to prevent competition for nutrients and space between your vegetables and unwanted plants. It also helps to reduce the risk of pests and diseases that may be harbored by the existing vegetation.
Before you start clearing the area, it’s a good idea to assess the soil quality. Take a handful of soil from different parts of the site and examine its texture and color. Healthy soil should be loose, crumbly, and dark in color. If the soil is compacted or appears sandy, you may need to amend it with organic matter such as compost or well-rotted manure to improve its fertility and structure.
Once you have evaluated the soil, you can begin the process of clearing the area. Start by removing any large rocks, branches, or other debris that may be present. This will make it easier to work the soil and ensure a clean, even surface for planting.
Next, use a shovel or garden hoe to dig up the grass and weeds. Begin at one corner of the site and work your way across, making sure to remove the entire root system of each plant. This will help prevent regrowth and ensure that your vegetables have the best chance of thriving.
As you clear the area, you may come across any persistent weeds or plants with deep roots. In these cases, it may be necessary to use a garden fork or a weed wrench to loosen the soil and extract the entire root system. This extra effort will pay off in the long run, as it will help create a weed-free environment for your vegetables to grow.
Once the area is cleared, take a moment to admire your hard work. You have created a blank canvas, ready to be transformed into a thriving vegetable garden. But before you start planting, there are a few more steps to take to prepare the soil and ensure optimal growing conditions for your vegetables.
Before you start planting, it’s crucial to test the soil in your vegetable garden. Different vegetables have different soil requirements, so understanding the composition of your soil will help you determine which vegetables will thrive in your garden.
You can purchase a soil testing kit from a garden center or send a soil sample to a laboratory for analysis. The test will provide you with information about the pH level, nutrient content, and organic matter in your soil. Based on the results, you can make any necessary amendments to ensure optimal growing conditions for your vegetables.
When testing the soil, it’s important to follow the instructions provided with the testing kit or laboratory. Typically, the process involves collecting soil samples from various areas of your garden and mixing them together to get a representative sample. This ensures that you get an accurate analysis of the overall soil composition.
The pH level of your soil is crucial for plant growth. Most vegetables prefer a slightly acidic to neutral soil pH, ranging from 6.0 to 7.0. If your soil is too acidic, you can add lime to raise the pH. On the other hand, if your soil is too alkaline, you can add sulfur or peat moss to lower the pH.
The nutrient content of your soil is also essential for healthy plant growth. The soil test will provide information about the levels of essential nutrients such as nitrogen, phosphorus, and potassium. If any of these nutrients are deficient, you can add organic matter or specific fertilizers to enrich the soil.
Furthermore, the soil test will reveal the organic matter content in your soil. Organic matter is crucial for soil fertility and moisture retention. If your soil lacks organic matter, you can add compost, well-rotted manure, or other organic materials to improve its structure and nutrient-holding capacity.
By testing the soil in your vegetable garden, you can ensure that you are providing the best possible growing conditions for your plants. This will result in healthier and more productive vegetables, giving you a bountiful harvest to enjoy.
After testing the soil, you may need to improve its quality by adding organic matter. Organic matter, such as compost or well-rotted manure, helps to improve soil structure, fertility, and water retention.
Spread a layer of organic matter over the surface of your garden and use a garden fork or a tiller to incorporate it into the soil. Aim for a depth of 6-8 inches to ensure that the organic matter is well mixed with the existing soil.
In addition to organic matter, you may also need to add fertilizers or soil amendments to address any nutrient deficiencies identified in the soil test. Follow the instructions on the fertilizer packaging and apply it according to the recommended rates.
When choosing fertilizers, it is important to consider the specific needs of your plants. Different plants require different nutrients, so it is essential to select a fertilizer that provides the necessary elements for optimal growth. For example, if you are growing tomatoes, you may want to choose a fertilizer that is high in phosphorus to promote fruit development.
In addition to fertilizers, you may also need to add specific soil amendments to adjust the pH level of your soil. Some plants prefer acidic soil, while others thrive in alkaline conditions. By adjusting the pH level, you can create an environment that is more favorable for your plants to grow and thrive.
Another way to improve the soil is by incorporating cover crops into your gardening practices. Cover crops, such as clover or winter rye, can help to prevent erosion, suppress weeds, and add organic matter to the soil when they are tilled under. These crops can also improve soil structure by breaking up compacted soil and increasing its ability to hold water.
It is important to note that improving soil is an ongoing process. Regularly adding organic matter, fertilizers, and soil amendments will help to maintain the health and fertility of your soil. Additionally, practicing good gardening techniques, such as proper watering and mulching, can also contribute to soil improvement.
By taking the time to improve your soil, you are setting the foundation for a successful garden. Healthy soil will provide the necessary nutrients and support for your plants to grow strong and produce bountiful harvests. So don’t overlook this important step in your gardening journey!
Before you start planting, it’s important to plan your garden layout. Consider the space requirements of each vegetable and arrange them accordingly to maximize your garden’s productivity.
Group vegetables with similar water and sunlight requirements together. This will make it easier for you to provide the necessary care and maintenance for each plant. Additionally, consider the height of the plants and their shade requirements to ensure that taller plants do not overshadow smaller ones.
It’s also a good idea to rotate your crops each year to prevent the buildup of pests and diseases in the soil. Plan your garden layout in a way that allows you to rotate your crops effectively.
When planning your garden layout, take into account the different microclimates within your garden. Some areas may receive more sunlight than others, while some may be more sheltered from the wind. By understanding these microclimates, you can strategically place your plants to take advantage of the varying conditions. For example, heat-loving plants like tomatoes and peppers can be positioned in the sunniest spots, while more delicate plants like lettuce can be placed in partially shaded areas.
In addition to considering the needs of individual plants, think about the overall aesthetic of your garden. You can create visual interest by incorporating different colors, textures, and heights. Planting flowers alongside your vegetables not only adds beauty to your garden but can also attract beneficial insects that help with pollination and pest control.
Furthermore, consider the practical aspects of your garden layout. Leave enough space between rows and beds to allow for easy access and maintenance. This will make tasks such as watering, weeding, and harvesting much more convenient. If you plan to use trellises or stakes for climbing plants, ensure that you have enough vertical space to accommodate their growth.
Lastly, don’t forget to include pathways in your garden layout. Well-defined paths not only provide easy navigation through your garden but also help to prevent soil compaction and minimize the risk of trampling on delicate plants. You can use materials such as gravel, wood chips, or stepping stones to create attractive and functional pathways.
By carefully planning your garden layout, taking into account the specific needs of your plants, the microclimates within your garden, and the practical aspects of maintenance, you can create a harmonious and productive space that will bring you joy throughout the growing season.
Now that you have planned your garden layout, it’s time to prepare the planting beds. Use a garden rake or a hoe to level the soil and create raised beds or rows for planting.
Ensure that the planting beds are wide enough to accommodate the root systems of your vegetables. The depth of the beds will depend on the specific requirements of each plant, so refer to the seed packets or plant labels for guidance.
If you prefer raised beds, you can build them using wood, bricks, or other materials. Raised beds provide better drainage and can help to prevent soil compaction.
Before you start preparing the planting beds, it’s important to assess the quality of your soil. Take a sample and send it to a local agricultural extension office for testing. This will help you determine the pH level, nutrient content, and any deficiencies in your soil.
Based on the test results, you may need to amend your soil with organic matter, such as compost or well-rotted manure, to improve its fertility and structure. This will provide a healthy environment for your plants to grow and thrive.
Once you have determined the condition of your soil and made any necessary amendments, it’s time to start preparing the planting beds. Begin by removing any weeds or grass from the area. Use a garden rake or hoe to loosen the soil and break up any clumps.
If you are creating raised beds, you can outline the shape and size using stakes and string. This will help you maintain a uniform and organized layout for your garden.
Next, add a layer of organic matter, such as compost or aged manure, to the top of the soil. This will help to improve its structure and fertility. Spread the organic matter evenly and work it into the soil using a garden fork or tiller.
After incorporating the organic matter, rake the soil again to level it and remove any large debris. This will create a smooth and even surface for planting.
Before you start planting, it’s a good idea to water the soil thoroughly. This will help to settle the soil and provide moisture for your plants.
By taking the time to properly prepare your planting beds, you are setting the foundation for a successful and productive garden. The effort you put in now will pay off in the form of healthy plants, abundant harvests, and a beautiful garden to enjoy.
With your planting beds ready, it’s time to start planting your vegetables. Follow the instructions on the seed packets or plant labels for the correct planting depth and spacing.
Make small holes in the soil using your finger or a dibber, and place the seeds or seedlings into the holes. Gently cover them with soil and water thoroughly.
Remember to label your plants to keep track of what you have planted. This will be especially helpful when it comes to crop rotation and identifying the different vegetables as they grow.
When choosing which vegetables to plant, consider the climate and growing conditions in your area. Some vegetables thrive in cooler temperatures, while others prefer warmer climates. It’s also important to think about the amount of sunlight your garden receives and the type of soil you have. Certain vegetables, like tomatoes and peppers, require full sun to grow and produce a bountiful harvest.
Additionally, think about the space available in your garden. Some vegetables, such as zucchini and squash, have sprawling vines that can take up a lot of room. If you have limited space, consider planting vertical crops like beans or cucumbers that can be trained to grow up trellises or fences.
When planting your vegetables, it’s important to give them enough room to grow. Crowding plants can lead to poor air circulation and increased risk of diseases. Follow the recommended spacing guidelines on the seed packets or plant labels to ensure that each plant has enough space to thrive.
Watering is crucial for the success of your vegetable garden. Most vegetables require consistent moisture to grow and produce a good crop. Water your plants deeply and regularly, especially during dry periods. Avoid overhead watering, as it can increase the risk of fungal diseases. Instead, use a soaker hose or drip irrigation system to deliver water directly to the roots.
As your vegetables grow, keep an eye out for pests and diseases. Common garden pests include aphids, slugs, and caterpillars. Use organic pest control methods, such as handpicking or applying natural insecticides, to protect your plants. Regularly inspect your plants for signs of diseases, such as wilting or discoloration, and take appropriate action to prevent the spread.
Finally, don’t forget to harvest your vegetables when they are ripe. Different vegetables have different signs of ripeness, so refer to gardening resources or consult experienced gardeners for guidance. Harvesting at the right time ensures that you enjoy the best flavor and nutritional value from your homegrown vegetables.
Once your vegetables are planted, it’s important to provide them with the care and maintenance they need to thrive. Here are some essential tasks to keep in mind:
By providing the necessary care and maintenance to your vegetables, you are ensuring their health and productivity. With proper attention, your garden will yield a bountiful harvest of fresh and delicious vegetables for you to enjoy.
Welcome to our comprehensive care guide and essential tips for nurturing your Dragon Tail Plant, also known as Dracaena Marginata. Whether you’re an experienced plant parent or just starting out, this article will provide you with all the information you need to create a lush indoor oasis with this beautiful, low-maintenance tropical plant.
The Dragon Tail Plant, or Dracaena Marginata, is a popular choice for indoor plant enthusiasts due to its striking appearance and air-purifying qualities. Originally from Madagascar, this houseplant features long, narrow leaves with vibrant red edges, adding a touch of elegance to any space.
One of the advantages of the Dragon Tail Plant is its low maintenance requirements, making it an ideal choice for busy individuals or those new to plant care. With the right care, you can easily keep your Dragon Tail Plant healthy and thriving in your home or office.
In this guide, we will cover various aspects of Dragon Tail Plant care, including watering, lighting, temperature needs, and soil preferences. We will also address common issues such as yellowing leaves, brown tips, and pest infestations, providing troubleshooting tips to help you maintain the overall health and beauty of your plant.
By following our expert advice, you can enjoy the many benefits that the Dragon Tail Plant offers as an indoor tropical plant. So, let’s dive into the world of Dracaena Marginata and create a green haven in your indoor space.
Introducing the Dragon Tail Plant, also known as Dracaena Marginata. This captivating houseplant has gained popularity among indoor plant enthusiasts for its unique characteristics and air-purifying abilities. Let’s delve into the origins and distinguishing features that make this plant a perfect addition to any home or office space.
Dragon Tail Plant, scientifically known as Dracaena Marginata, is native to Madagascar, where it thrives in the tropical climate. Its slender, arching leaves feature rich shades of green with a distinctive red or purple edge, adding a touch of elegance to any interior. This aesthetically pleasing plant can reach impressive heights, making it a statement piece that complements various decor styles.
One of the standout qualities of the Dragon Tail Plant is its efficiency in purifying the air we breathe. As an air-purifying plant, it excels at removing toxins such as formaldehyde, benzene, and trichloroethylene from the surrounding environment. This makes it an ideal choice for individuals seeking to improve the quality of indoor air.
Whether you’re a seasoned plant parent or just beginning your indoor gardening journey, the Dragon Tail Plant, with its striking appearance and air-purifying properties, is sure to captivate your senses and enhance your living or working space.
Proper care is essential to keep your dragon tail plant, also known as Dracaena Marginata, thriving and looking its best. By following these care tips, you can ensure that your indoor plant remains healthy and vibrant for years to come.
In addition to these care tips, it’s important to fertilize your dragon tail plant to support its growth. Use a balanced, water-soluble fertilizer once a month during the growing season (spring and summer), and reduce fertilization during the winter months.
Regular pruning helps maintain the shape and appearance of your dragon tail plant. Remove any yellow, brown, or damaged leaves by cutting them close to the main stem. Use clean, sharp pruning shears to prevent tearing or crushing the foliage. Pruning can also encourage new growth and prevent overcrowding.
By following these care tips and providing the right conditions, you can enjoy the beauty of the dragon tail plant as a low maintenance, indoor plant.
Even low maintenance plants like the dragon tail plant, also known as Dracaena Marginata, can encounter common problems. It’s essential to address these issues promptly to maintain the overall health and beauty of your houseplant.
One common issue you may face with your dragon tail plant is yellowing leaves. This can be caused by various factors, including overwatering, underwatering, or exposure to direct sunlight. To remedy this problem, ensure you are maintaining a proper watering schedule and providing adequate indirect sunlight. Trim off any excessively yellowed leaves to promote new growth.
Brown tips on the leaves of your dragon tail plant can indicate inconsistent watering or low humidity levels. Make sure you are watering your plant appropriately, allowing the topsoil to dry out between waterings. Additionally, consider using a humidifier or placing a tray filled with water near the plant to increase humidity levels. Trim off the brown-tipped leaves to enhance the plant’s aesthetic appeal.
Just like any other houseplant, dragon tail plants can be susceptible to pest infestations. Common pests that can affect your plant include spider mites, mealybugs, and scale insects. Regularly inspect your plant for signs of pests such as webbing, sticky residue, or small insects. If you notice an infestation, isolate the affected plant and treat it with appropriate organic or chemical pest control methods.
By addressing these common issues and providing the necessary care, you can keep your dragon tail plant thriving and enjoying its lush foliage for years to come.
In conclusion, the dragon tail plant, or Dracaena Marginata, is a stunning and air-purifying indoor plant that can thrive with minimal care. By following the tips provided in this guide, you can create a lush indoor oasis and enjoy the many benefits this tropical plant offers.
With its striking long, arching leaves and resilience to varying light conditions, the dragon tail plant is a versatile addition to any indoor space.
Whether you’re a busy professional looking to bring nature indoors or a plant enthusiast seeking a low-maintenance companion, the Dracaena Marginata is an excellent choice. Its natural ability to purify the air, combined with its eye-catching appearance, makes it a welcome addition to any home or office.
So, why not include the dragon tail plant in your collection and transform your space into a vibrant and calming haven? With proper care and attention, this indoor plant will reward you with beauty and tranquility for years to come.
The watering frequency for your dragon tail plant will depend on various factors, such as the size of your plant, the pot it’s in, and the temperature and humidity of your environment. As a general guideline, water your plant when the top inch of soil feels dry to the touch. Be sure not to overwater, as this can lead to root rot. Allow the excess water to drain out of the pot, and avoid letting the plant sit in standing water.
Dragon tail plants thrive in bright, indirect light. They can tolerate some direct sunlight, but prolonged exposure can scorch their leaves. Place your plant near a window with filtered light or use sheer curtains to diffuse sunlight. If you have limited natural light in your space, you can also use fluorescent or grow lights to provide adequate illumination for your dragon tail plant.
Dragon tail plants prefer temperatures between 65°F and 75°F (18°C and 24°C). They can tolerate slightly cooler temperatures in the range of 55°F to 60°F (13°C to 15°C) but may experience slower growth. Avoid placing your plant near drafts, air conditioning vents, or heat sources, as extreme temperature fluctuations can stress the plant.
The dragon tail plant thrives in well-draining soil. A good potting mix for this plant would consist of a combination of peat moss, perlite, and a small amount of sand to improve drainage. Avoid using heavy clay-based soils that retain too much moisture and lead to root rot.
Fertilize your dragon tail plant every 2-4 weeks during the spring and summer months when it is actively growing. Use a balanced, water-soluble fertilizer diluted to half the recommended strength. During the fall and winter months, reduce fertilization to once every 2-3 months or suspend feeding altogether as the plant’s growth slows down.
Yes, you can prune your dragon tail plant to control its size and shape. Use sharp, clean pruning shears to remove any yellow or brown leaves, as well as leggy or overgrown stems. You can also trim the top of the plant to encourage bushier growth. Remember to sanitize your pruning tools before and after use to prevent the spread of diseases.
Yellowing leaves on a dragon tail plant can be a sign of overwatering, underwatering, or nutrient deficiencies. Check the soil moisture levels and adjust your watering accordingly. Ensure your plant is receiving the correct amount of light and fertilize it regularly to provide necessary nutrients. If the problem persists, consider repotting the plant with fresh, well-draining soil.
Dragon tail plants are generally resistant to pests but can occasionally attract mealybugs and spider mites. Regularly inspect your plant for signs of infestation, such as small webbing, sticky residue, or visible pests. If you notice any pests, isolate the affected plant and treat it with insecticidal soap or a neem oil solution. Be sure to follow the instructions on the product label for safe and effective use.
Welcome to the world of spicy flavors and vibrant colors! If you’ve been dreaming of adding some heat to your culinary adventures, growing your own bird chili plant is the perfect choice. Imagine having the satisfaction of plucking fresh, fiery peppers from your very own backyard. In this article, we’ll provide you with all the bird chili plant care tips you need to know to ensure a successful yield. From planting to nurturing your plant, we’ve got you covered!
When it comes to growing bird chilies, selecting the right plant variety is essential. Different varieties offer distinct flavors, heat levels, and growth habits, allowing you to customize your chili pepper harvest to suit your tastes and preferences. In this section, we will explore a range of bird chili plant varieties, helping you find the perfect match for your garden.
One popular variety is the Bird’s Eye Chili, known for its fiery heat and vibrant red color. These small peppers pack a punch and are commonly used in Asian and African cuisines. If you enjoy the heat and are looking for an authentic spice experience, the Bird’s Eye Chili plant is an excellent choice.
For those seeking a milder option, the Bell Pepper Chili variety offers a less intense heat profile while still providing a satisfying kick. These chilies are perfect for adding a subtle spice to your dishes, making them a favorite among home cooks and beginners.
If you’re looking for a unique flavor profile, consider the Chocolate Habanero, a variety that combines intense heat with a rich, chocolatey taste. These chilies add a bold and distinctive flavor to your culinary creations, making them a favorite among adventurous chefs and spice enthusiasts.
When selecting a bird chili plant variety, it’s important to consider your growing conditions. Some varieties thrive in hotter climates, while others are more adaptable and suitable for cooler regions. Take into account factors such as sunlight, temperature, and soil conditions to ensure the optimal growth and health of your plants.
Once you’ve decided on the bird chili plant variety that suits your taste and growing conditions, the next step is to find a reliable source to purchase the plants. Local nurseries, garden centers, and online plant retailers offer a wide range of bird chili plant varieties for sale.
Before making a purchase, it’s advisable to research the reputation and quality of the seller. Read customer reviews, check for certifications, and inquire about the plants’ health and origin. This will help ensure that you acquire healthy, disease-free bird chili plants that will thrive in your garden.
When purchasing bird chili plants online, pay attention to shipping policies and the condition in which plants will be delivered. Look for sellers that guarantee safe packaging to protect the plants during transport, minimizing the chances of damage or stress.
Choosing the right bird chili plant variety is crucial for a successful and bountiful harvest of spicy peppers. Whether you prefer the intense heat of the Bird’s Eye Chili, the milder kick of the Bell Pepper Chili, or the unique flavor of the Chocolate Habanero, there is a bird chili variety to suit every taste. Remember to consider your growing conditions and source your plants from reputable sellers to ensure healthy, thriving plants.
| Chili Variety | Heat Level | Flavor Profile | Recommended Growing Conditions |
|---|---|---|---|
| Bird’s Eye Chili | Very Hot | Fiery, vibrant | Tropical or warm climate |
| Bell Pepper Chili | Mild to Medium | Subtle, versatile | Adaptable |
| Chocolate Habanero | Extremely Hot | Intense, chocolatey | Warm climate |
Taking care of your bird chili plant is essential for ensuring its optimal growth and productivity. By following these care tips, you can enjoy a thriving plant that rewards you with an abundant harvest of flavorful and spicy peppers.
Proper watering is crucial for the health of your bird chili plant. It is recommended to water the plant deeply when the top inch of soil becomes dry. However, avoid overwatering as it can lead to root rot. Ensure that your plant has proper drainage to prevent waterlogging.
Bird chili plants thrive in warm and sunny conditions. Place your plant in an area where it receives at least 6-8 hours of direct sunlight daily. If you’re growing the plant indoors, ensure it is near a sunny window or use artificial grow lights to provide sufficient light.
Feed your bird chili plant with a balanced fertilizer during the growing season to provide it with essential nutrients. Choose a fertilizer specifically formulated for chili plants and follow the manufacturer’s instructions for application. Avoid over-fertilizing, as it can negatively affect the plant’s health.
Protect your bird chili plant from common pests such as aphids, spider mites, and whiteflies. Regularly inspect your plant for any signs of infestation and take immediate action. Use organic pest control methods, such as neem oil or insecticidal soap, to keep pests at bay.
By implementing these care tips, you can ensure the health and vitality of your bird chili plant. With a little attention and care, you’ll soon be enjoying the fiery flavors of your homegrown bird chili peppers!
Congratulations on choosing to cultivate your very own bird chili plant! By following the information and tips provided in this article, you are on your way to successfully growing and harvesting spicy pepper plants that will add flavor and heat to your meals. The bird chili plant is a wonderful addition to any garden, whether you are a spice lover or simply enjoy adding a kick to your dishes.
With proper care and attention, your chili pepper plant will thrive and reward you with a bountiful harvest of bird’s eye chilies. Remember to provide adequate sunlight, water, and nutrients to promote healthy growth. Keep an eye out for any potential pests and address them promptly to keep your plant healthy.
Imagine the satisfaction of plucking fresh, vibrant peppers from your own backyard and using them in your favorite recipes. The bird chili plant allows you to have a steady supply of spicy peppers right at your fingertips. Embrace the joy of growing your own food and take pride in the flavorful results of your cultivation.
To start growing a bird chili plant, you will need to obtain chili seeds or seedlings. You can purchase these from nurseries or online seed suppliers. Plant the seeds or seedlings in well-draining soil, and place them in a warm and sunny location. Keep the soil consistently moist and water the plant regularly. With proper care, your bird chili plant will start growing and producing delicious peppers.
The time it takes for a bird chili plant to bear fruit can vary depending on various factors such as the variety, growing conditions, and care provided. On average, it takes around 80 to 100 days from planting for the peppers to reach maturity. However, some varieties may produce peppers earlier or later. Patience and consistent care are key to successfully growing and harvesting peppers from your bird chili plant.
The watering frequency for a bird chili plant depends on various factors such as the weather, soil moisture, and pot size. As a general guideline, water your plant whenever the top inch of the soil feels dry. Avoid overwatering, as it can lead to root rot and other issues. Additionally, ensure that the pot or planting area has proper drainage to prevent waterlogged soil.
Yes, you can grow a bird chili plant indoors. However, it requires proper conditions to thrive. Choose a south-facing window or provide artificial grow lights to ensure the plant receives sufficient sunlight. Use a well-draining potting mix and ensure proper ventilation in the room. Regularly monitor the indoor temperature to ensure it stays within the plant’s preferred range. With proper care, you can successfully grow a bird chili plant indoors and enjoy fresh peppers year-round.
To protect your bird chili plant from pests, regularly inspect it for signs of infestation, such as holes in leaves or chewed foliage. You can use insecticidal soaps or organic pest control methods to treat common pests like aphids, spider mites, or caterpillars. Additionally, attracting natural predators, such as ladybugs or lacewings, can help control pest populations. Proper sanitation, including removing dead leaves and debris, can also reduce pest habitats.

Gardening is the art and practice of cultivating and nurturing plants in a designated area, typically a garden or a plot of land. It involves the cultivation of various types of plants, including flowers, vegetables, herbs, and fruits. Gardening can be done for aesthetic purposes, to create a beautiful and visually appealing outdoor space, or for practical reasons, such as growing food for personal consumption.
Gardening offers numerous benefits, both for individuals and for the environment. Here are some of the key advantages of engaging in gardening:
Gardening is a physical activity that promotes exercise and movement. It involves tasks such as digging, planting, weeding, and watering, which can help improve cardiovascular health, strengthen muscles, and increase flexibility. Additionally, spending time in nature and engaging with plants has been shown to reduce stress, improve mood, and enhance overall mental well-being.
Gardening provides an opportunity to grow your own food, which can contribute to food security and self-sufficiency. By cultivating vegetables, fruits, and herbs, individuals can have a fresh and reliable source of nutritious produce. This is particularly beneficial for those who are concerned about the quality and safety of commercially grown food.
Gardening promotes environmental conservation by creating green spaces that support biodiversity. By planting native species and providing habitats for beneficial insects, birds, and other wildlife, gardens can contribute to the preservation of local ecosystems. Additionally, gardening can help reduce carbon emissions by sequestering carbon dioxide and improving air quality.
Getting started with gardening requires some basic knowledge and skills. Here are the key elements to consider:
Choose a suitable location for your garden based on factors such as sunlight exposure, soil quality, and access to water. Most plants require at least six hours of direct sunlight per day, so it’s important to select an area that receives adequate sunlight.
Prepare the soil by removing any weeds or grass and loosening it with a garden fork or tiller. Add organic matter, such as compost or well-rotted manure, to improve soil fertility and structure. This will provide plants with the necessary nutrients and ensure proper drainage.
Choose plants that are suitable for your climate, soil type, and available space. Consider factors such as the plant’s mature size, water requirements, and sunlight preferences. It’s also important to select plants that complement each other in terms of color, texture, and growth habit.
Water your plants regularly, taking into account their specific water needs. Some plants require more frequent watering, while others are more drought-tolerant. In addition to watering, maintain your garden by regularly removing weeds, pruning plants, and monitoring for pests and diseases.
Gardening is a fulfilling and rewarding hobby that offers a range of joys and pleasures. Here are some of the reasons why people find joy in gardening:
Gardening allows individuals to connect with nature and experience the beauty and wonder of the natural world. Whether it’s observing the growth and development of plants, listening to the sounds of birds and insects, or simply being surrounded by greenery, gardening provides a sense of peace and tranquility.
Gardening is a creative outlet that allows individuals to express their style and preferences. From selecting plants and arranging them in aesthetically pleasing combinations to designing garden layouts and structures, gardening offers endless opportunities for creativity and self-expression.
Gardening provides a sense of accomplishment and satisfaction as individuals witness the fruits of their labor. From seeing seeds germinate and plants grow to harvesting a bountiful crop or enjoying the beauty of blooming flowers, each stage of the gardening process brings a sense of achievement and pride.
In conclusion, gardening is a versatile and rewarding activity that offers numerous benefits for individuals and the environment. Whether you’re a beginner or an experienced gardener, the joys of gardening are accessible to all. So, grab your gardening tools, get your hands dirty, and experience the wonders of cultivating and nurturing plants.


Agave and cacti are both unique and fascinating plants that are often associated with desert environments. However, despite their similarities in appearance and ability to thrive in arid conditions, agave and cacti are two distinct plant families. In this article, we will explore the differences between agave and cacti and answer the question: Is agave a cactus?
Agave is a succulent plant that belongs to the Agavaceae family. It is native to the arid regions of the Americas, including the southwestern United States and Mexico. Agave plants are known for their thick, fleshy leaves that store water, allowing them to survive in dry environments. These plants come in a variety of shapes, sizes, and colors, with some species even producing beautiful flowers.
Cacti, on the other hand, belong to the Cactaceae family and are also succulent plants. They are primarily found in the Americas, with the majority of species being native to Mexico. Cacti have adapted to survive in desert conditions by developing specialized features such as spines, which help reduce water loss and protect the plant from predators. Unlike agave, cacti are known for their unique and often whimsical shapes.
While agave and cacti share some similarities, several key differences set them apart:
Based on the differences outlined above, it is clear that agave and cacti are not the same. Agave plants belong to the Agavaceae family, while cacti belong to the Cactaceae family. While they both have adaptations that allow them to survive in arid environments, their physical characteristics and growth patterns are distinct.
Whether you have an agave or a cactus in your garden, both plants are fascinating additions that can thrive in dry conditions. Their unique shapes, vibrant colors, and ability to withstand harsh environments make them popular choices for xeriscaping and desert-themed gardens.
So, the next time someone asks you if agave is a cactus, you can confidently say “no” and impress them with your knowledge of these remarkable plants.
Agave and cacti may share some similarities, but they are not the same. Agave is a succulent plant belonging to the Agavaceae family, while cacti are members of the Cactaceae family. Understanding the differences between these two plant families can help us appreciate their unique qualities and the beauty they bring to our gardens and landscapes.


Ornamental peppers are not just beautiful additions to your garden or indoor space; they also pique the curiosity of many gardeners and food enthusiasts. You may be wondering if these vibrant and colorful peppers are edible. In this article, we will explore the edibility of ornamental peppers and provide you with some important information to consider.
Ornamental peppers, also known as Capsicum annuum, are a variety of peppers cultivated for their attractive appearance rather than their culinary use. These peppers come in a wide range of colors, including red, yellow, orange, purple, and even black. Their small size and ornamental foliage make them popular choices for adding visual interest to gardens, containers, and indoor spaces.
While ornamental peppers are not typically grown for culinary purposes, they are generally safe to eat. However, it’s important to note that some varieties may have a higher level of heat or spiciness than others. If you are planning to consume ornamental peppers, it’s crucial to know the specific variety you have and its level of heat.
It’s worth mentioning that ornamental peppers are often treated with pesticides or other chemicals to protect them from pests and diseases. Therefore, it is essential to wash them thoroughly before consuming them, especially if you plan to eat them raw.
While ornamental peppers may not be the first choice for culinary use, they can still be enjoyed in various ways. Here are a few edible uses for ornamental peppers:
Before consuming ornamental peppers, there are a few important considerations to keep in mind:
While ornamental peppers are primarily grown for their visual appeal, many varieties are safe to eat. However, it’s important to be aware of the specific variety you have, its heat level, and any chemical treatments it may have undergone. With proper precautions and knowledge, you can enjoy the beauty of ornamental peppers while exploring their edible potential.
